

In this tutorial we are going to learn how to give a grunge dirty retro photo effect to any image in a quick and easy way. For this matter we are going to use the awesome Perfect Effects Free Edition Photoshop plugin, which is, by the way, absolutely free.
I posted about this plugin a while ago and many visitors didn’t believe it was actually free. Mostly everybody expected a crippled trial or a time limited demo.
Well this is not the case. Perfect Effects Free Edition plugin is absolutely free. It is a slimmed down version (25 effects) of the full Perfect Effects 3 plugin with (300+ effects). So, you end up having an awesome piece of free software with 25 cool effects just for you at no cost. And if you decide that you want more, you can upgrade to the full version, or buy more presets in the OnOne Software Marketplace.
This tutorial will show you how easy and fast is to apply really cool effects using this plugin. You won’t need to play around with curves, levels or any other complex command. Just a few clicks and you are done.
Enough! Let’s start with the tutorial. Download the Perfect Effects Free Edition plugin. After filling the download form (no credit card required, just your name and email), you will receive an email with the download link and the installation instructions for Mac and Windows.
Download this image from Wikimedia.org and open it in Photoshop. You can use this image for your commercial or personal work but, please, first read the usage rights here.

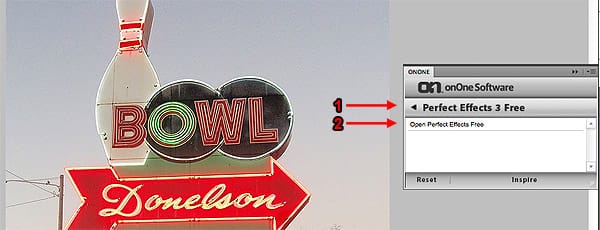
Now open Perfect Effects. Go to menu WINDOW > EXTENSION > ONONE. A new palette with the OnOne Software logo will open. Under the logo you will see a list of all OnOne plugins installed (in this case chances are that you’ve only installed this one). Click on the Perfect Effects 3 Free button. Then double-click on the Open Perfect Effects Free title.
The plugin will open as a standalone application. In fact many, if not most, plugins work as a standalone application connected to Photoshop.
Let’s check the plugin interface:
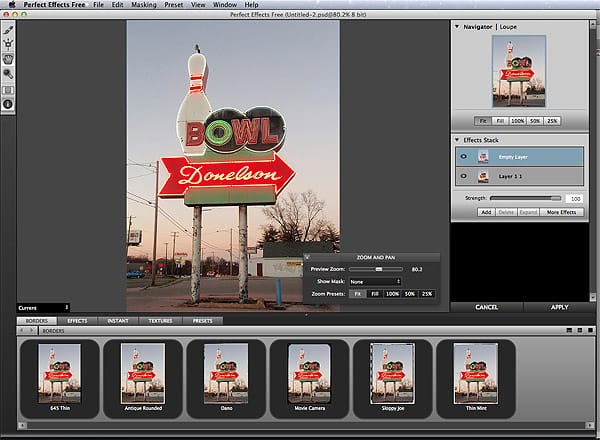
I won’t go into much detail with the interface. As you see it is a similar layout as Photoshop. In the panel at the bottom you will find some kind of effects navigator that will let you try different effects with a single click.
On the right side there is a Layers palette. Each time you double click on an effect, you will create a new layer with that effect.
Each effect will be applied using the layer right below as the base image.
Let’s start adding effects. Click on the Effects tab and then start clicking (single click) on each effect and see how the image changes instantly. Also, the effect layer on the right changes its name accordingly.
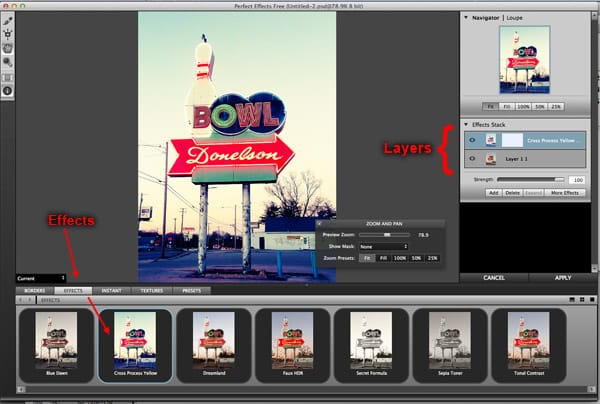
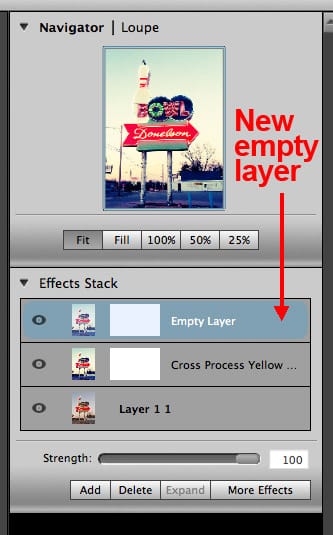
When you are done trying effects, double click on the Cross Process Yellow effect. The preview image will look like this:
At the same time, you will see that a new empty layer was added to the layers palette, right above the Cross Processing Yellow layer.
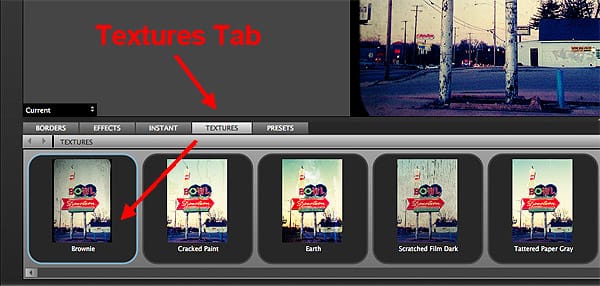
Now let’s click on the Textures tab and select (single click) the Brownie texture.
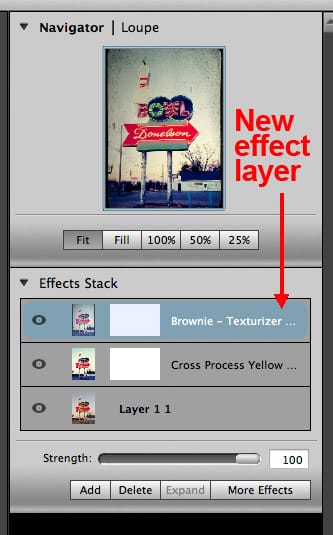
In the Layers palette you will see that the layer that was previously empty, now has the name of the texture effect recently selected. Remember that when you make a single click on an effect, the current layer changes its name to reflect the effect just clicked.
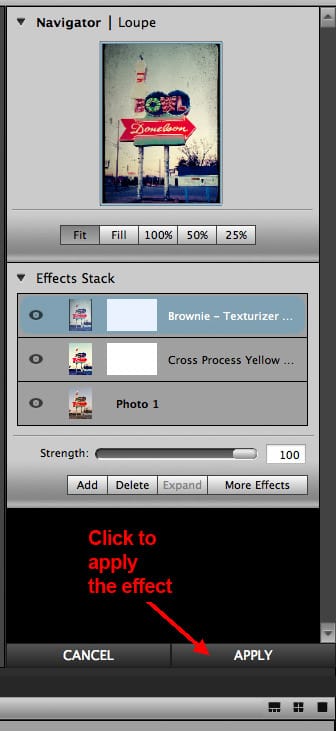
Remember that a double click sets a layer with the effect just clicked, and creates a new empty one. In this case, since this is the last effect we are going to apply, then you don’t need to double click to create a new layer.
The preview image should be like this one:
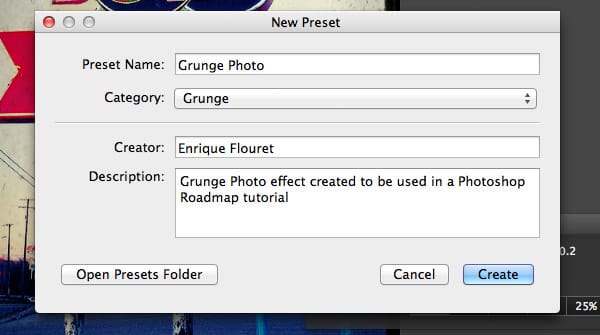
Before applying the final effect to the image, lets save this preset for future use. Go to Menu PRESETS > SAVE PRESET… and complete all the info you need there.
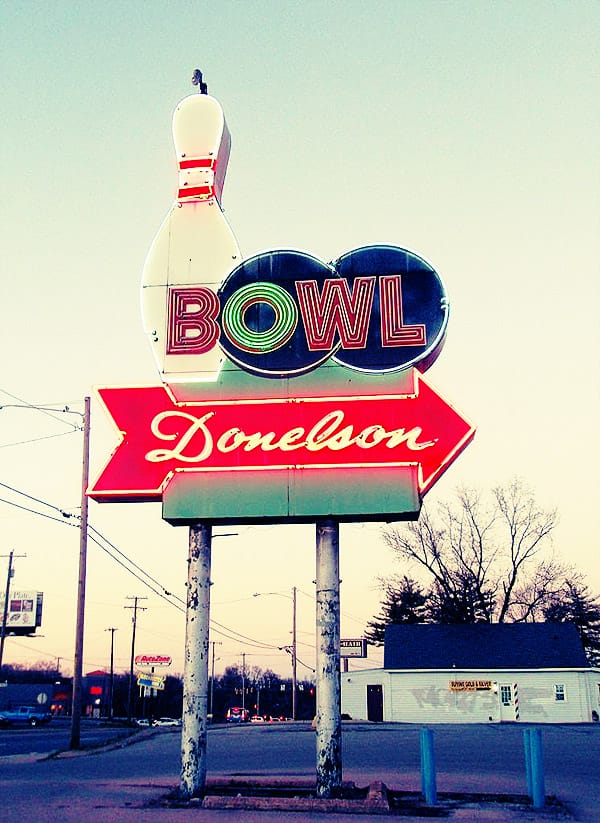
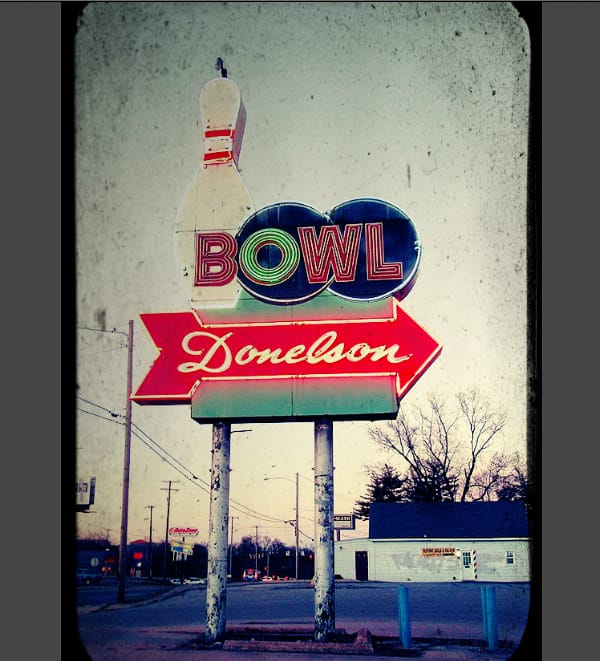
Now click the APPLY button to apply the completed effect to your image. The plugin will close and you will be taken back to Photoshop.
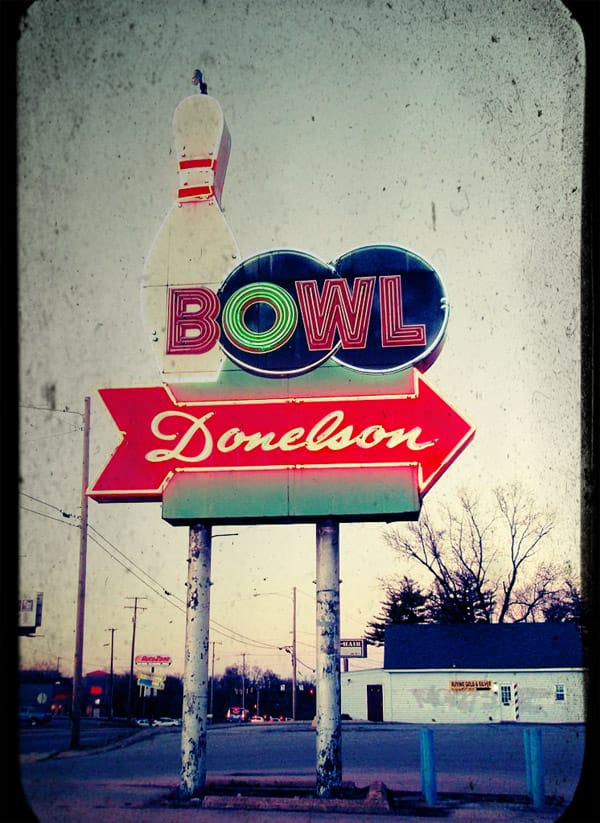
And that’s it. Here’s your two steps grunge retro photo effect:
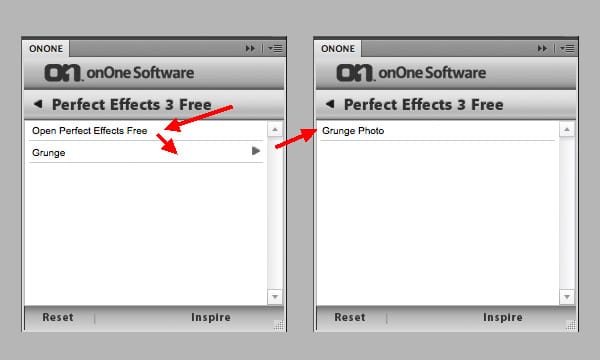
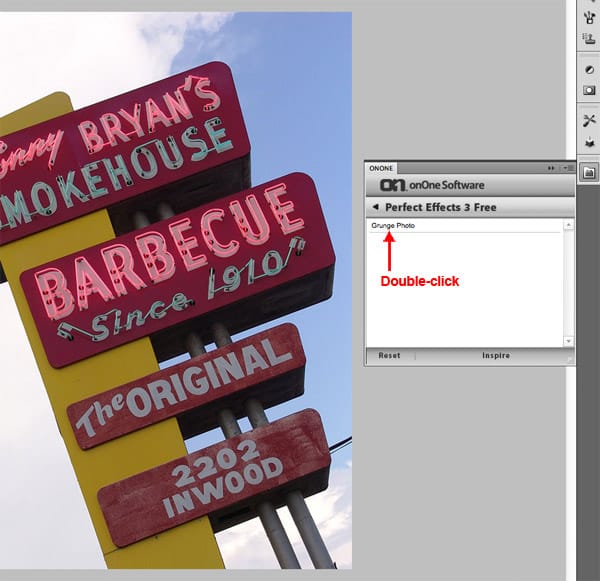
Since we saved our effect as a preset, go again to the Onone Software extension palette and click on the Perfect Effects 3 Free Edition button. You will now see the Grunge category you just created. Double-click on that category and all the saved presets (one in this case) will show.
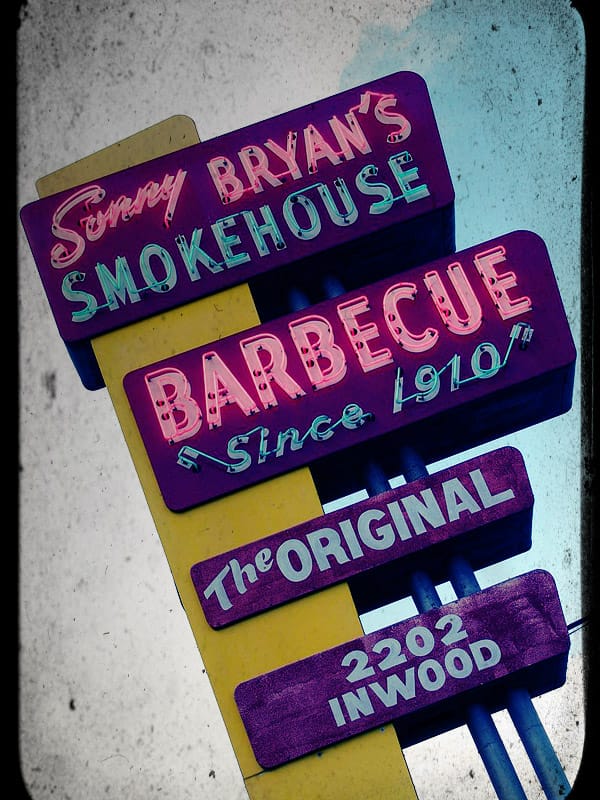
Let’s try the preset on another photo. Download and open this photo – (usage rights) – and click on the Grunge Photo preset from the Onone palete.
And without doing anything else, the effect is applied.


