Create a Dispersion Effect in Photoshop

Create a Dispersion Effect in Photoshop

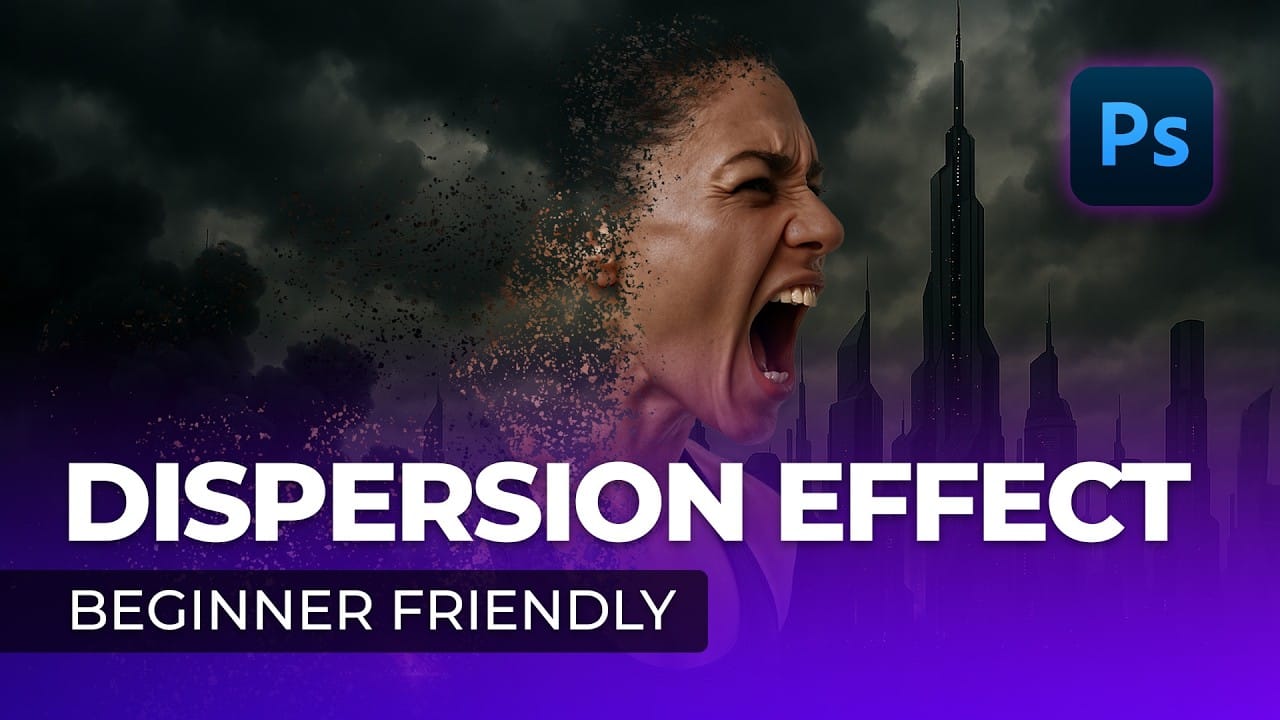
The dispersion effect transforms ordinary photographs into dynamic artwork, creating the illusion that parts of the subject are breaking apart and scattering into particles. This popular technique adds movement and a surreal quality to static images, making them ideal for creative projects and eye-catching digital content.

This tutorial provides a step-by-step guide to achieving a professional dispersion effect using Photoshop’s versatile tools. You will learn how to combine custom brushes, layer masks, and the Liquefy filter to create compelling and visually striking compositions.

Watch the Tutorial

Video by WeJustClickme. Any links or downloads mentioned by the creator are available only on YouTube

The Art of Digital Dispersion

Creating a dispersion effect in Photoshop involves more than just scattering pixels; it's about crafting a narrative where a subject appears to dissolve into its environment, or break free from its form. This technique leverages the software's powerful masking and transformation capabilities to achieve a sense of motion and disintegration. The visual impact often conveys themes of change, freedom, or abstract beauty, making it a favorite among digital artists.

At its core, the dispersion effect relies on a strategic interplay of several Photoshop features. Layer masks provide precise control over visibility, allowing artists to selectively hide or reveal parts of an image. Custom brushes, often designed with irregular or "splatter" patterns, are crucial for creating the fragmented particles. Finally, the Liquefy filter is used to distort and stretch the subject, giving the impression that parts are actively pulling away and dissipating.

Mastering this effect enables artists to imbue their images with a unique blend of realism and fantasy, pushing the boundaries of traditional photo manipulation to create truly captivating visual experiences.

Practical Tips for Creating Dispersion Effects

  • Organize your workspace by naming layers (e.g., liquefy, main image) to maintain clarity throughout the editing process.
  • Master brush manipulation by using the arrow keys for precise rotation and the bracket keys to quickly adjust size.
  • Leverage inverted masks by holding Alt and clicking the mask icon to hide the entire layer, then selectively reveal parts with a white brush.
  • Exaggerate distortions with the Liquefy filter's Forward Warp tool to achieve a more dramatic and realistic scattering appearance.
  • Control visibility on layer masks by setting the foreground color to black to hide pixels and white to reveal them.

More Tutorials about the Dispersion Effect

Explore additional resources and expand your skills with these related articles and tutorials on creating dispersion effects in Photoshop.

Creating a Dispersion Effect in Photoshop
The dispersion effect transforms ordinary portraits into dynamic artwork by creating the illusion that parts of the subject are breaking apart and scattering into particles. This popular technique adds movement and drama to static images, making them perfect for creative projects, album covers, or eye-catching social media content. This tutorial demonstrates a streamlined approach to creating professional dispersion effects using Photoshop's built-in tools. The process combines automated backgr
Create a amazing dispersion effect in Photoshop
This tutorial will show you how to make a photo of a model dissolving into flying particles. It's a simple process that only requires a few steps. First, the user will learn techniques to improve the colors of the image. They'll adjust the levels and curves to enhance the vibrancy and contrast of the photograph. This will help the dispersion effect stand out more prominently. Then, the user will apply the dispersion effect, making the model appear to break apart into small pieces that drift aw
Create a pixelated dispersion effect in Photoshop
In this Photoshop tutorial, the author provides step-by-step instructions on how to create a captivating Pixelated dispersion effect. The tutorial utilizes a Pixel brush set, as well as various filters, to achieve the desired visual impact. The author guides the reader through the process, highlighting the key techniques and tools necessary to replicate the effect. By following the instructions, users can transform their images and add a unique, eye-catching element to their digital creations.
How to Create an Awesome Dispersion Action in Adobe Photoshop
In this engaging video tutorial, you will learn step by step how to create an incredible dispersion effect using Adobe Photoshop, a powerful tool for digital design and photo editing. We will begin by generating several unique patterns that we will later utilize for the creation of the dispersed portions of our image. Once we have our patterns ready, we will carefully define the specific areas of our photograph that we intend to disperse, ensuring that we have a clear vision of the effect we wan

Get tutorials & freebies delivered to you.

Subscribe to the Photoshop Roadmap newsletter, a weekly roundup of new tutorials, insights and quality downloads, trusted by 6500+ readers.

You might also like

How to Enhance Skin Tones Using Gradients in Photoshop

Skin tones often appear washed out or lifeless in photographs due to challenging lighting conditions or camera settings. This gradient-based technique brings vibrancy back to portraits while creating natural-looking dimensional highlights that draw the viewer's eye to key facial features. The method uses Color Range selections combined with...

7 Signs You're a Photoshop Pro - Skill Assessment Guide

Professional Photoshop mastery isn't about memorizing every menu or filter. It's about developing efficient workflows, understanding core concepts, and building muscle memory for essential techniques. Real pros focus on the right tools for their specific needs rather than trying to learn everything. This comprehensive assessment covers...

How to Use Generative Upscale with Multiple AI Models in Photoshop

Pixelated vintage photos and low-resolution images no longer need to stay small. Photoshop's Generative Upscale feature now offers multiple AI models to enlarge images up to 4x their original size while adding remarkable detail and clarity. This new feature includes three distinct AI models—Adobe's Firefly...

Create a Pointillism Effect in Photoshop

Pointillism, the late 19th-century painting technique that uses small dots of color to form images, creates a distinctive artistic look where colors blend optically when viewed from a distance. This digital recreation technique transforms ordinary photographs into artwork that mimics the style of masters like Paul Signac. The process combines...

How to Convert WebP to JPEG in Bulk Using Image Processor

Converting large folders of WebP images to JPEG format can be time-consuming when done manually. Image Processor provides an efficient solution for batch conversion, automatically handling multiple files while maintaining quality settings and organization. This method works with any image format conversion and creates organized output folders, making it ideal...

How to Use Generative Credits in Adobe Creative Cloud: Standard vs Premium Features

Adobe's generative AI features transform how creatives work, but understanding which tools consume credits can save you time and budget frustration. The credit system divides features into standard and premium tiers, with different consumption rates based on processing complexity. Knowing the difference between assistive AI tools that cost...

You’ve successfully subscribed to Photoshop Roadmap
Welcome back! You’ve successfully signed in.
Great! You’ve successfully signed up.
Success! Your email is updated.
Your link has expired
Success! Check your email for magic link to sign-in.