Creating convincing age reduction in portraits requires more than automated filters alone. While neural filters provide a strong foundation for facial rejuvenation, combining them with manual retouching techniques produces more natural and professional results.
This comprehensive approach covers everything from initial age reduction and wrinkle removal to skin smoothing, facial reshaping, and final color correction for believable younger-looking portraits.
Watch the Video
Practical Tips
Master these key techniques to achieve realistic age reduction results:
- Always duplicate your layer first and work non-destructively to preserve the original image
- Use layer masks to selectively reveal or hide neural filter effects, especially around problematic areas like the nose
- Select the appropriate spot healing brush mode - use "lighten" for dark blemishes and "darken" for bright spots to preserve skin texture
- Apply skin smoothing selectively with black layer masks, painting white only where needed rather than across the entire face
- Add subtle grain and sharpening in Camera Raw to counter the digital smoothness and restore natural texture
Related Articles and Tutorials
Explore these additional portrait enhancement and retouching techniques:
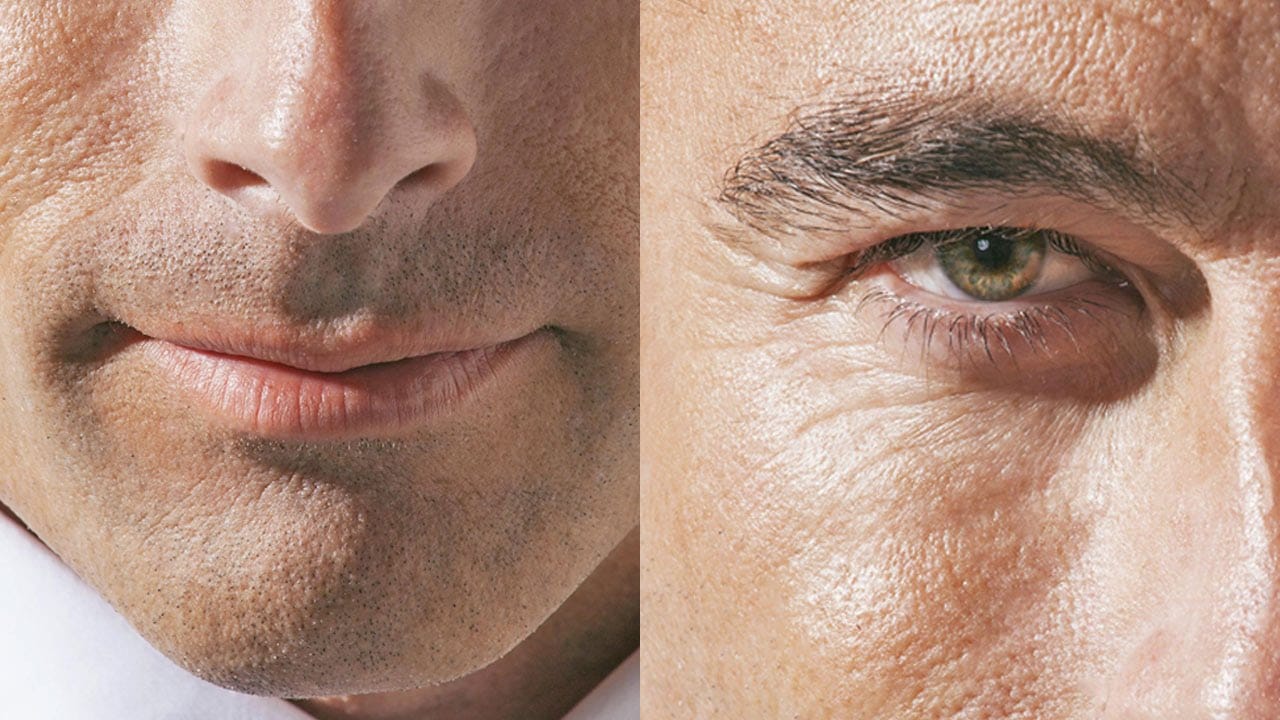
How to Retouch Mature Skin in Photoshop
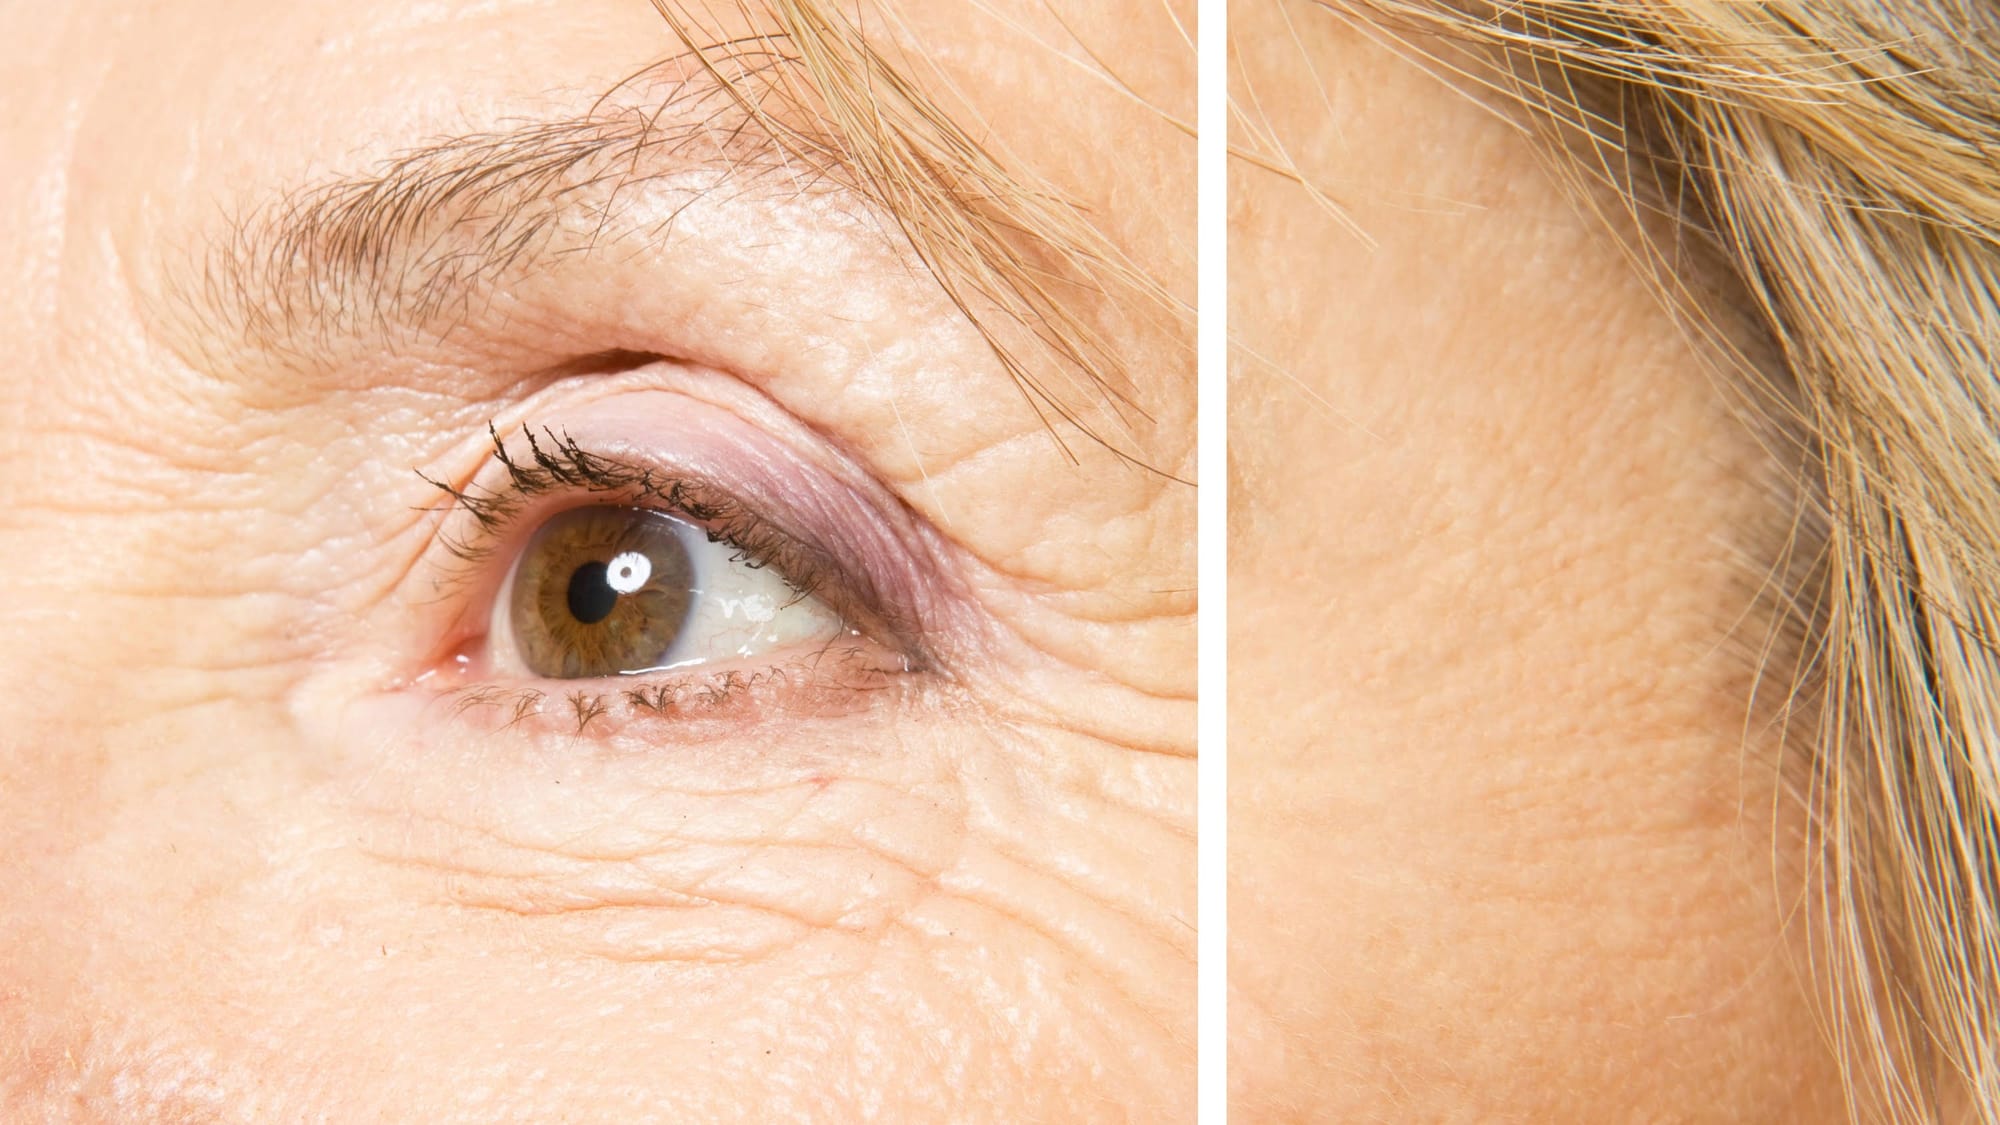
Retouching mature skin requires a different approach than standard beauty editing. As we age, skin naturally loses color and develops deeper shadows that emphasize wrinkles and pores. The key is enhancing without erasing character—maintaining authenticity while creating a healthier, more vibrant appearance.
This workflow focuses on three essential steps: brightening shadows to reduce the appearance of deep lines, restoring natural color to skin and features, and selectively minimizing unwanted
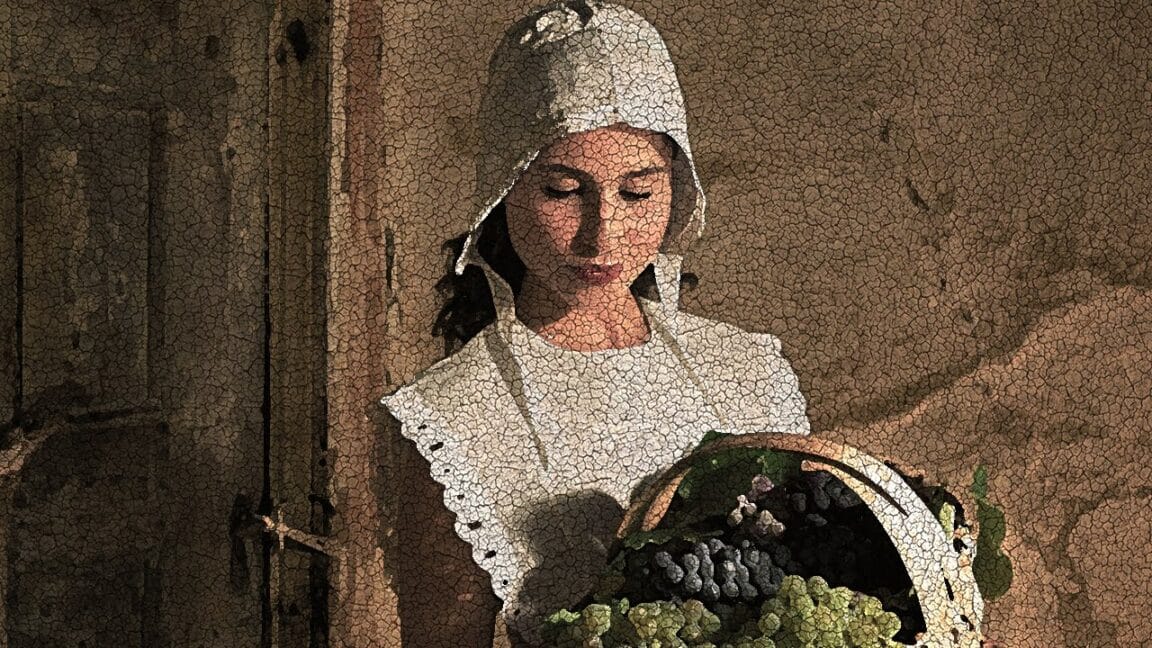
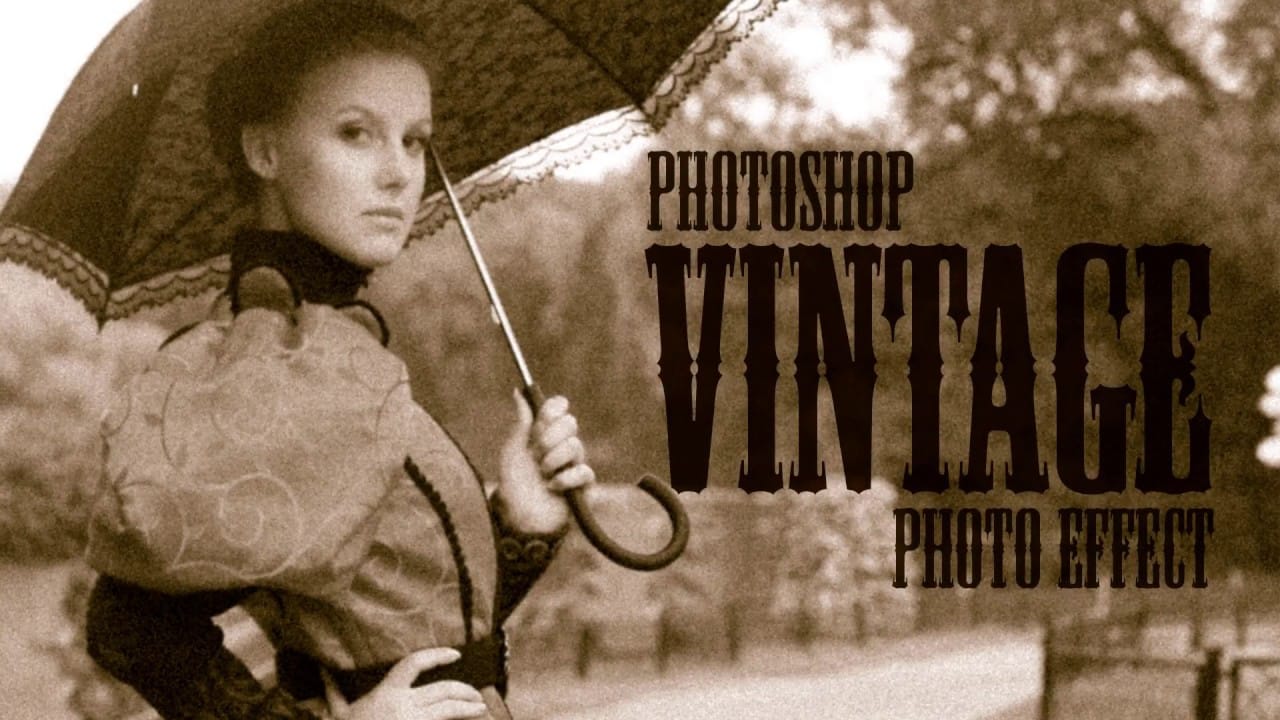
How to Transform a Photo into an Antique, Oil Painting Photoshop
This tutorial explores a fascinating method to transform digital photographs into timeless antique oil paintings. It focuses on techniques that emulate the classic appearance of aged art, adding character and depth to modern images.
Viewers will discover how to apply artistic effects within Photoshop, including specific color adjustments, textural overlays, and brushstroke simulations, to achieve a convincing vintage aesthetic reminiscent of historical artworks.
Watch the Video
Crafting the
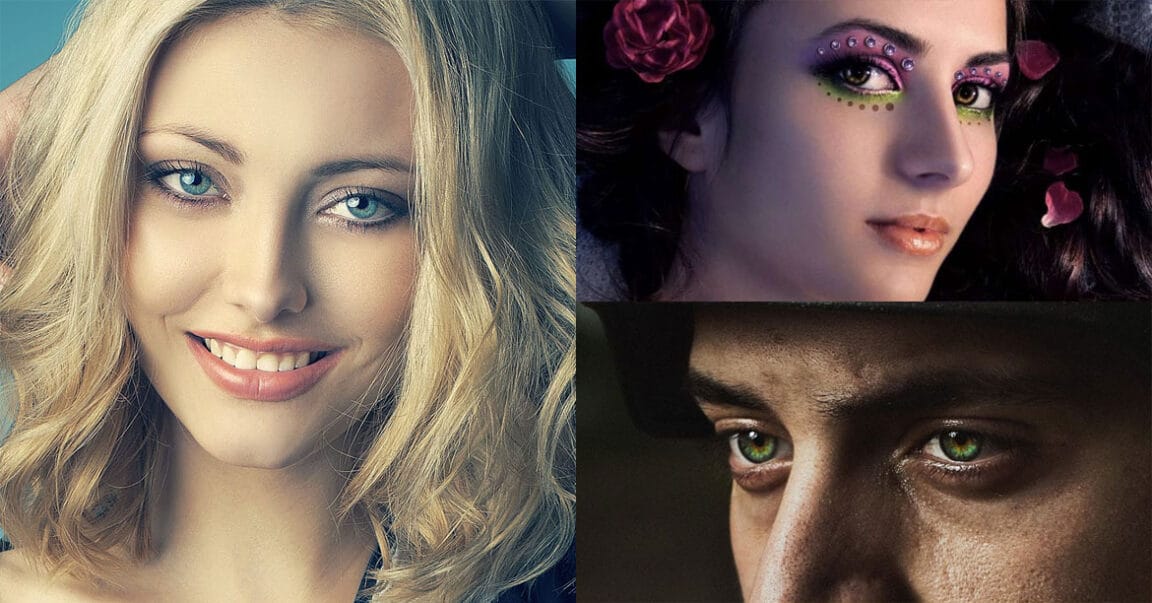
A Complete Guide to Digital Makeover in Photoshop
Fake images are all around us. Almost every fashion model or artist photo is digitally beautified prior to its public release. Sometimes this goes too far, and the photos are so heavily edited that they leave almost no traces of the original natural beauty of the subject being retouched.
This digital enhancement of human faces and bodies is called Digital Makeover. It usually involves techniques such as skin smoothing, red eye removal, hair color replacement, and so on. Although at first sight
How to Remove Wrinkles in Photoshop
When retouching portraits, the key to natural-looking wrinkle removal lies in choosing the right approach for your image. Complete wrinkle elimination can make subjects appear artificially smooth, while subtle reduction maintains character and authenticity.
This tutorial demonstrates two distinct methods: one for complete wrinkle removal and another for natural-looking wrinkle reduction that preserves skin texture and maintains realistic aging.
Watch the Video
Practical Tips
Master these k
Add Creamy Tones to a Photo for a Vintage Look in Photoshop
This Photoshop tutorial by JustThisGood teaches you how to add creamy tones to your photos, achieving a vintage aesthetic that many find appealing. With clear and simple steps, you'll be guided through the process, making it easy for anyone to follow along.
You will explore various techniques for adjusting color balance and applying soft filters to create that perfect aged look. The tutorial emphasizes accessibility, allowing even beginners to achieve stunning results without extensive experien
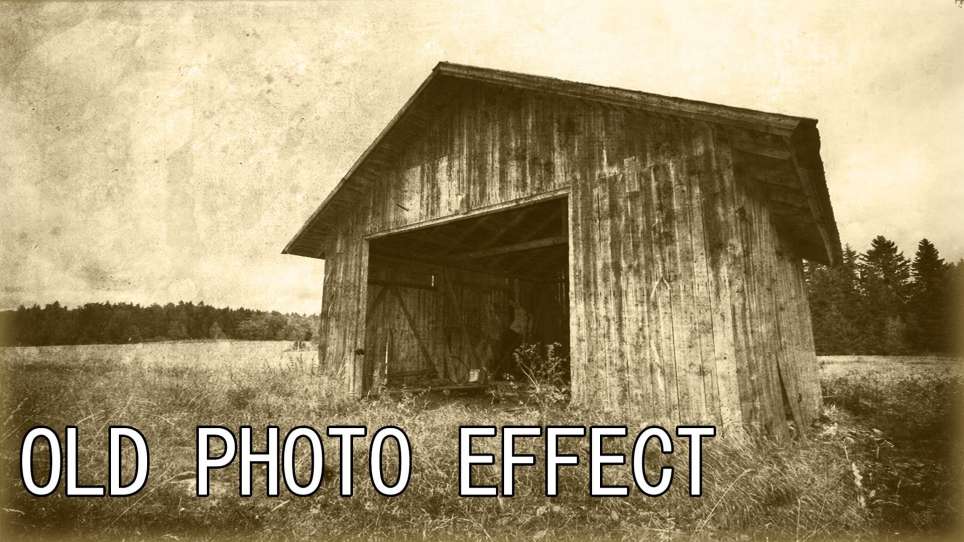
Create a realistic old vintage photo effect in Photoshop
Photographs are timeless. In fact, it's often our old, weathered and faded photographs that we treasure the most. Snapshots from a bygone era fill our hearts with nostalgia and romantic notions of how much simpler life must have been.
While today's digital cameras continue to amaze us with their technology, there's still something magical and irreplaceable about old, vintage photographs. And not only do we love to look at them, but we also love to recreate the look of them in programs like Phot
Create an Old Photo Effect in Photoshop
The author, Photoshop Pro Help, provides a tutorial on how to create an old photo effect in Photoshop. They explain that if you have ever admired the style of vintage photos and wanted to give your modern photos a similar look, this tutorial will show you how to apply an old photo style with a torn and damaged brown vintage effect. This can transform your photos to look as if they were taken straight from a history book.
The tutorial guides the user through the process of achieving this retro a
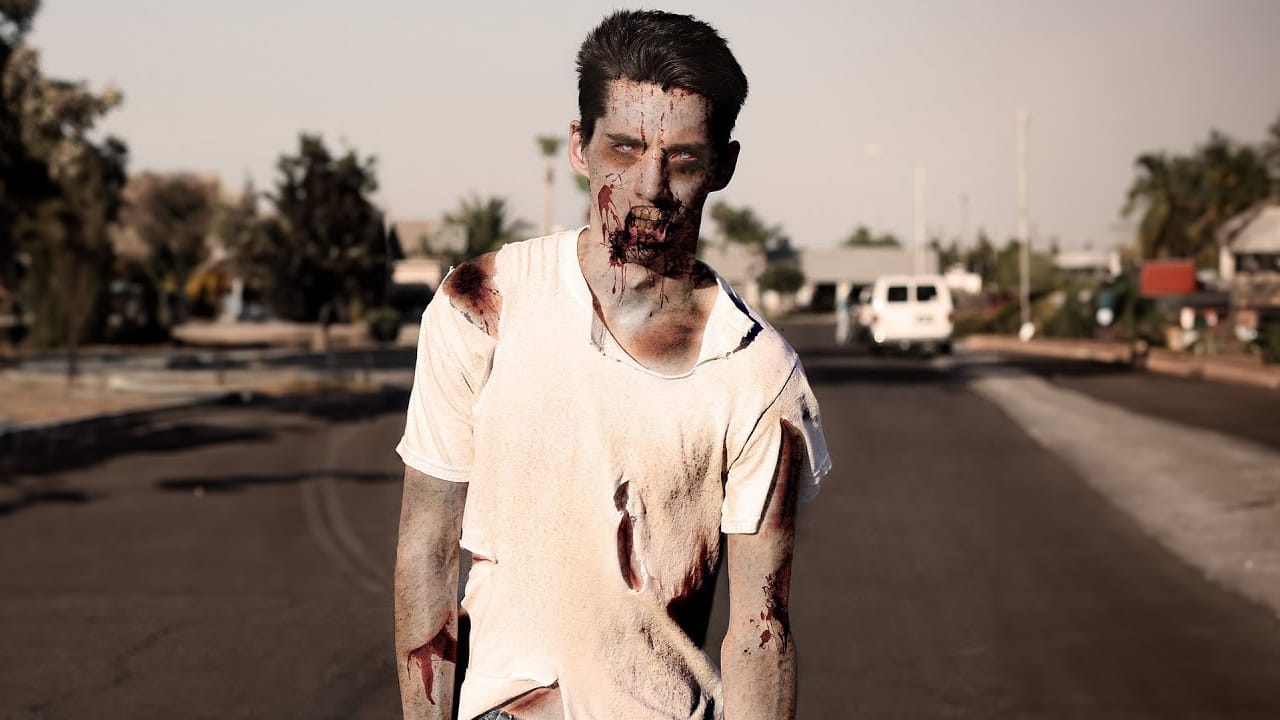
Learn How to Turn Anyone Into a Zombie
Transform yourself into a convincing zombie using advanced Photoshop techniques that go far beyond basic filters. This comprehensive tutorial covers everything from creating pale, bruised skin and bloodshot eyes to adding realistic wounds and grungy textures.
The process requires intermediate Photoshop skills including masking, blend modes, and adjustment layers to achieve professional horror makeup effects digitally.
Watch the Tutorial
Essential Tips for Zombie Effects
These techniques wi
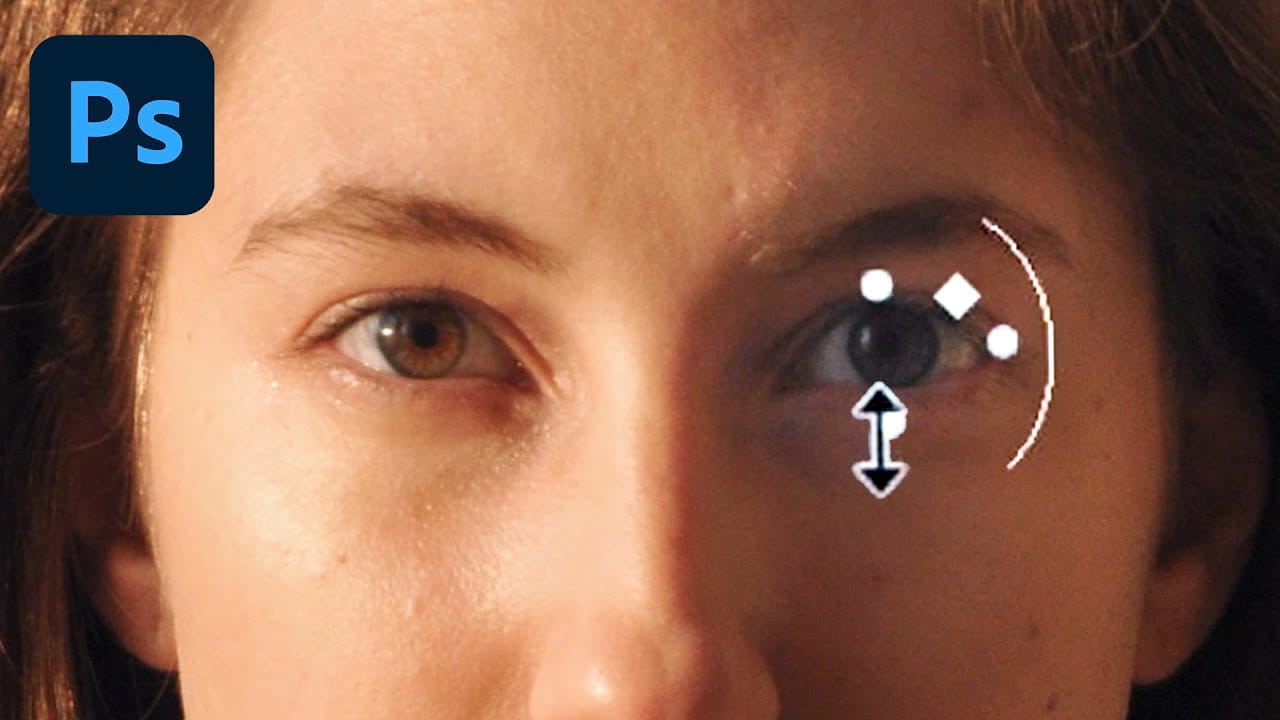
How to Adjust and Change Facial Features in Photoshop
Modern versions of Photoshop offer powerful AI-driven tools that can automatically detect and modify facial features with remarkable precision. The Face-Aware Liquify tool uses intelligent sliders to adjust eye size, nose dimensions, and mouth shape, while Neural Filters can alter facial expressions like happiness and surprise using cloud-based processing.
These techniques provide photographers and digital artists with sophisticated alternatives to manual retouching, though they raise important