Understanding the basics of Photoshop Smart Objects

Understanding the basics of Photoshop Smart Objects

Photoshop users often face the challenge of maintaining image quality when resizing or making multiple adjustments, which can lead to frustrating pixelation and loss of detail. This technical hurdle can significantly impact the final output, especially in professional design and photo compositing.

This video tutorial demonstrates how Smart Objects in Photoshop provide a powerful solution to these common editing issues. Viewers will learn how to preserve image quality through unlimited transformations and update composite photos dynamically, streamlining their workflow for mock-ups and graphic design projects.

Watch the Video

Video by PHLEARN. Any links or downloads mentioned by the creator are available only on YouTube

The Core Advantages of Working with Smart Objects

Smart Objects fundamentally change how Photoshop handles image data, moving beyond the traditional raster layer limitations. When an image is converted into a Smart Object, Photoshop essentially embeds the original image data, or even a complete Photoshop document (referred to as a PSB file), within the current project. This encapsulation means that any transformations, such as scaling, rotating, or skewing, are applied to a non-destructive wrapper, not the original pixels themselves.

This approach stands in stark contrast to standard raster layers, where each resizing operation can lead to a permanent loss of pixel information, resulting in blurry or pixelated images when scaled back up. Smart Objects allow for unlimited transformations without degradation because the software always refers back to the original, high-resolution data stored within the object. This capability is crucial for maintaining crisp details and sharp edges throughout an editing process.

Beyond quality preservation, Smart Objects offer significant workflow benefits, particularly for mock-ups, composites, and managing reusable assets. The ability to update the content of a Smart Object externally and have those changes automatically reflect across all instances in a main document ensures consistency and saves immense time. This makes them an indispensable tool for efficient and flexible image manipulation in professional environments.

Practical Tips for Using Smart Objects

  • Convert layers to Smart Objects by right-clicking the layer and selecting "Convert to Smart Object" or via Layer > Smart Objects > Convert to Smart Object.
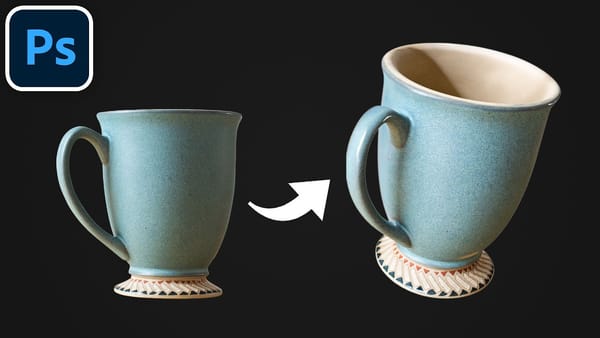
  • Transform Smart Objects multiple times (scale, rotate, skew) without losing image quality, as Photoshop retains the original pixel data.
  • Update the content of a Smart Object by double-clicking its thumbnail on the Layers panel; this opens the Smart Object as a separate document.
  • Replace the content of an opened Smart Object by dragging in a new image or adding new layers, then save (Ctrl/Cmd + S) to instantly update it in your main composite.
  • Utilize Smart Objects for mock-ups and composites where the content needs to be interchangeable while maintaining complex transformations, layer masks, and blend modes applied to the Smart Object container.

Explore more techniques and creative applications to enhance your Photoshop skills with Smart Objects.

Basic Photoshop techniques you really need to learn
Achieving the perfect result in Photoshop can often feel like a challenging journey. Many users concentrate on the final image but may struggle with the individual steps necessary to get there. While you might be familiar with various keyboard shortcuts and have collected numerous brushes and actions, these alone are not enough to ensure success. This collection of tutorials is designed to guide you through essential retouching techniques. Each tutorial focuses on foundational skills that are c
Learn Photoshop by Combining Tools and Techniques
Learning Photoshop can be an exciting journey, especially when you explore various techniques and tools. This approach allows you to understand how different elements work together and enhance your creativity. In this presentation, you will follow along as the process begins with a straightforward out-of-camera photograph of a Supercar. Through a series of steps, you'll see how the image transforms into something entirely new. The focus will be on practical application, showing real-time adjust
10 Fundamental Photoshop Techniques Every Beginner Should Know
For any beginner photographer, grasping the basic know-how of Photoshop can seem pretty daunting – especially if you’re trying to go it alone without classes or professional instruction. These ten easy tips, however, will quickly get you acquainted with the basics of Photoshop. After these tutorials you will be on your way to creating amazing photo effects in no time. 1. Touchups and Blemishes This is usually the first trick that people are dying to learn in photoshop. Who wouldn’t want to er
How to Color, Brighten and Sharpen Eyes in Photoshop
In this tutorial by Aaron Nace from Phlearn, learn how to enhance eyes in Photoshop to make them captivating and sharp. Techniques include coloring the eyes by sampling natural hues and adjusting lightness and saturation, using blending modes like "Soft Light" or "Overlay" for a natural look, and softening edges with Gaussian Blur. Dodge and Burn techniques are used to enhance depth and light in the pupils, while selective sharpening draws attention to the eyes, making them stand out in portrai

Get tutorials & freebies delivered to you.

Subscribe to the Photoshop Roadmap newsletter, a weekly roundup of new tutorials, insights and quality downloads, trusted by 6500+ readers.

You might also like

Complete Photoshop Editing Workflow: 5 Steps from Raw to Polished

Photoshop offers endless possibilities for photo enhancement, but many photographers never move beyond basic adjustments because the software feels overwhelming. This comprehensive workflow breaks down photo editing into five manageable stages that work consistently across different photography styles. The systematic approach covers everything from initial raw processing to advanced lighting...

Photoshop Workspace Basics: Navigation, Zooming, and Essential Interface Elements

Photoshop's interface can feel overwhelming when you first open the program. Dozens of panels, tools, and menus compete for attention, making simple tasks feel complicated. This tutorial breaks down the essential workspace elements and teaches fundamental navigation skills that form the foundation of efficient Photoshop work. Watch the...

How to Restore Old Damaged Photos Using Nano Banana in Photoshop

Old family photos with scratches, tears, and missing sections can seem beyond repair. Google's Nano Banana AI model, now integrated into Photoshop, makes full restoration possible in minutes rather than hours. This powerful tool excels at maintaining facial characteristics while automatically filling in damaged areas and adding realistic...

How to Get Higher Quality Results from Photoshop's Generative Fill Tool

Photoshop's Generative Fill creates impressive AI extensions, but the results often look blurry and pixelated when viewed at full size. This quality limitation makes many AI-generated areas unusable for printing or large displays. This technique shows how to work around the 1024x1024 pixel quality limit to create much...

How to Use Photoshop's Liquify Tool for Non-Destructive Portrait Retouching

Clothing wrinkles, hair that lacks volume, and awkward fabric bunching can distract from an otherwise great portrait. Photoshop's Liquify tool offers a powerful solution for smoothing out these issues while preserving the natural look of your subject. This tutorial demonstrates how to use the Liquify tool non-destructively with...

You’ve successfully subscribed to Photoshop Roadmap
Welcome back! You’ve successfully signed in.
Great! You’ve successfully signed up.
Success! Your email is updated.
Your link has expired
Success! Check your email for magic link to sign-in.