

Creating virtual Lego models on your Mac or PC is easier than ever with various software options available. These applications utilize detailed Lego part data in the form of 3D objects, allowing you to construct intricate Lego scenes or even generate instruction booklets for your creations. For added creativity, some users have rendered Lego bricks and transformed them into Photoshop brushes for unique artistic projects.
The process involves several tools. LDraw serves as a foundational resource, while MLCad helps you arrange a selection of bricks across a virtual workspace. L3P and L3PAO convert MLCad files into POVRay format, which is then used with POVRay to render the final scene. While these programs are free, their complexity may pose challenges for those less familiar with technical software. Once the scene is rendered, importing it into Adobe Photoshop allows for the individual creation of brushes, expanding your design possibilities.
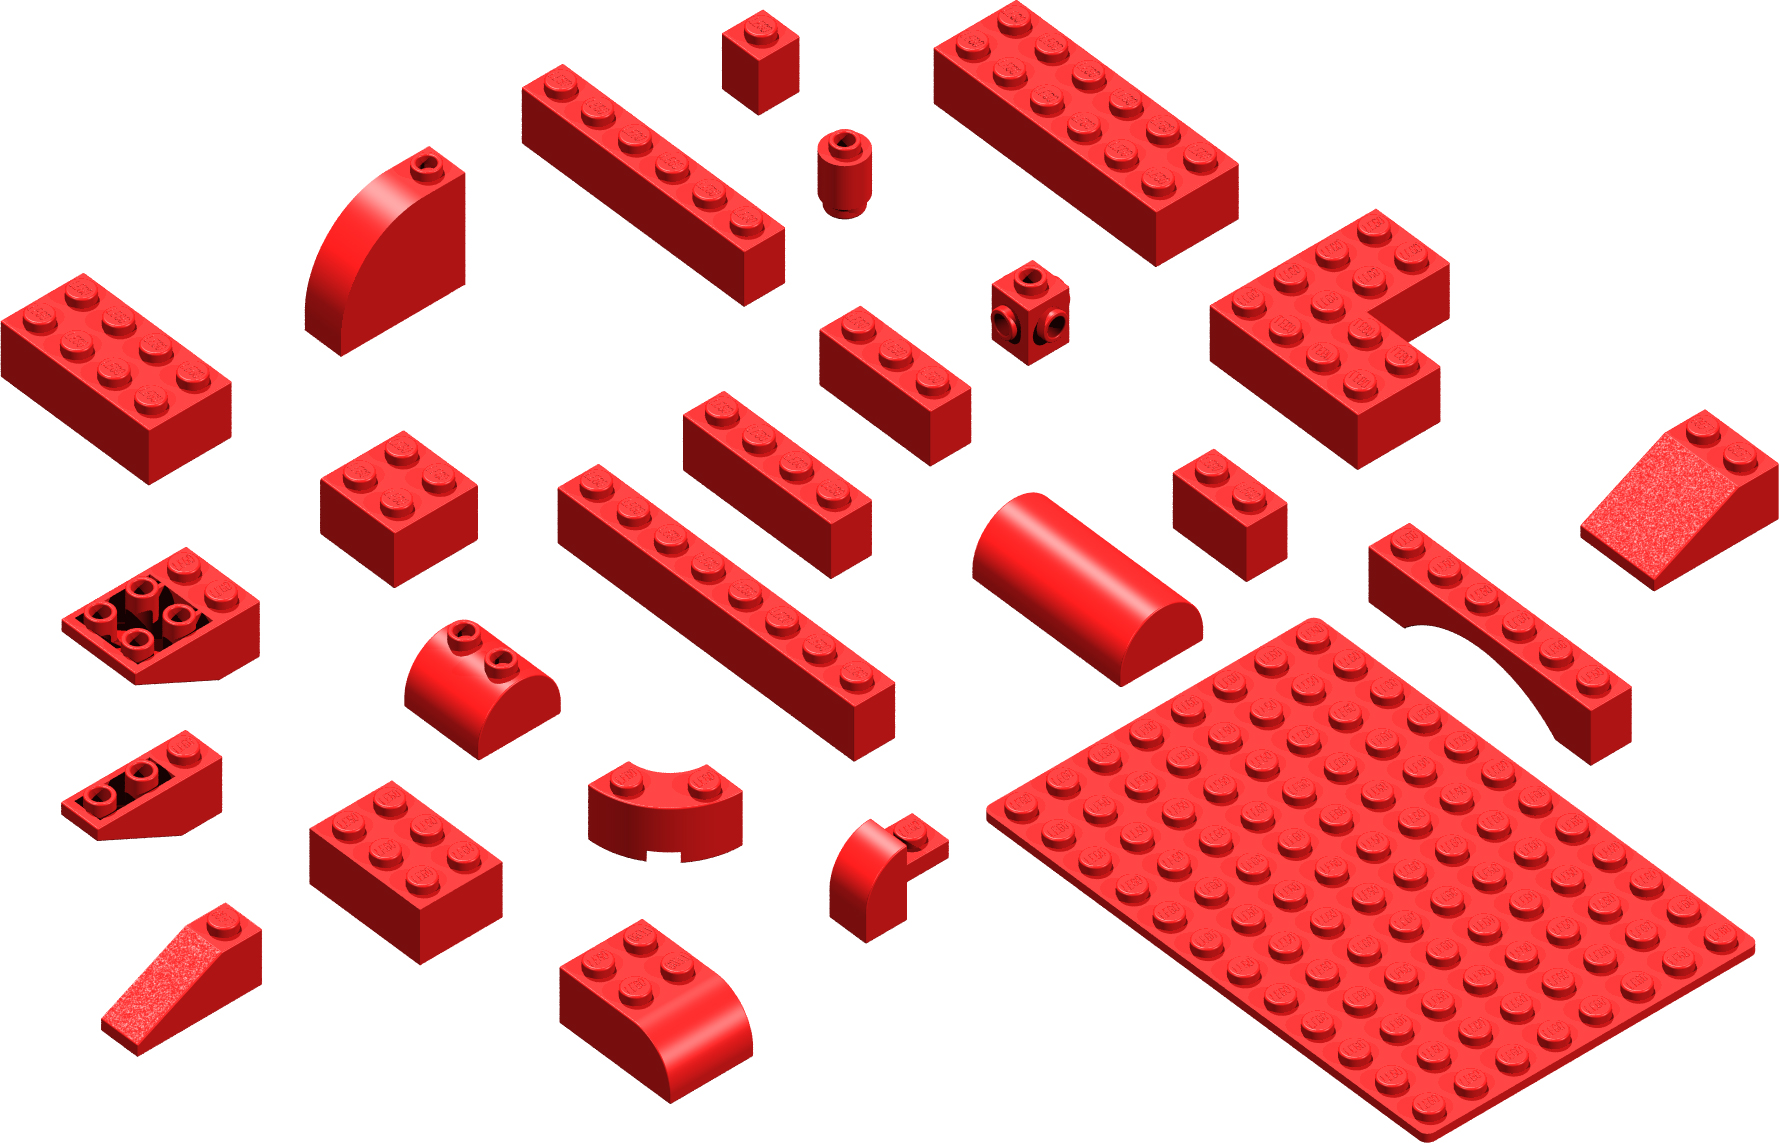
Base image of rendered Lego Bricks

The image above is a low resolution preview of the base image that we will be using. Download and open in Photoshop the high resolution version below:
The process of creating the Photoshop brushes
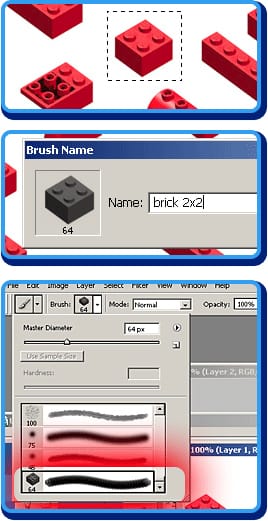 |
Step 1Using the marquee tool, select a brick Step 2Go to: EDIT > DEFINE BRUSH PRESET…, type in the brush name and press OK Step 3Select the brush tool from the tool palette. Then go to the brushes pulldown menu at the top of the screen and check at the bottom of the brushes list to see the newly added brush tip. |
Installing the Lego Bricks brushes
Following the steps mentioned above, I created two high resolution versions of the Lego bricks brushes: A normal set and a negative set. Download the Lego bricks Photoshop brushes here.
There are many ways to install a set of brushes in Photoshop. I will show you only one. This method will append the brushes to the current list, instead of replacing them.
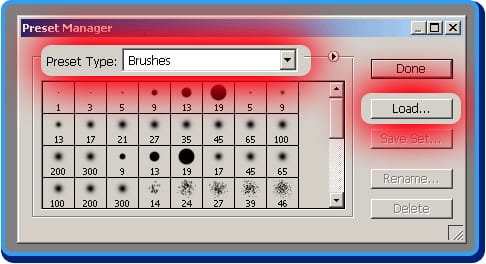
Go to EDIT > PRESETS MANAGER and choose Brushes in the Presets pulldown menu. After that, the current set of brushes will show. Then, click on the LOAD button and select the set of brushes you want to install. As mentioned before, the new set will be added to the current set.
Painting with the Lego Bricks brushes
The difference between the two sets of brushes is how they paint according to the background. The process of creating the negative version although easy at first sight is a bit more tricky. Since it involves the usage of the rendering program, it is beyond the scope of this tutorial to teach you that process.
Just download the already built sets and concentrate on how you can use them to create different effects.
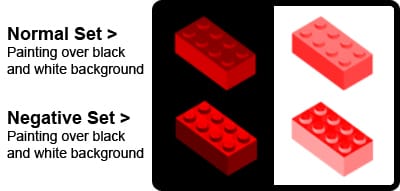
The normal set will paint a washed out brick like some sort of “Andy Warhol” illustration. The negative set, when used on a dark background, will paint a near exact version of the rendered brick.
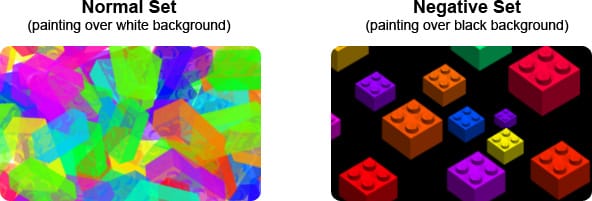
Due to the transparent nature of Photoshop brushes, in the image on the left I intentionally superimposed the bricks to create an interesting effect, while on the right image, I took care of leaving enough space between bricks to create a more realistic composition.
Playing with brushes settings
Now the fun part begins. Using the presets control palette (see image below) you can customize the way the brush tool paints.
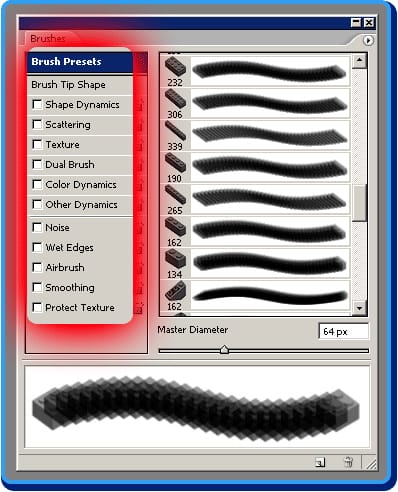
The following chart will show you how to achieve interesting effects just by tweaking a couple of basic settings. Play with these settings and explore new ones to make the most from this powerful tool
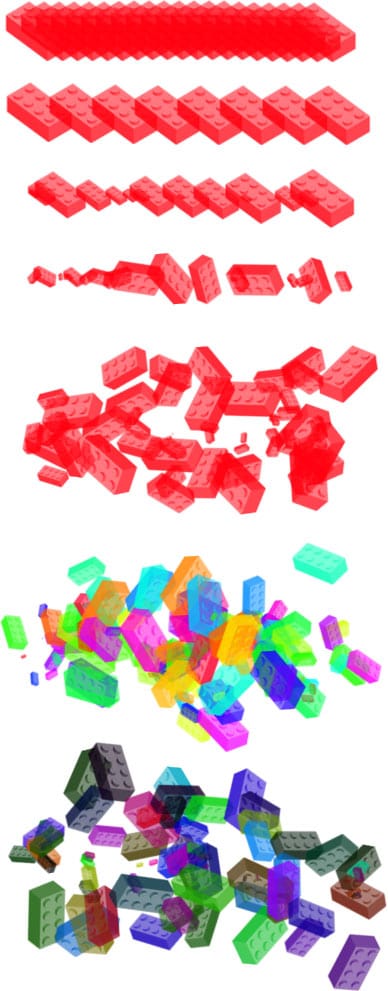 |
< Brush Tip Shape: Diameter: 65px Since we are using a high resolution brush, we lower the original size for this example. < Brush Tip Shape: Spacing: 71%. This setting controls the brush tip spacing within a single stroke. < Shape Dynamics Size Jitter: 100%. The brick changes its size randomly within the same stroke. < Shape Dynamics Angle Jitter: 100%. Flip X Jitter & Flip Y Jitter: Checked. We rotate and flip the brick to give a more natural look (lighting is incorrect, but that’s not much of a problem). < Scattering Scatter: 300%. This setting gives a chaotic look to the stroke < Color Dynamics Hue Jitter: 100%. Purity: 100%. Now the best part. Using Color Dynamics controls you can have random colors without changing the foreground color in the tool palette. < Color Dynamics. Brightness Jitter : 100%. Randomly changing the brightness can give you more depth. Try different combinations to avoid a “dirty” or “unsaturated” look to your bricks.
|
Paint with real Lego colors
Although this may seem somewhat geeky, besides using brushes based on real Lego bricks, you can also paint with official Lego colors. Just check this color table from Peeron and start painting.


