

Creating textured images in Photoshop is quite easy. Just paste a texture on a layer above your image, apply an Overaly Blending Mode and you are done! Looks ugly, doesn’t it? Sorry. That’s the way. If you don’t like it you will have to spend most of your day downloading textures that look good on the web but don’t blend well with your image. Needless to say that your image will still look bad. You have to start throwing some color correction tricks, vignettes, another texture, levels, and so on.
Fortunately Topaz Labs came up with a solution to this problem. Topaz Texture Effects Plugin. This Photoshop plugin and standalone application, is literally a creativity machine. It offers a wide range of pre-made and stunningly looking (yes that good) texture effects. And you can apply them with just one click.
You can also customize those effects with ease. And you can even create new ones in a few clicks. The only problem you will be facing is to decide which effect to keep. Besides, Topaz has made an excellent job in developing a software that so easy to use that you will be creating wonders right from start. To follow this tutorial, just download a fully functional 30 day demo of Topaz Texture Effects here…
1) One-Click Texture Effect
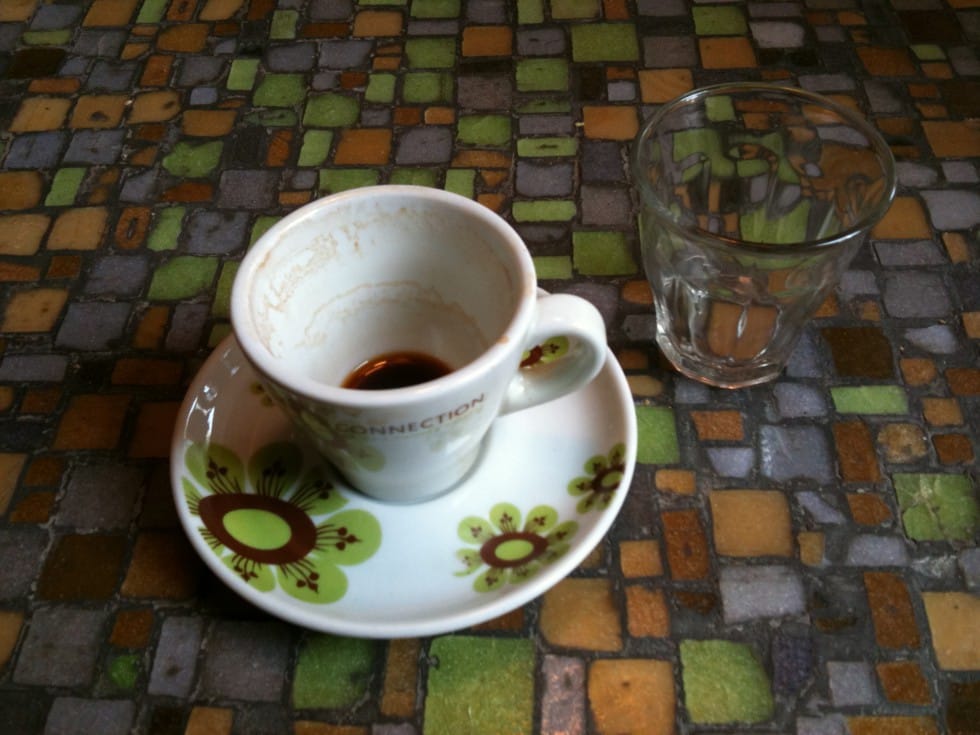
Open your image. In this tutorial we will be using this grungy image which already has some original texture of its own. Let’s see how can we push that a bit more.
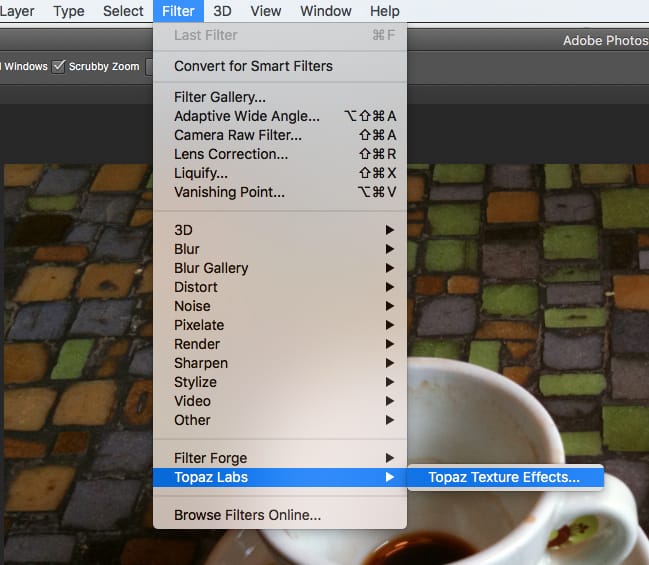
Now, go to menu FILTER > TOPAZ LABS > TOPAZ TEXTURE EFFECTS... to open the plugin window.
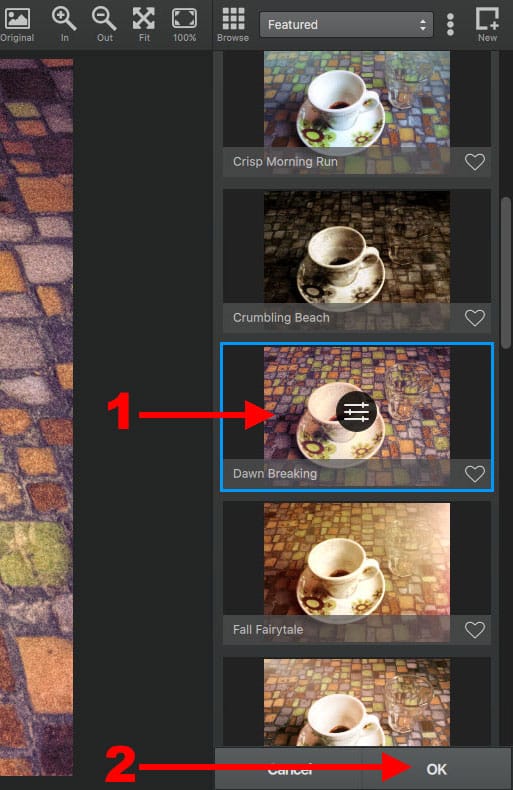
From the presets panel at the right choose one you like, and click ok.
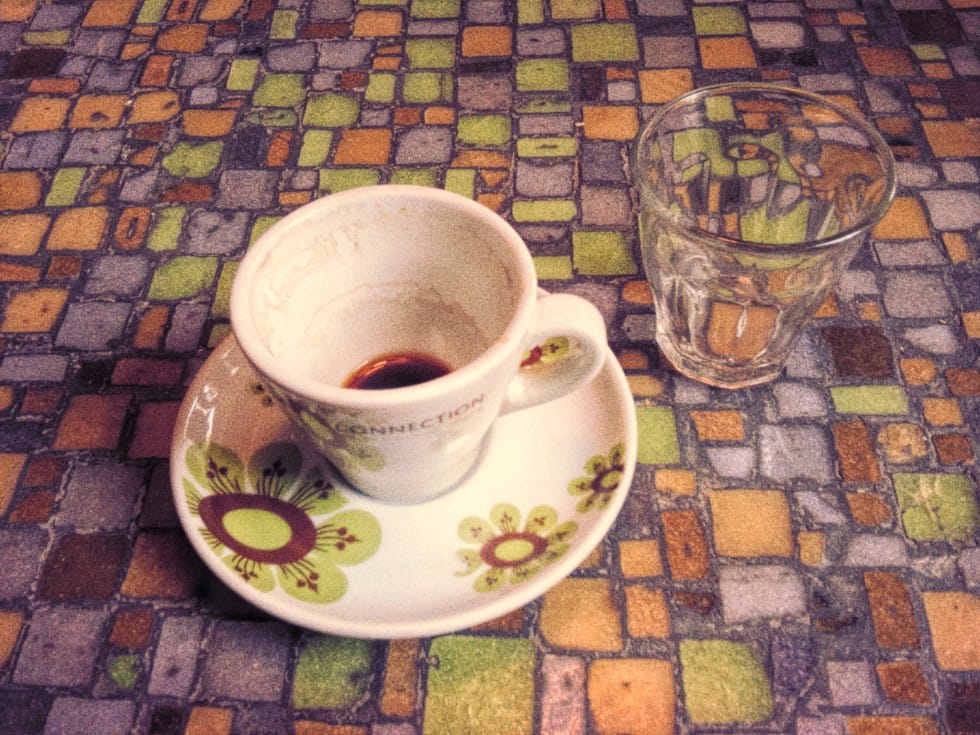
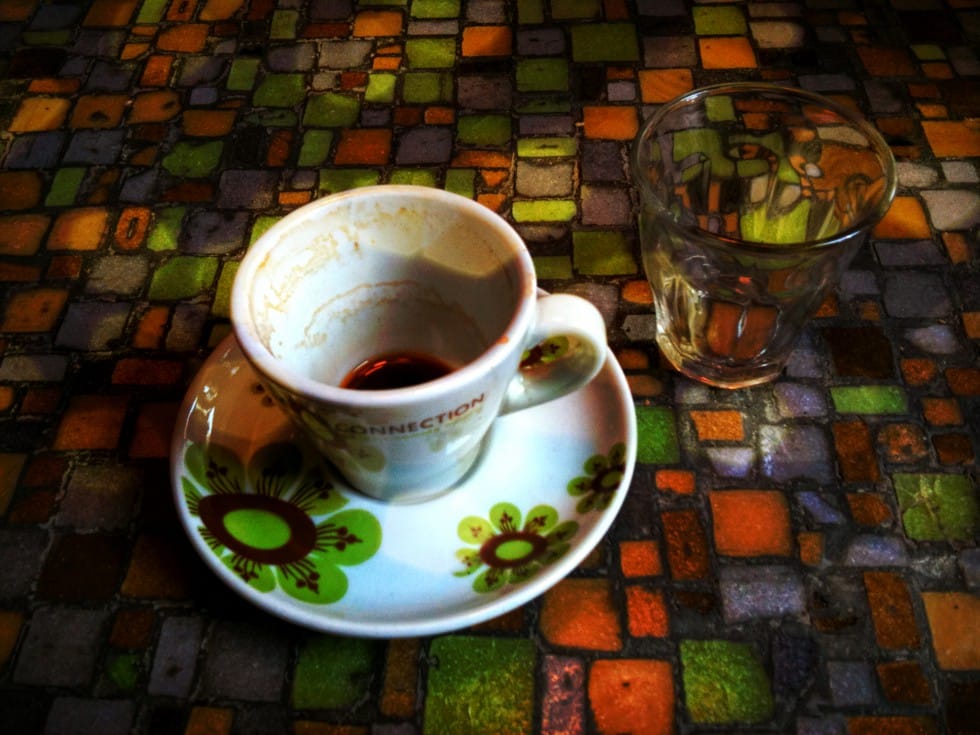
With just a couple of clicks you ended up with a beautifully textured image like the one below.
2) Customizing a Preset
This time we will chose another preset and make some quick changes to it. We will make it simple, there are a lot of options you can change easily.
In this case we will choose COLOR BURST preset. Then click on the small sliders icon that’s in the middle of the preset preview.
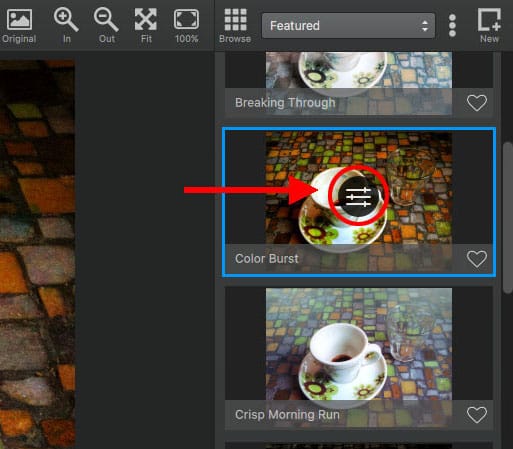
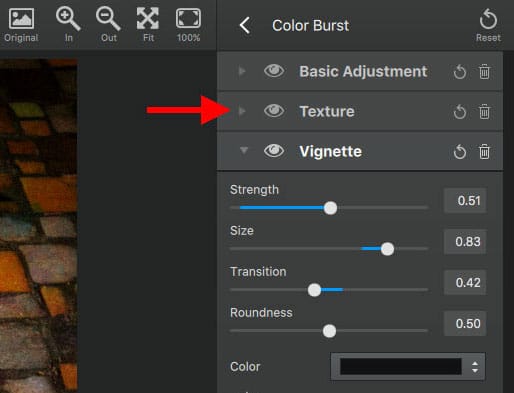
The preset panel will open showing all the adjustments defined for this preset. Click on the TEXTURE adjustment so we can change the current preset texture.
Choose the texture you like most. The yellow bokeh one looks interesting for this particular image. Notice that when you click on a texture, you are pinning it. Then you can mouse over the rest of the textures, without clicking on any of them, to see how they compare to the one that you chose before.

Click OK to apply the effect and close the plugin window
3) Create a New Effect From Scratch
Open your image. Now click on the NEW button at top right of the plugin window.

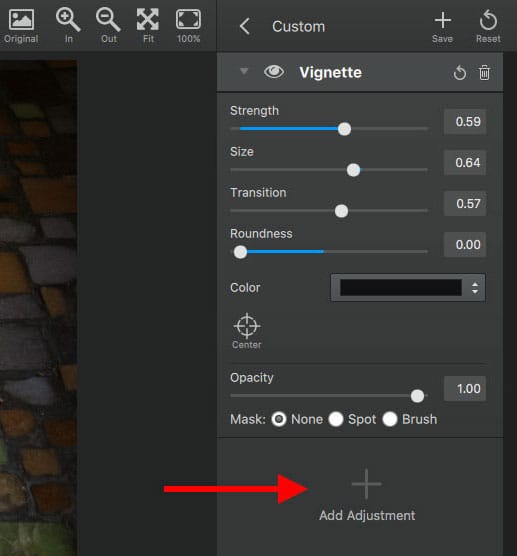
Click on the ADD ADJUSTMENT button and then select VIGNETTE from the adjustments list.
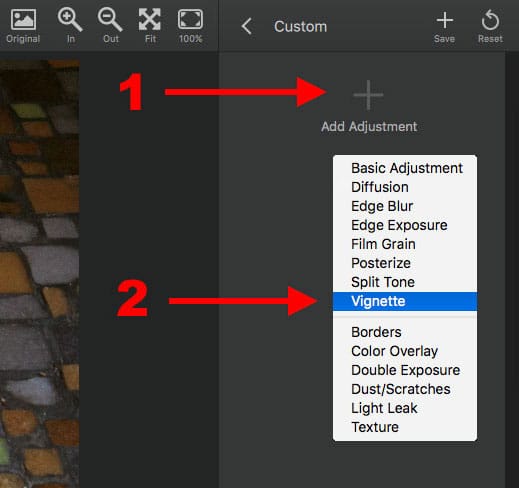
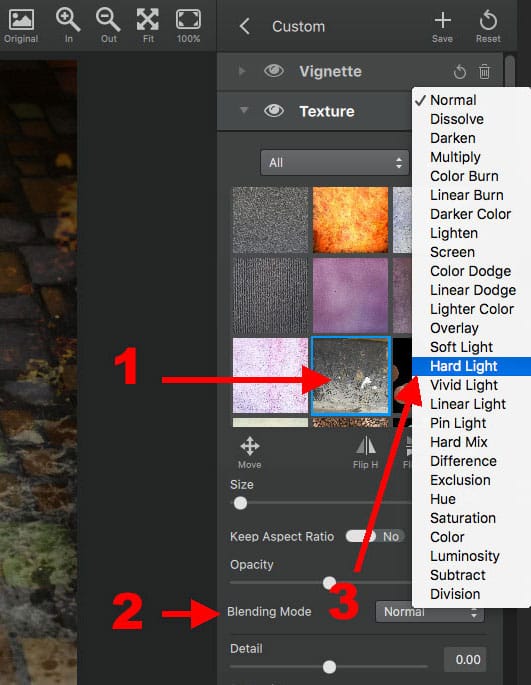
Copy the settings shown in the image below, or simply choose your own. When you are done, then click on the ADD ADJUSTMENT button below the VIGNETTE effects panel. Select TEXTURE from the adjustments list.
Choose a texture from the list of textures, and then select a blending mode. Hard Light looks like a good choice in this image and texture combination.
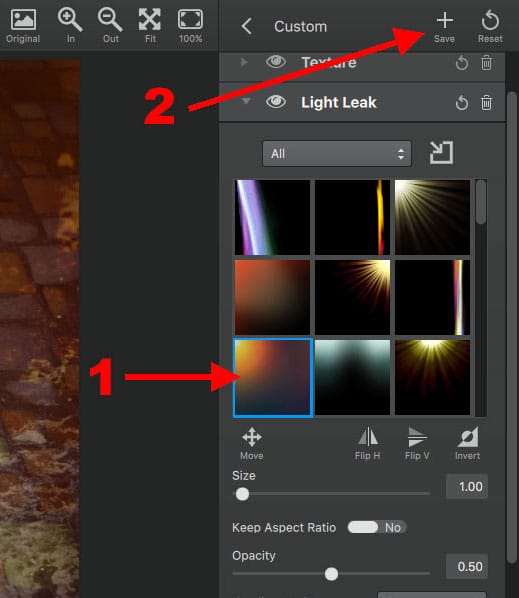
When you are satisfied with your settings, just click the SAVE button on the top right of the plugin window.
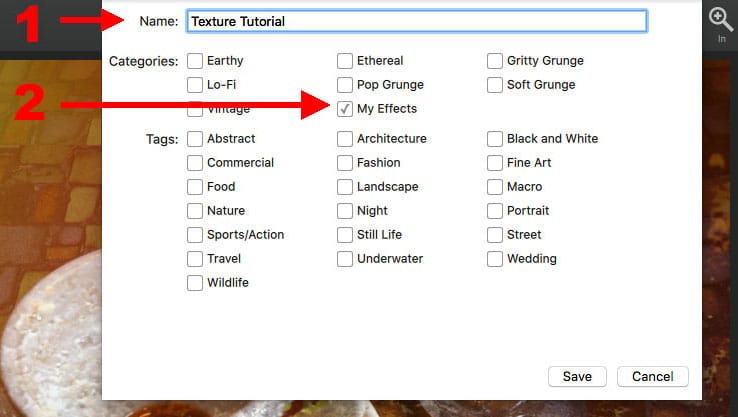
Write a name for your preset and select a category and tag if you want. Click SAVE to save the preset, and then click OK to apply the preset and close the plugin window.
Your image should look something like the one below.

We’ve only scratched the surface of this plugin. The options are endless. You can even import your own textures. For that case I would recommend some beautiful commercial textures from FlyPaper Textures. But you can import any texture you want.
I was very impressed with the ease of use and speed of this plugin. It is even faster than some native Photoshop plugins. TopazLabs has created an amazing piece of software and I strongly recommend it to anyone who wants to wants to experiment with new creative options.


