Creating a 3D Glowing Text Effect in Photoshop

Creating a 3D Glowing Text Effect in Photoshop

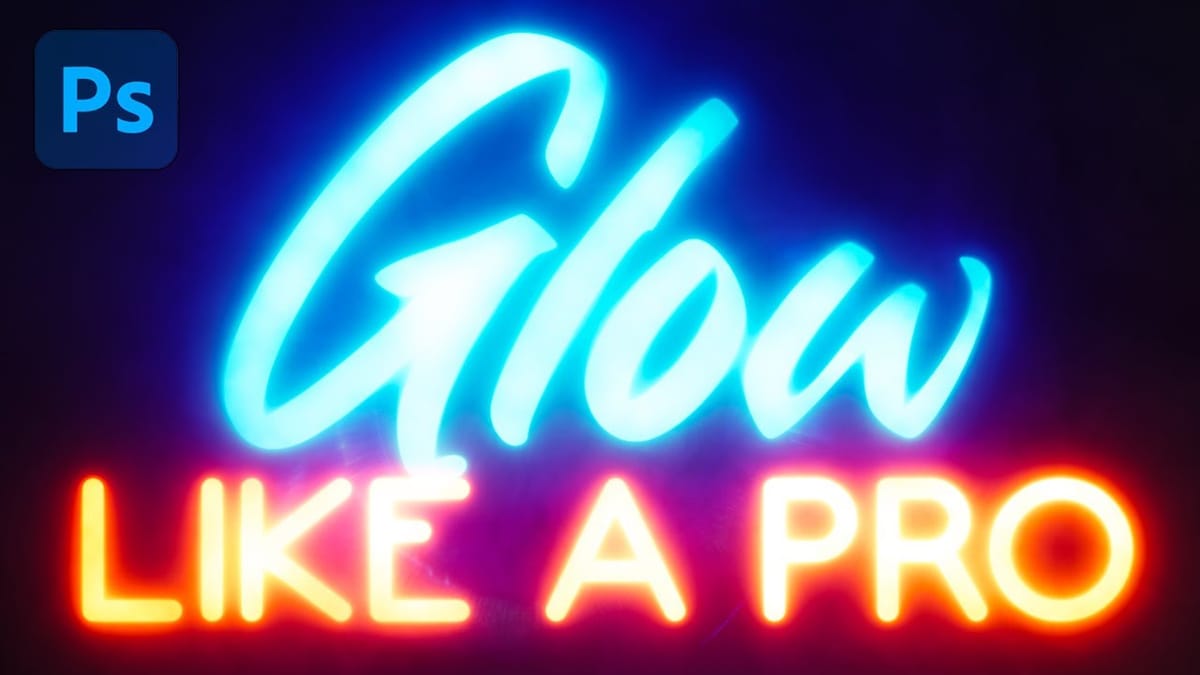
Adding depth and luminosity to text can transform a simple design into something visually striking. The combination of 3D extrusion and glow effects creates text that appears to leap off the page, making it perfect for logos, headers, and eye-catching graphics.

This tutorial demonstrates how to build a complete 3D text effect with glowing elements using Smart Objects and layer effects. The technique covers everything from creating dimensional text to applying multiple glow layers for enhanced visual impact.

Watch the Tutorial

Any links or downloads mentioned by the creator are available only on YouTube

Understanding 3D Text Effects in Photoshop

Creating convincing 3D text requires understanding how depth, lighting, and color work together. Unlike true 3D modeling software, Photoshop achieves dimensional effects through layer duplication and strategic positioning. This approach gives designers precise control over every aspect of the text appearance.

The glow effect adds another layer of complexity by simulating how light interacts with surfaces. Multiple glow layers at different intensities create the illusion of depth and atmosphere around the text. The key elements include:

  • Extrusion depth through layer positioning
  • Surface lighting with bevel and emboss effects
  • Atmospheric glow through blur and blend modes
  • Color harmony between text and background elements

Smart Objects play a crucial role in this workflow by maintaining text editability throughout the process. This means the entire effect can be updated simply by changing the original text, making the technique highly practical for client work and design iterations.

Practical Tips for 3D Glow Effects

  • Use Smart Objects for text to maintain editability throughout the entire process and easily swap content later
  • Build extrusion gradually using the transform repeat shortcut (Ctrl+Shift+Alt+T) rather than creating too many layers at once
  • Balance glow intensity by using multiple blur layers at different opacities instead of one strong effect
  • Match colors strategically by making the extrusion darker than the main text and the glow lighter than both
  • Test different blend modes like Linear Dodge and Screen for glow effects to find what works best with your color scheme

More Tutorials about 3D Text Effects

Explore additional techniques for creating dimensional text and lighting effects in Photoshop.

Glowing Text Effect in Photoshop
Looking for an alternative to the flat-looking Outer Glow Effect in Photoshop? In this tutorial, we’ll check out a simple technique that generates awesome results to create a more realistic glow for text and logos. Be sure to try out the same technique to make your photographs glow as well! Download free fog and lens […] More
Create a Realistic Neon Sign Text Effect in Photoshop
In this neon effect Photoshop tutorial, you’ll learn how to make a neon effect, sign, light using only Smart Objects in Photoshop.at the end of the tutorial, you will be able to create a very realistic & colorful Neon text effect Mockup which can be reused again and again to re-apply the complete neon effect […] More
Create a Realistic Neon Text Effect in Photoshop
Learn how to create an amazing realistic neon text effect in a few easy steps using Adobe Photoshop.

Get tutorials & freebies delivered to you.

Subscribe to the Photoshop Roadmap newsletter, a weekly roundup of new tutorials, insights and quality downloads, trusted by 6500+ readers.

You might also like

How to Use Color Average for Color Toning in Photoshop

Color average creates a unified color tone by analyzing all the colors in your image and calculating their mathematical average. This technique adds depth and cohesion to photos, composites, and AI-generated images by applying a subtle color wash that ties all elements together. The method works particularly well for composites...

How to Remove Complex Background Elements Using AI in Photoshop

Removing complex background elements like fencing or wire mesh has traditionally been one of the most time-consuming tasks in photo editing. New AI-powered tools in Photoshop can now eliminate these distracting elements while preserving fine details in your subject. This tutorial demonstrates two practical workflows: one using the latest Firefly...

How to Use Photoshop's Auto Layer Rename Feature

Messy layer names like "Layer 52 copy 4" and "Untitled 5" clutter your workspace and slow down complex projects. Photoshop's new auto-rename feature uses AI to automatically identify and name layers based on their content, from "Woman in yellow shirt" to "...

New Generative Fill Features in Photoshop Beta: Reference Images and Credit Tracking

Photoshop Beta introduces significant improvements to Generative Fill that address the most requested features from users. The updated interface now displays your generative credit balance and usage, while the new reference image capability lets you add up to eight specific images to guide AI generation with precise visual examples. These...

Essential Photoshop Tools for Beginners: Brush, Crop, and Move Tool Tutorial

Learning Photoshop tools feels overwhelming when you don't know where to start. This tutorial focuses on three essential tools that form the foundation of most Photoshop work: the brush tool for painting and retouching, the crop tool for resizing and straightening images, and the move tool for positioning...

How to Add Custom Textures to Photos in Photoshop

Adding textures to photographs can transform ordinary images into compelling artistic compositions. This technique uses multiple texture layers combined with strategic blending modes and color adjustments to create depth and visual interest. The process involves layering different texture types—color overlays, surface patterns, and lighting effects—then using masking techniques...

You’ve successfully subscribed to Photoshop Roadmap
Welcome back! You’ve successfully signed in.
Great! You’ve successfully signed up.
Success! Your email is updated.
Your link has expired
Success! Check your email for magic link to sign-in.