How to Create Realistic Design Mockups in Photoshop

How to Create Realistic Design Mockups in Photoshop

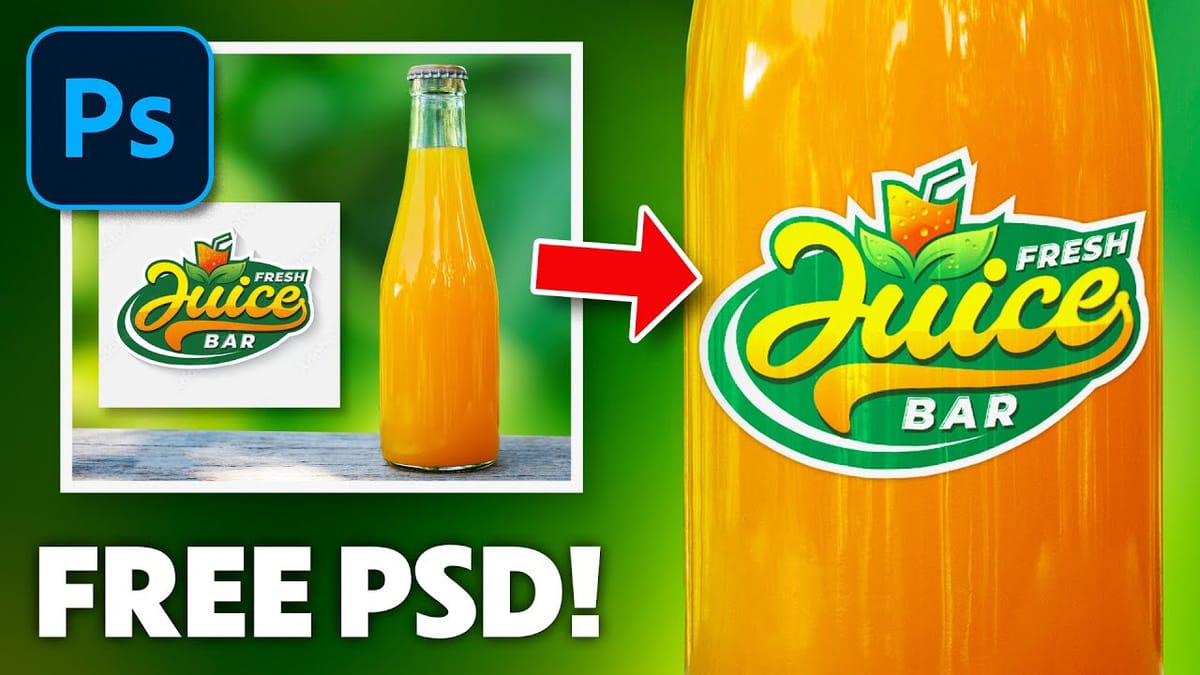
Creating convincing product mockups requires more than simply placing a design onto a template. Real fabric surfaces have subtle color variations, texture bumps, and complex lighting that affect how printed designs actually appear.

This comprehensive tutorial demonstrates professional techniques for building realistic mockups from scratch. You'll learn to control surface preparation, blend modes, displacement mapping, and lighting effects to achieve results that match real-world printing conditions.

Watch the Tutorial

Video by PiXimperfect. Any links or downloads mentioned by the creator are available only on YouTube

The Science Behind Realistic Mockup Creation

Professional mockup design relies on understanding how printed materials interact with different surfaces. Fabric printing, screen printing, and digital transfers each produce distinct visual characteristics that affect color saturation, edge sharpness, and surface texture integration.

The key principle involves surface preparation before design placement. Raw product photos contain color casts, brightness variations, and existing textures that interfere with design accuracy. Neutralizing these elements creates a consistent base that preserves the original design colors while maintaining realistic material properties.

Advanced mockup techniques also account for how light interacts with printed surfaces. Real printed designs don't simply sit on top of materials—they integrate with surface bumps, follow fabric weaves, and reflect light differently in raised versus recessed areas. This requires careful attention to:

  • Displacement mapping for surface texture integration
  • Blend mode combinations for realistic color interaction
  • Selective brightness and saturation adjustments based on surface topology

Essential Tips for Professional Mockups

  • Prepare the base surface first by reducing color saturation and adjusting brightness before placing any designs—this prevents unwanted color contamination.
  • Use multiply blend mode for dark areas and screen blend mode for highlights to simulate how printed ink interacts with fabric surfaces naturally.
  • Create displacement maps from desaturated surface copies to add realistic texture bumps and fabric weave integration to your designs.
  • Apply subtle Gaussian blur to designs since real printed materials lack the sharp pixel-perfect edges of digital files.
  • Reduce saturation in shadow areas using channel-based masks to replicate how colors appear less vibrant in darker surface regions.

More Tutorials About Mockup Design

Explore additional techniques for creating professional product presentations and design mockups.

Place a logo onto a bottle in Photoshop [FREE PSD]
Learn to easily place any logo onto a bottle in Photoshop. This short tutorial is packed with information. You will learn about Smart Objects, Clipping Masks, Color Modes, and more. Download the free tutorial psd here… More
Easily create realistic mockups and templates in Photoshop
In this tutorial by Quistt, you'll discover how to craft realistic mockups and templates in Photoshop with ease. This comprehensive guide will walk you through the process of creating high-quality product showcases, whether you're designing for books, signs, t-shirts, or various other merchandise. You'll learn to utilize Photoshop's powerful tools and features to produce mockups that look both professional and authentic. The tutorial covers techniques for adding realistic details and ensuring y
Create a realistic tattoo out of any design in Photoshop
This tutorial by Aaron Nace from Phlearn, will show you how to transform any design into a realistic-looking tattoo using Photoshop. Aaron demonstrates various tools and techniques to achieve a natural and authentic appearance. One key step is leveraging filters to introduce variation in the lines, which helps create a more realistic tattoo look. The Liquify Tool and Smudge Tool are also utilized to follow the contours of the body, ensuring a seamless integration of the design. Furthermore, th
How to replace a sign for mockups in Photoshop
Today we show you how to add your own text and logos to a sign in Photoshop! Learn how to remove existing graphics from a photographed sign, place your own graphics in proper perspective, and work using multiple Photoshop documents that update in real time as you make changes. Download the Sample Images & PSD […] More

Get tutorials & freebies delivered to you.

Subscribe to the Photoshop Roadmap newsletter, a weekly roundup of new tutorials, insights and quality downloads, trusted by 6500+ readers.

You might also like

Complete Photoshop Editing Workflow: 5 Steps from Raw to Polished

Photoshop offers endless possibilities for photo enhancement, but many photographers never move beyond basic adjustments because the software feels overwhelming. This comprehensive workflow breaks down photo editing into five manageable stages that work consistently across different photography styles. The systematic approach covers everything from initial raw processing to advanced lighting...

Photoshop Workspace Basics: Navigation, Zooming, and Essential Interface Elements

Photoshop's interface can feel overwhelming when you first open the program. Dozens of panels, tools, and menus compete for attention, making simple tasks feel complicated. This tutorial breaks down the essential workspace elements and teaches fundamental navigation skills that form the foundation of efficient Photoshop work. Watch the...

How to Restore Old Damaged Photos Using Nano Banana in Photoshop

Old family photos with scratches, tears, and missing sections can seem beyond repair. Google's Nano Banana AI model, now integrated into Photoshop, makes full restoration possible in minutes rather than hours. This powerful tool excels at maintaining facial characteristics while automatically filling in damaged areas and adding realistic...

How to Get Higher Quality Results from Photoshop's Generative Fill Tool

Photoshop's Generative Fill creates impressive AI extensions, but the results often look blurry and pixelated when viewed at full size. This quality limitation makes many AI-generated areas unusable for printing or large displays. This technique shows how to work around the 1024x1024 pixel quality limit to create much...

How to Use Photoshop's Liquify Tool for Non-Destructive Portrait Retouching

Clothing wrinkles, hair that lacks volume, and awkward fabric bunching can distract from an otherwise great portrait. Photoshop's Liquify tool offers a powerful solution for smoothing out these issues while preserving the natural look of your subject. This tutorial demonstrates how to use the Liquify tool non-destructively with...

You’ve successfully subscribed to Photoshop Roadmap
Welcome back! You’ve successfully signed in.
Great! You’ve successfully signed up.
Success! Your email is updated.
Your link has expired
Success! Check your email for magic link to sign-in.