How to Use AI Masking in Adobe Camera Raw for Professional Photo Editing

How to Use AI Masking in Adobe Camera Raw for Professional Photo Editing

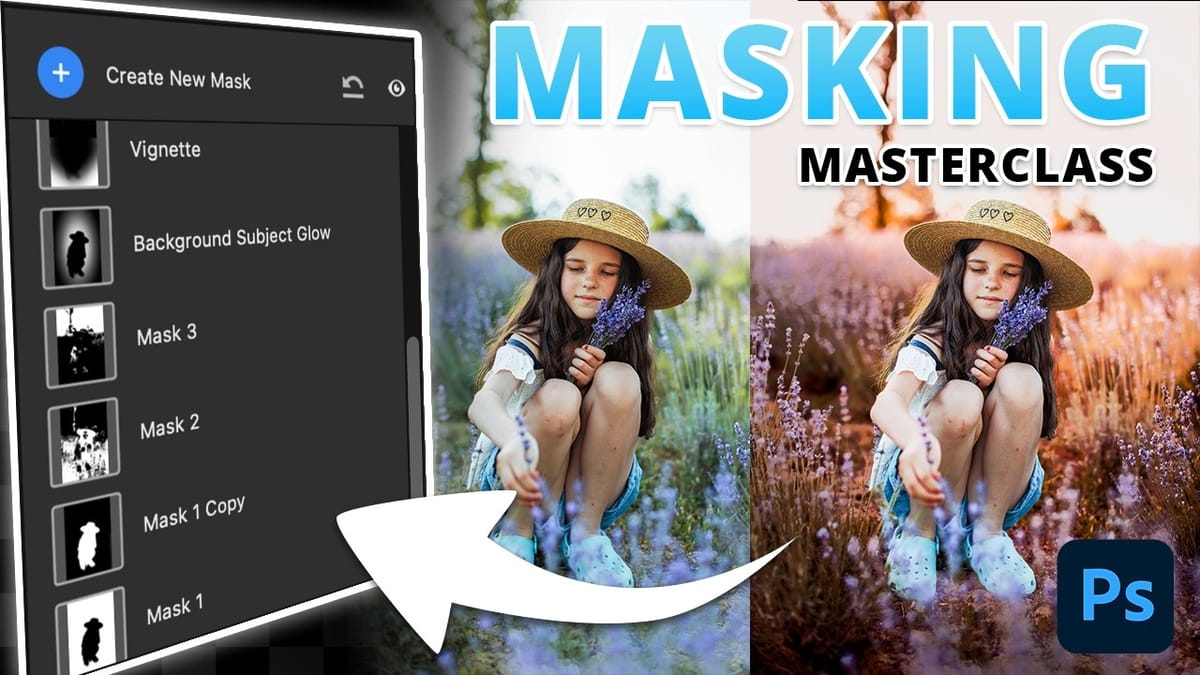
Adobe Camera Raw's AI masking tools automatically detect subjects, backgrounds, skies, and landscapes, letting you make precise adjustments to specific areas of your photos. These intelligent masks eliminate the need for manual selection work, while allowing you to combine and refine them for complete creative control.

The technique works with any image format and preserves all your adjustments when using smart objects, making it perfect for non-destructive editing workflows that you can modify at any time.

Watch the Video

Video by PHLEARN. Any links or downloads mentioned by the creator are available only on YouTube

Practical Tips

These key techniques will help you master AI masking in Adobe Camera Raw:

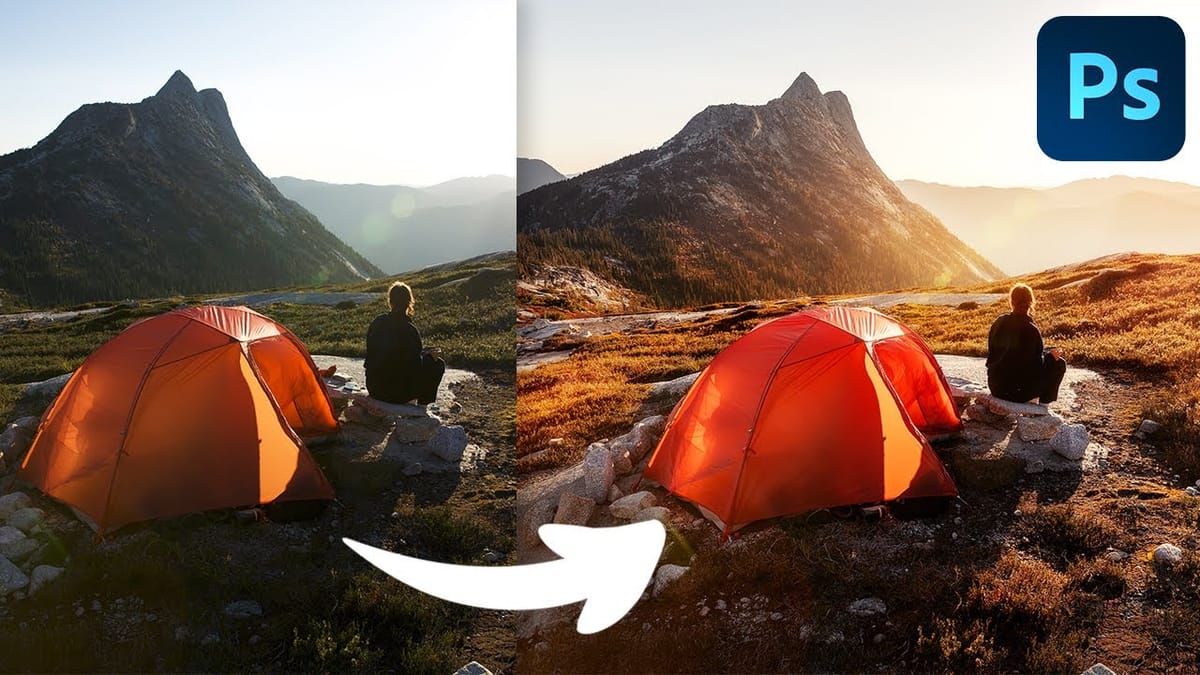
  • Always convert your layer to a smart object first using Filter > Convert for Smart Filters to maintain non-destructive editing capabilities
  • Use the subtract option with radial gradients to create natural lighting effects behind subjects after applying background masks
  • Combine multiple AI mask types like landscape elements (sky, mountains, water) with subject masks for complete scene control
  • Press Y to toggle mask overlays on and off to see exactly which areas you're adjusting
  • Adjust feathering on radial and linear masks to blend effects seamlessly into your image

Explore more advanced AI techniques and professional editing workflows:

Transform Your Photos with These Photoshop Masks
Masking in Photoshop is a powerful technique to isolate and enhance different parts of an image. However, many users find it complicated and time-consuming, often sticking to basic masks or selections that limit creative control. This can make photo editing feel frustrating and slow, especially when trying to achieve subtle
Complete Photoshop Editing Workflow: 5 Steps from Raw to Polished
Photoshop offers endless possibilities for photo enhancement, but many photographers never move beyond basic adjustments because the software feels overwhelming. This comprehensive workflow breaks down photo editing into five manageable stages that work consistently across different photography styles. The systematic approach covers everything from initial raw processing to advanced lighting
How to Color Grade Without Oversaturating Skin Tones Using Camera Raw
Professional color grading often creates a dilemma: boosting vibrant colors while keeping skin tones natural. Traditional saturation adjustments can make portraits look overprocessed, turning skin an unflattering orange or magenta. This technique uses Camera Raw’s masking tools to selectively enhance background colors while protecting skin tones, creating vibrant images that
Advanced Black and White Photo Editing with Selective Masking in Photoshop
Most black and white conversions fall flat because they rely on simple global adjustments that treat the entire image uniformly. Professional-level dramatic black and white photos require selective contrast adjustments that target specific areas like skies, foregrounds, and tonal ranges independently. This approach transforms ordinary monochrome images into compelling, high-contrast

Get tutorials & freebies delivered to you.

Subscribe to the Photoshop Roadmap newsletter, a weekly roundup of new tutorials, insights and quality downloads, trusted by 6500+ readers.

You might also like

How to Use Color Average for Color Toning in Photoshop

Color average creates a unified color tone by analyzing all the colors in your image and calculating their mathematical average. This technique adds depth and cohesion to photos, composites, and AI-generated images by applying a subtle color wash that ties all elements together. The method works particularly well for composites...

How to Remove Complex Background Elements Using AI in Photoshop

Removing complex background elements like fencing or wire mesh has traditionally been one of the most time-consuming tasks in photo editing. New AI-powered tools in Photoshop can now eliminate these distracting elements while preserving fine details in your subject. This tutorial demonstrates two practical workflows: one using the latest Firefly...

How to Use Photoshop's Auto Layer Rename Feature

Messy layer names like "Layer 52 copy 4" and "Untitled 5" clutter your workspace and slow down complex projects. Photoshop's new auto-rename feature uses AI to automatically identify and name layers based on their content, from "Woman in yellow shirt" to "...

New Generative Fill Features in Photoshop Beta: Reference Images and Credit Tracking

Photoshop Beta introduces significant improvements to Generative Fill that address the most requested features from users. The updated interface now displays your generative credit balance and usage, while the new reference image capability lets you add up to eight specific images to guide AI generation with precise visual examples. These...

Essential Photoshop Tools for Beginners: Brush, Crop, and Move Tool Tutorial

Learning Photoshop tools feels overwhelming when you don't know where to start. This tutorial focuses on three essential tools that form the foundation of most Photoshop work: the brush tool for painting and retouching, the crop tool for resizing and straightening images, and the move tool for positioning...

How to Add Custom Textures to Photos in Photoshop

Adding textures to photographs can transform ordinary images into compelling artistic compositions. This technique uses multiple texture layers combined with strategic blending modes and color adjustments to create depth and visual interest. The process involves layering different texture types—color overlays, surface patterns, and lighting effects—then using masking techniques...

You’ve successfully subscribed to Photoshop Roadmap
Welcome back! You’ve successfully signed in.
Great! You’ve successfully signed up.
Success! Your email is updated.
Your link has expired
Success! Check your email for magic link to sign-in.