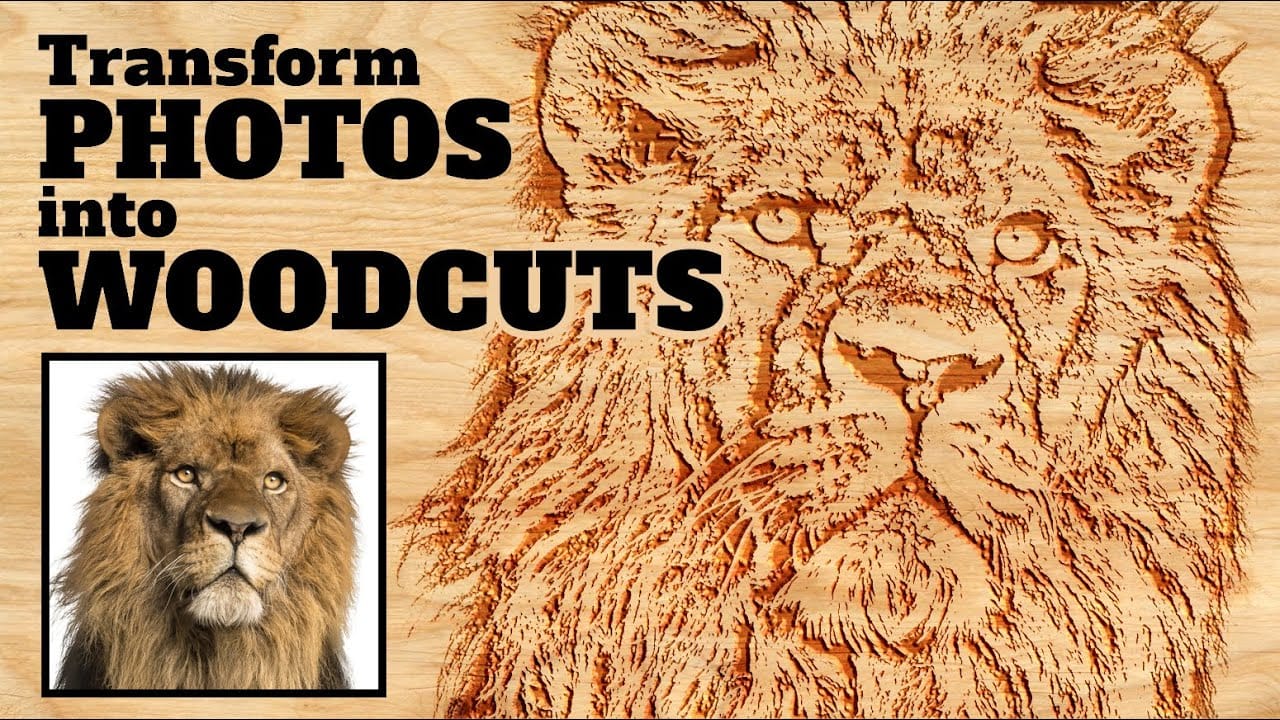
Wood engravings capture the timeless aesthetic of traditional printmaking, transforming ordinary photographs into artwork that resembles hand-carved illustrations. This technique combines the rustic charm of wood textures with the precise detail of engraved lines, creating images that feel both historical and artistic.
The process uses non-destructive editing methods and smart objects, allowing you to experiment with settings while preserving your original photo. By layering wood textures with specific filter effects and blending modes, you can achieve a convincing engraved appearance that works well for portraits, landscapes, or any detailed photograph.
Watch the Video
Video by Photoshop Arthouse. Any links or downloads mentioned by the creator are available only on YouTube
Practical Tips
Master the wood engraving effect with these essential techniques from the tutorial:
- Convert your photo and adjustment layers into a smart object before applying filters to maintain editability and create reusable templates
- Use the Emboss filter with an angle of -135°, height of 5 pixels, and amount of 500% to create the carved texture effect
- Apply Soft Light blend mode to the embossed layer to blend the effect naturally with the underlying wood texture
- Add a duplicate layer with Gaussian blur (3-pixel radius) to soften harsh edges and create a more realistic engraved appearance
- Start with high-contrast photos that have clear details, as they translate better into the engraved aesthetic
Related Articles and Tutorials
Explore more vintage and artistic photo effects with these specialized tutorials: