How to Edit Landscape Photos in Adobe Photoshop or Lightroom

How to Edit Landscape Photos in Adobe Photoshop or Lightroom

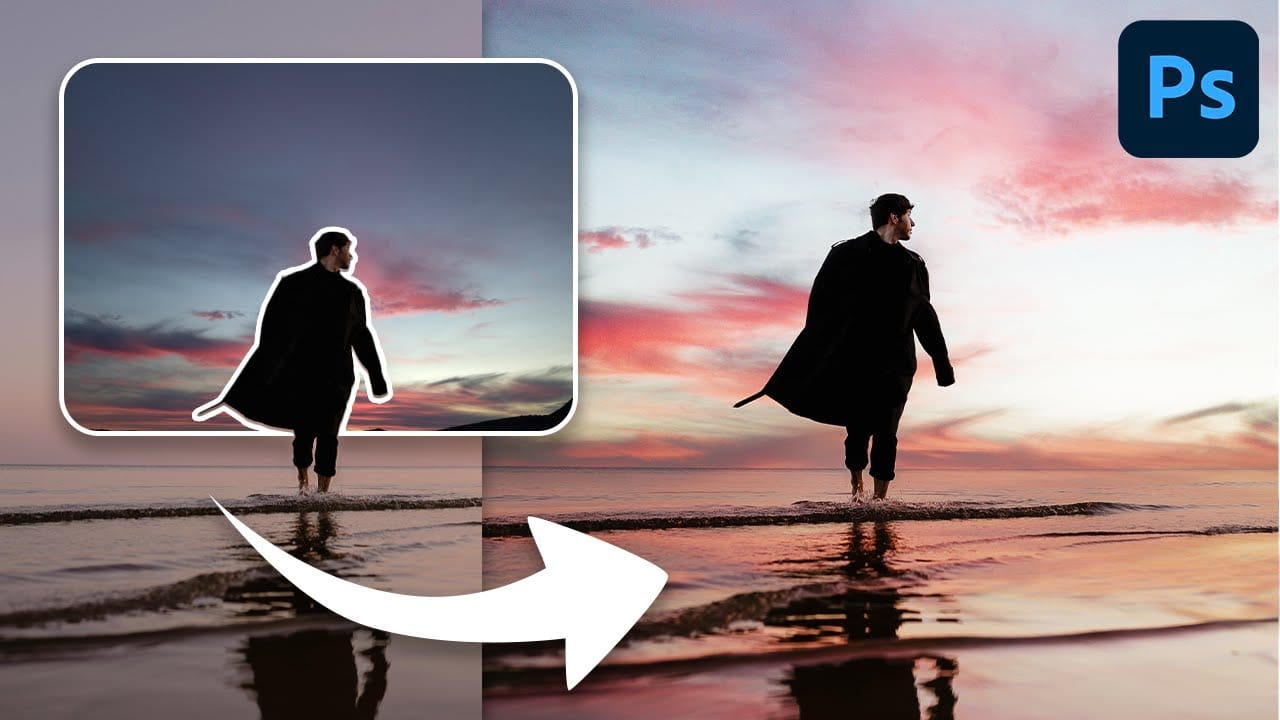
Landscape photography often presents unique challenges and opportunities for post-processing. Capturing the grandeur of nature requires not only a keen eye but also the ability to refine and enhance images to truly convey the scene's atmosphere and depth.

This video tutorial demonstrates a comprehensive workflow for editing landscape photos, primarily utilizing Adobe Camera Raw (compatible with Lightroom) and Photoshop. Viewers will learn how to apply non-destructive adjustments, create depth through selective edits, and introduce realistic light effects to transform their images.

Watch the Landscape Photo Editing Tutorial

Video by Zenzdesign. Any links or downloads mentioned by the creator are available only on YouTube

The Power of Selective Adjustments in Landscape Photography

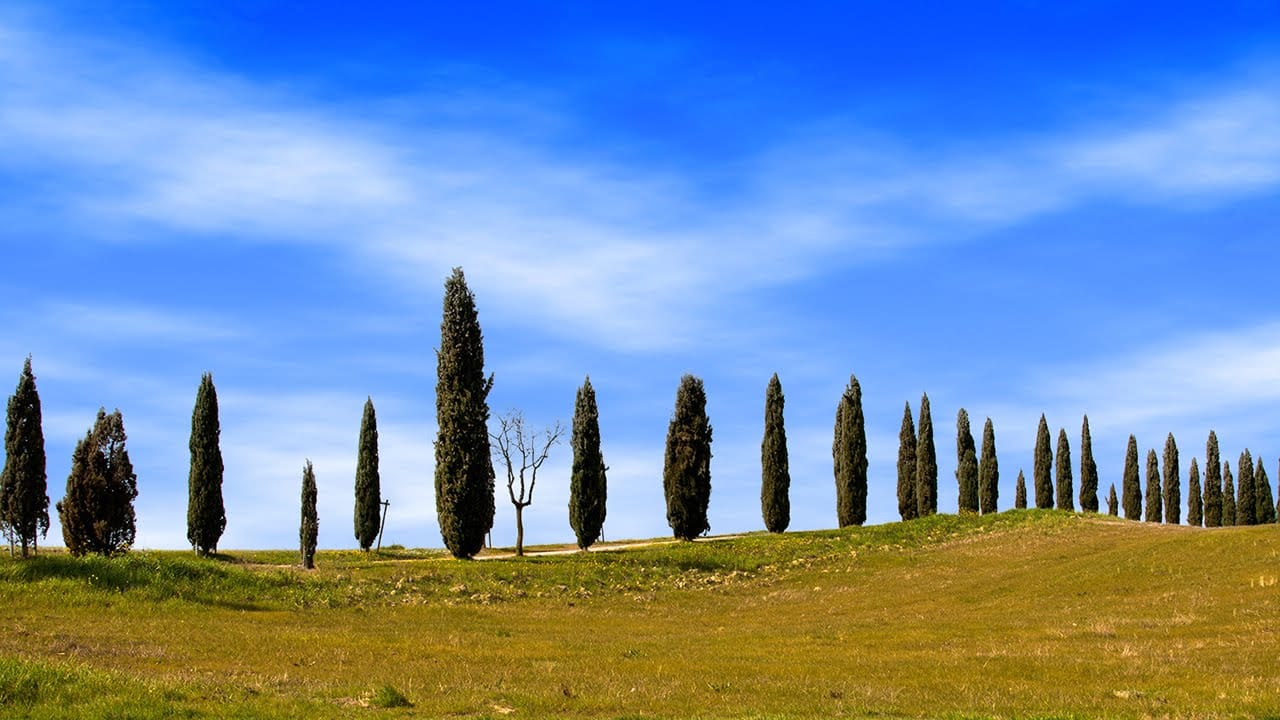
Effective landscape photo editing often hinges on the principle of selective adjustments, rather than applying global changes across an entire image. This approach allows photographers to address specific areas—such as the sky, foreground, or distant mountains—independently, tailoring exposure, contrast, and color to each element's unique needs. By isolating adjustments, one can maintain detail in highlights while lifting shadows, or enhance atmospheric effects without desaturating other parts of the scene.

Tools like Adobe Camera Raw's masking capabilities or Lightroom's local adjustment brushes are indispensable for this process. They enable precise control over luminosity and color, allowing for the creation of depth and visual interest. For instance, darkening the edges of a frame can draw the viewer's eye towards the central subject, while subtly brightening a distant peak can enhance its prominence and separation from the background. This meticulous attention to detail ensures that the final image possesses a natural yet impactful quality.

Furthermore, the strategic use of atmospheric effects, such as haze or dehaze, can significantly influence the perceived depth and mood of a landscape. Reducing haze can bring clarity to distant elements, while adding a touch of mist can evoke a sense of mystery or softness. These nuanced adjustments contribute to a more immersive and emotionally resonant photographic experience.

Practical Tips for Editing Landscape Photos

  • Start with Smart Objects: Convert your background layer to a Smart Object before applying Camera Raw Filter settings to enable non-destructive editing and allow for future modifications.
  • Utilize Camera Raw Masking: Employ the masking brush (shortcut K) within Camera Raw to make precise, localized adjustments to different parts of your landscape, such as the sky, foreground, or specific elements like trees and mist.
  • Create Depth with Light: Strategically lighten shadows in the background (e.g., mountains) while keeping foreground shadows slightly darker to create a sense of depth and separation in your image.
  • Refine Atmospheric Effects: Use the Dehaze slider in Camera Raw to either reduce atmospheric haze for clarity or introduce subtle mist effects to enhance mood and depth in specific areas.
  • Add Realistic Light Beams: Generate sun rays or light beams in Photoshop by creating a new layer, using a soft, light-colored brush, and transforming the shape with Ctrl/Command + T and Ctrl/Command dragging to stretch the light. Adjust opacity for realism.

Explore more techniques to enhance your landscape photography and master advanced Photoshop skills.

Learn how to replace the sky in a landscape photo
Marty Geller from Blue Lightning TV has created a Photoshop tutorial that teaches you how to replace a dull, washed-out sky in a landscape photo with a stunning blue sky and wispy, white clouds. The tutorial guides you through the process step by step, providing detailed instructions and tips to ensure a seamless and natural-looking result. Whether you're a beginner or an experienced Photoshop user, this tutorial can help you breathe new life into your landscape photos. By learning how to repla
How To Easily Change The Sky In Photoshop
In this lesson, you’ll explore how to replace skies in Photoshop effortlessly. The tutorial begins by showing you how to access the Sky Replacement Panel. This tool gives you control over enhancing images with dynamic skies. You’ll also learn how to add a new sky to your photo, transforming the atmosphere and overall impact of the image. The video breaks this step down for you, making it easy to follow along. Additionally, the tutorial covers creating realistic sky reflections. This step is cr
Create a nice tiny planet out of a landscape photo in Photoshop
According to Tutorials Junction, creating a nice tiny planet out of a landscape photo in Photoshop is a straightforward process. The tutorial explains how to achieve this 3D effect using Adobe Photoshop. The video may seem lengthy, but the photo effect itself is quite quick. The majority of the time is spent composing the model and using lighting effects. The key is to start with the right image and make it square, as the filter used for this effect works best with a square format. While the p
Learn how to create light rays and dust particles in Photoshop
As a reader, you'll find this tutorial by Aaron Nace from Phlearn to be an informative and practical guide. He'll show you how to create stunning light rays and dust particles from scratch in Photoshop, using a custom brush. The step-by-step instructions are easy to follow, making it accessible even for beginners. You'll learn how to set up the brush, adjust the opacity and size, and apply it to your image to achieve the desired effect. The resulting light rays and dust particles will add dept

Get tutorials & freebies delivered to you.

Subscribe to the Photoshop Roadmap newsletter, a weekly roundup of new tutorials, insights and quality downloads, trusted by 6500+ readers.

You might also like

How to Use AI Masking in Adobe Camera Raw for Professional Photo Editing

Adobe Camera Raw's AI masking tools automatically detect subjects, backgrounds, skies, and landscapes, letting you make precise adjustments to specific areas of your photos. These intelligent masks eliminate the need for manual selection work, while allowing you to combine and refine them for complete creative control. The technique...

How to Remove Objects from Photos Using AI Tools in Photoshop

Photoshop's AI-powered object removal tools can eliminate unwanted distractions from your photos with minimal effort. The Remove Tool and Generative Fill feature automated detection for common distractions like people and wires, plus manual painting options for custom removals. These tools work on separate layers, preserving your original image...

Speed Up Your Color Grading Workflow with Photoshop Actions

Color grading can transform your images, but manually adjusting curves and levels for every photo takes time. Photoshop actions offer a faster approach by applying professional color treatments with a single click. This workflow uses pre-built actions, tints, and LUTs to achieve various moods and styles instantly, letting you layer...

7 Essential Tips for Speed Painting in Digital Art

Speed painting isn't just about working faster—it's about eliminating friction from your creative process. These seven techniques help you get ideas onto canvas quickly without getting bogged down in unnecessary decisions or premature details. Whether you're exploring concepts for professional work or personal...

Professional Color Grading Techniques in Photoshop

Color grading transforms ordinary photos into compelling images with professional mood and atmosphere. These non-destructive techniques let you adjust tones, enhance specific colors, and create cinematic looks while preserving your original image data. Master these four essential color grading methods to develop a consistent editing workflow that elevates your photography....

How to Save Cut-Out Elements with Transparent Backgrounds in Photoshop

Creating seamless photo composites requires properly saving cut-out elements with transparent backgrounds. Whether you're extracting people, objects, or other elements for later use, the file format you choose determines how easily you can place these elements into new scenes. Two main approaches work best: saving as PSD files...

You’ve successfully subscribed to Photoshop Roadmap
Welcome back! You’ve successfully signed in.
Great! You’ve successfully signed up.
Success! Your email is updated.
Your link has expired
Success! Check your email for magic link to sign-in.