

Professional photo editing often requires removing unwanted objects while maintaining natural-looking results. The challenge lies in creating seamless edges and realistic backgrounds, especially around complex subjects like hair or intricate details.
This tutorial demonstrates both basic object removal using Photoshop's Remove Tool and an advanced "clean plate" technique used in professional TV and movie poster production.
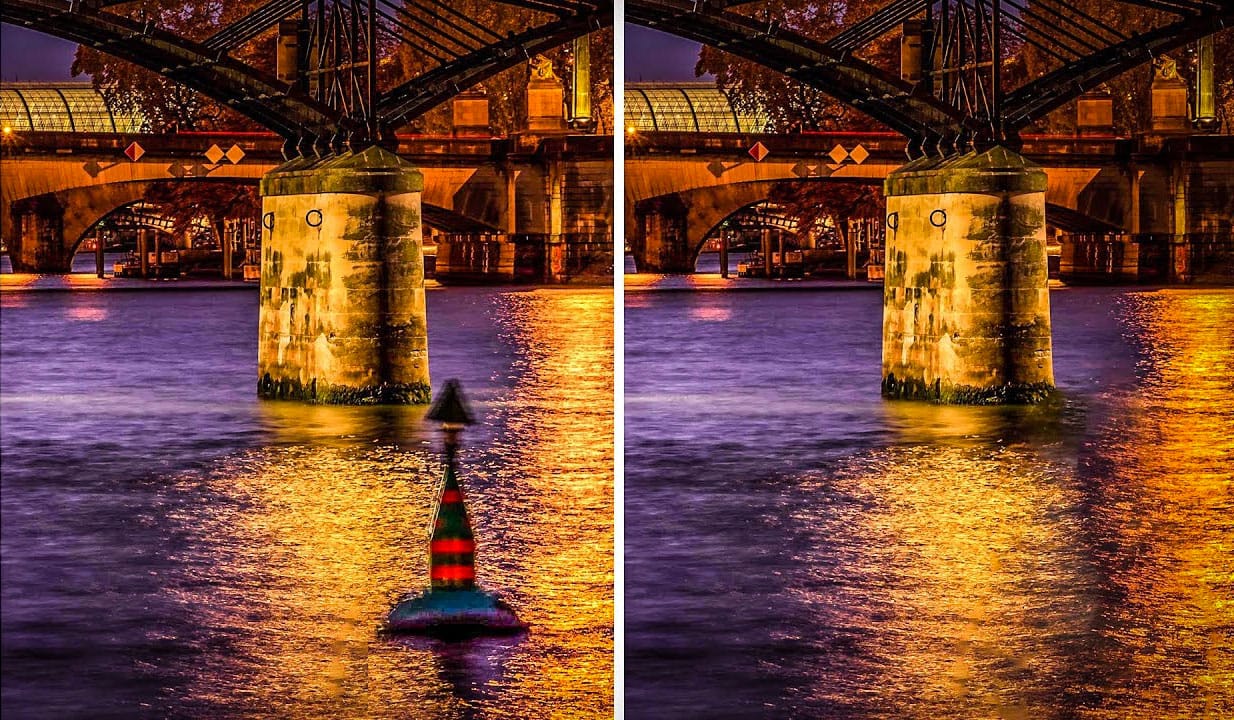
Watch the Tutorial
Video by Photoshop Training Channel. Any links or downloads mentioned by the creator are available only on YouTube
Essential Tips for Object Removal
- Create a new layer before starting removals to preserve the original image and maintain editing flexibility
- Uncheck "remove after each stroke" in the Remove Tool settings to control when changes are applied and review results first
- Use Generative Fill instead of the Remove Tool for intricate details like hair, jewelry, or complex textures
- Apply the clean plate technique for complex removals by first removing the subject to generate a perfect background, then masking to reveal the subject
- Expand selections by 3-4 pixels using Quick Mask mode and the Maximum filter to include flyaway hairs and edge details
More Tutorials About Object Removal in Photoshop
Explore additional techniques and tools for removing unwanted elements from your photos.
How to Remove Unwanted Objects in Different Ways in Photoshop
Do you have photographs with distracting elements that need removing? In this insightful Photoshop tutorial from artist Zak Eazy, viewers will learn several effective techniques for eliminating unwanted objects from their images. Whether it's removing superfluous signs, wires or passersby, Zak walks through practical use cases that showcase the Patch and Clone Stamp tools as well as Content-Aware Fill.
Through demonstration on real-world sample images, viewers will gain an understanding of when

How to Erase Anything in Photoshop with Content Aware Fill
In this tutorial, the author Serge Ramelli shows how to erase anything using the content-aware fill in the latest version of Photoshop. This updated feature makes it simple and quick to remove just about anything from a photo. However, it's important to note that you'll need the most recent version of Photoshop to utilize this tool.
The content-aware fill feature in Photoshop allows users to easily erase unwanted elements from their images. By selecting the area to be removed and using the cont
How to Remove People From Photos in Photoshop: Easy and Advanced Methods
Removing unwanted elements from photographs, especially people, is a common task in digital image editing. Whether you're a professional photographer or an enthusiast, the ability to clean up a scene can transform an ordinary shot into a compelling visual, allowing the true subject or landscape to shine without distractions.
This video explores two distinct approaches to achieve this in Photoshop. Viewers will discover how to use the automated features for simpler scenarios involving crowds, an


