How to Trim and Shape Eyebrows in Photoshop

How to Trim and Shape Eyebrows in Photoshop

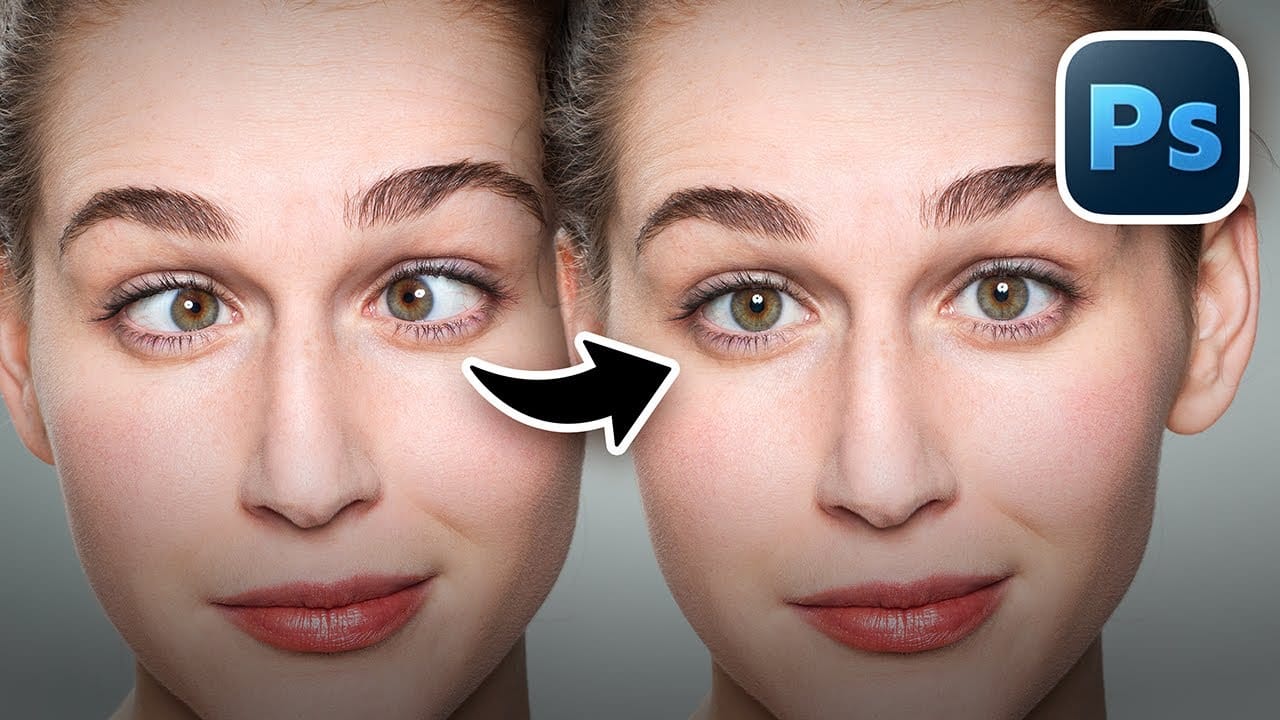
Eyebrow retouching requires precision and the right technique to maintain natural-looking results. Whether you're cleaning up stray hairs, reshaping uneven brows, or reconstructing missing sections, the key lies in understanding how to blend seamlessly with existing hair patterns and skin texture.

This comprehensive approach covers three distinct scenarios: minor cleanup work, extensive reshaping, and eyebrow reconstruction using samples from other areas of the face.

Watch the Video

Video by PiXimperfect. Any links or downloads mentioned by the creator are available only on YouTube

Practical Tips

Master these essential techniques for professional eyebrow retouching that maintains natural appearance:

  • Make selections perpendicular to eyebrow direction for the most natural hair flow and easier blending
  • Use Quick Mask mode (Q key) with gaussian blur to preview and adjust selection softness before copying areas
  • Rotate your canvas with the R key to make drawing easier when working at difficult angles
  • Apply the "island technique" with clone stamp tool - isolate individual hairs before removing them with healing tools
  • Clean skin areas of blemishes and artifacts before copying sections to avoid transferring imperfections

Explore these portrait retouching tutorials to enhance your facial feature editing skills:

Create and Shape Eyebrows in Photoshop
Well-shaped eyebrows dramatically transform facial appearance, yet many portraits suffer from sparse or poorly defined brows. This technique shows how to create custom brushes that paint individual hairs, producing natural-looking eyebrows that enhance any portrait. The method builds a reusable brush system that works for both eyebrows and eyelashes, making it valuable for consistent portrait retouching work. Watch the Video Practical Tips Master these essential techniques for creating rea
Learn how to cut things out like a pro in Photoshop
If you're using Photoshop, chances are you're going to have to clip a subject from its background and work your editing magic. As a newbie, you may have been using the eraser tool to death, making memes that you hope would impress your Facebook friends and go viral. Well, that's fine. But, ever wondered how to retouch a bad hair cut or trim a bonsai plant for a professional retouching job? This video is your answer. Watch, practice, and repeat. In no time, you'd be editing fur. Yes, fur. And wh
Remove Fringes After Cutting Out Hair in Photoshop
This tutorial by PiXimperfect addresses the crucial challenge of removing edge fringes that frequently arise during hair masking in Photoshop, a common issue that can compromise the integrity of composite images. For design professionals, achieving a flawless finish is paramount, and understanding how to eliminate these distracting color edges is essential for creating high-quality visuals. In this guide, the focus is on utilizing Clipping Masks to enhance hair selection, allowing for a more pr
How to Remove Facial Hair in Photoshop
Removing facial hair from portraits requires more than just automatic healing tools. When dealing with beards, mustaches, or stubble, you need to essentially repaint the person's face while maintaining realistic skin texture and natural-looking results. This technique combines manual brush painting with texture borrowing from reference photos to create seamless facial hair removal that looks convincing at any zoom level. Watch the Video Practical Tips Master these essential techniques for
Remove bags and blemishes from portraits using the patch tool in Photoshop
Under eye bags and skin imperfections can detract from otherwise stunning portraits. The patch tool combined with the fade command offers a quick, effective solution that preserves natural skin texture while eliminating unwanted blemishes. This technique works by selecting problem areas and blending them with cleaner sections of nearby skin, creating seamless results without complex retouching skills. Watch the Video Practical Tips Master these essential techniques for natural-looking skin
How to Fix Crossed Eyes and Lazy Eyes in Photoshop
Portrait photographers and retouchers often encounter images where subjects have crossed or lazy eyes, which can distract from an otherwise great shot. Whether caused by timing, lighting, or natural eye alignment issues, these problems can be corrected effectively without compromising image quality. This tutorial demonstrates two practical approaches: using AI-powered generative fill for quick results, and a free alternative method that works with any version of the software. Watch the Video
How to Color, Brighten and Sharpen Eyes in Photoshop
Eyes are often the focal point of portrait photography, but they don't always capture attention in their natural state. This comprehensive tutorial demonstrates how to transform ordinary eyes into captivating features through strategic color enhancement, precise lighting adjustments, and professional sharpening techniques. The method focuses on enhancing existing eye colors rather than completely changing them, creating natural-looking results that draw viewers into the portrait. You'll learn t
How to Fix Missing Teeth in Photoshop
Have you ever needed to fix missing teeth in a photo? It's a common issue, but luckily, Photoshop makes it easy to address. In this quick tutorial, you'll learn a simple technique to make those gaps disappear. The process is straightforward. First, use the Stamp Tool to copy the surrounding tooth enamel and fill in the missing area. Then, refine the edges using the Healing Brush to blend it seamlessly. Finally, add some subtle shading to make the repair look natural. The whole thing can be don
3 steps to remove stray flyaway hair fast in Photoshop
Removing stray flyaway hair in Photoshop can be a quick and efficient process. This guide offers a straightforward workflow that allows you to tackle multiple flyaways at once, saving you time and effort. The tutorial emphasizes the use of masks, which enables you to manage the unwanted hairs without the tedious job of cloning out each one individually. You will find that by following these three simple steps, you can achieve a clean and polished look for your images. Whether for portrait phot
Removing Red Eye and Whitening Teeth
This video tutorial by Bryan O'Neil Hughes, for Adobe Photoshop Playbook series, covers how to fix red eye and whiten teeth in Photoshop. The first part focuses on the red eye correction tool, which is straightforward: simply zoom in on the eye and draw a box around the red area, and Photoshop will automatically correct it. The second part addresses teeth whitening, which is a bit more complex. After zooming in on the teeth, you use the Dodge tool set to mid-tones with low exposure to lighten

Get tutorials & freebies delivered to you.

Subscribe to the Photoshop Roadmap newsletter, a weekly roundup of new tutorials, insights and quality downloads, trusted by 6500+ readers.

You might also like

10 Photoshop Tricks You Probably Forgot Exist

There’s a funny pattern with Photoshop. The longer you use it, the more you rely on the same small set of tools… while some of the most powerful techniques quietly fade into the background. Not because they stopped working — but because they’re just a bit hidden, or not...

Add Floral Patterns to Black Dresses Using Brushes in Photoshop

Transform plain black clothing into vibrant, patterned garments using custom brushes and strategic layer blending. This non-destructive technique combines precise selections with clipping masks to paint realistic floral designs directly onto fabric while preserving the original photograph. The method works particularly well on black materials because the hard light blend...

How to Replace Objects Using Reference Images in Photoshop Generative Fill

Reference images transform Generative Fill from a text-based tool into a precise visual command system. Instead of describing what you want, you show the AI exactly which object to create, leading to more accurate and predictable results. This technique works by combining traditional selection tools with the new reference image...

How to Use Blend If Sliders for Pixel-Perfect Transparency in Photoshop

Blend If sliders control transparency based on brightness levels, making complex selections unnecessary. Understanding how these two simple sliders work with RGB channels opens up precise compositing possibilities that would otherwise require multiple masks and selections. The technique works by targeting specific brightness ranges from 0 to 255, allowing you...

How to Create a Double Exposure Effect in Photoshop Using Screen Blend Mode

Double exposure effects transform ordinary portraits into striking artistic compositions by blending two images seamlessly. This technique works best with high-contrast images—silhouettes against bright backgrounds paired with nature scenes or textures. The key to successful double exposures lies in the contrast between light and dark areas. When you combine...

You’ve successfully subscribed to Photoshop Roadmap
Welcome back! You’ve successfully signed in.
Great! You’ve successfully signed up.
Success! Your email is updated.
Your link has expired
Success! Check your email for magic link to sign-in.