Most users cycle through blend modes randomly or avoid the curves panel entirely, missing out on precise control over their edits. These fundamental tools become intuitive once you understand the logic behind their organization and function.
This tutorial breaks down four essential concepts that separate casual users from confident editors: the six blend mode groups, how curves translate brightness, what RGB channels reveal about your images, and when to use fill versus opacity.
Watch the Video
Video by Adobe. Any links or downloads mentioned by the creator are available only on YouTube
Practical Tips
Apply these core concepts to work more efficiently with layers and adjustments:
- Remember blend mode groups: darken modes hide whites, lighten modes hide blacks, and contrast modes turn 50% gray into your blend color
- Use curves by thinking vertically—drag points up to brighten those tones, drag down to darken them
- Check individual RGB channels to see color distribution and make precise selections based on actual color data
- Lower fill to hide layer content while keeping drop shadows and glows visible, lower opacity to hide everything equally
- Try comparative blend modes when stacking similar photos to instantly spot differences and alignment issues
Related Articles and Tutorials
Explore these guides to deepen your understanding of these fundamental concepts:
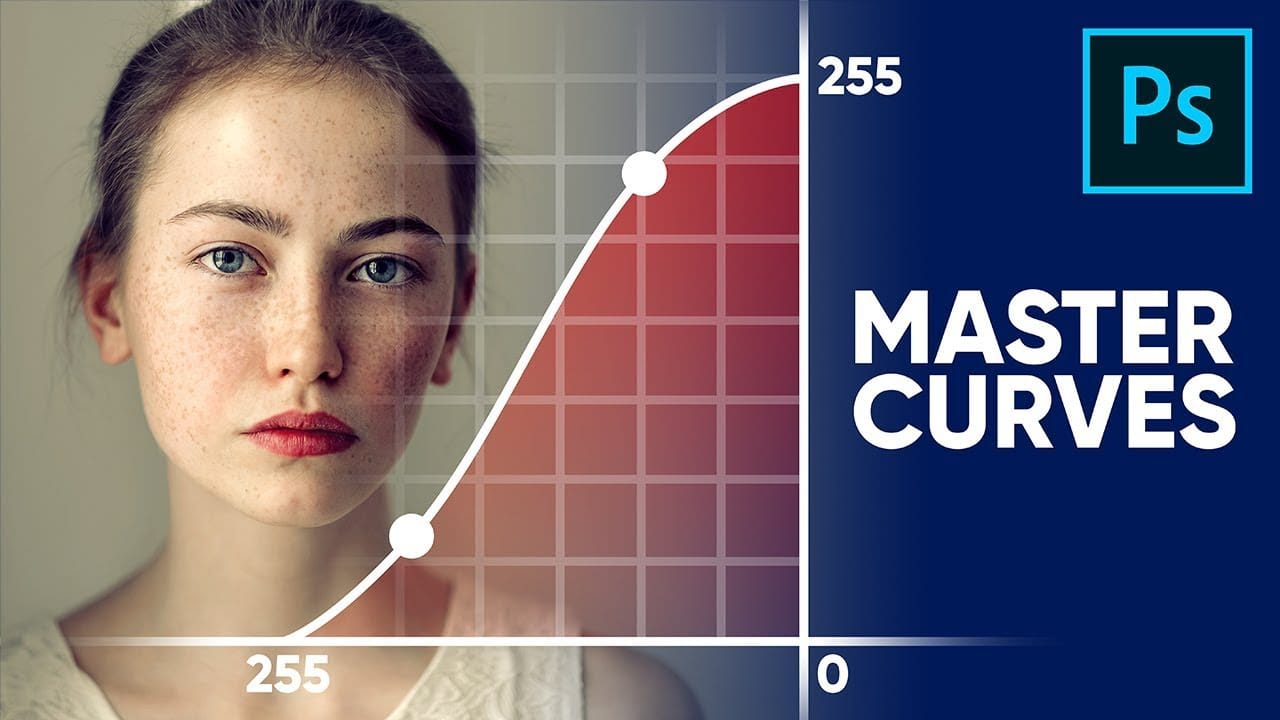
Master Curves from Start to Finish in Photoshop
This insightful tutorial from PiXimperfect provides a comprehensive guide to mastering the powerful Curves tool in Photoshop. They guarantee that after watching this video, viewers will become true masters of the Curves function.
The tutorial delves into the fundamental concepts behind Curves and explores the limitless applications of this versatile tool. Whether it's stylizing images or matching colors, the author demonstrates how Curves can be a game-changer in the world of digital imaging.
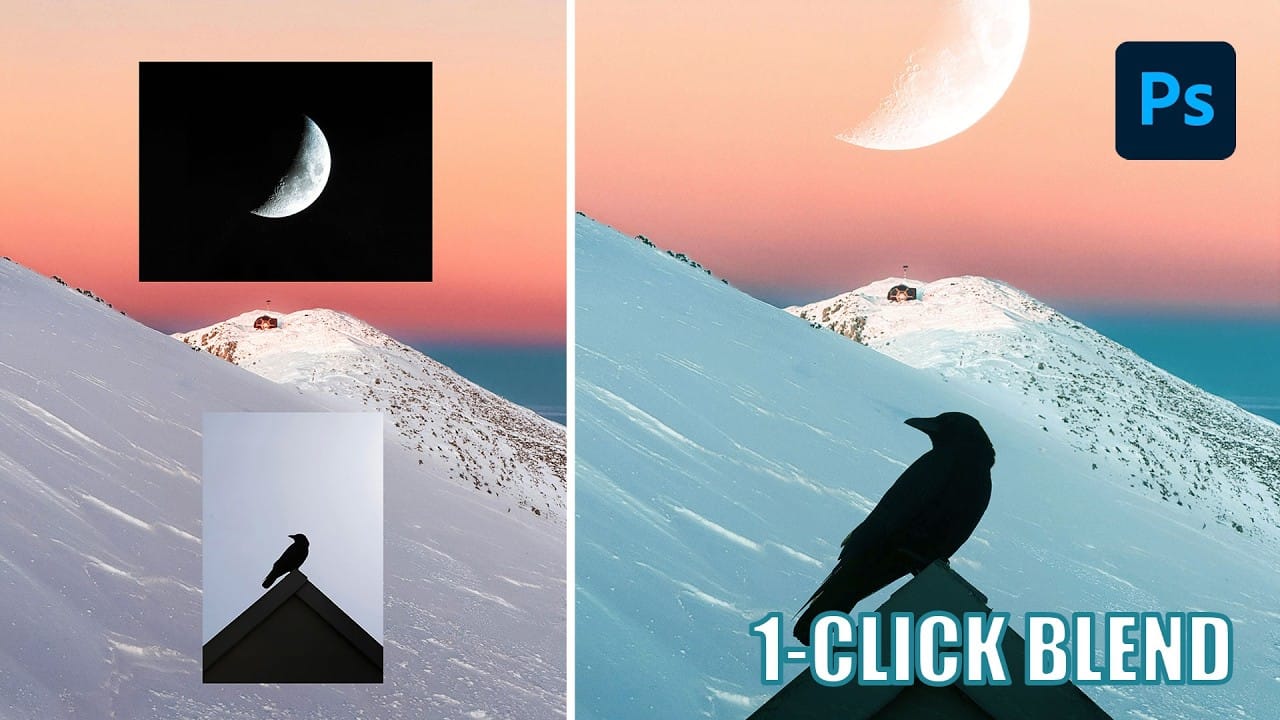
Understanding Photoshop Blending Modes: A Complete Guide to Layer Blending
Blending modes transform how layers interact in Photoshop, letting you seamlessly combine images without complex masking. This technique reveals only light areas, dark areas, or specific colors from each layer.
Master these essential blending groups to create professional composites and artistic effects with just a few clicks.
Watch the Tutorial
Essential Blending Mode Tips
* Use Screen or Lighten modes to make dark backgrounds disappear while keeping bright elements visible
* Apply Mult
The Science of All 27 Blend Modes in Photoshop
Blend modes are a core feature in Photoshop, essential for manipulating how layers interact and visually combine. They unlock a vast range of creative possibilities, from subtle image enhancements to dramatic composite effects. Understanding each mode allows for precise control over your image adjustments and creative vision.
This comprehensive guide demystifies all 27 main blend modes, detailing their unique properties and practical applications. It serves as an invaluable reference, helping y

Photoshop for Beginners: 30-Minute Masterclass
This fast-track course offers everything you need to start using Photoshop in just a few minutes. Designed specifically for beginners, it guides you through essential concepts and tools, enabling you to build a solid foundation in the software.
You will learn the basics of Photoshop, making it easy to grasp even if you have no prior experience. The tutorial covers key features and techniques, helping you gain confidence as you explore the program. Whether you're looking to refine your skills or

Free Photoshop Course: Advanced Photoshop Compositing Techniques
This advanced Photoshop tutorial by Dansky from EnvatoTuts offers an excellent opportunity to enhance your skills. You will learn a variety of techniques that focus on combining creative assets effectively.
The tutorial guides you through the intricacies of photo manipulation, allowing you to transform ordinary images into extraordinary visuals. You will explore different methods for achieving eye-catching visual effects that are crucial in creating professional artwork.
By following along wit

21 Photoshop Tips – From Basic to Advanced!
Photoshop's extensive toolkit means there's always something new to learn or a more efficient way to approach a task, whether you are just starting or have years of experience. Mastering its nuances can significantly enhance both your creative output and workflow efficiency.
This video offers a comprehensive collection of 21 tips, guiding viewers from foundational techniques to more sophisticated methods for image manipulation, compositing, and graphic design. Each tip is designed to provide pr

10 little-known Photoshop features you should really learn
Photoshop's true power isn't just in its headline features—it's in the hidden gems that can transform your workflow overnight. While everyone knows about layers and the healing brush, these lesser-known capabilities can save you hours and open up creative possibilities you never knew existed.
If you're a seasoned professional or an ambitious beginner, these 10 features will give you that unfair advantage that separates efficient creators from those still clicking through endless menus.
1. Ble