Most black and white conversions fall flat because they rely on simple global adjustments that treat the entire image uniformly. Professional-level dramatic black and white photos require selective contrast adjustments that target specific areas like skies, foregrounds, and tonal ranges independently.
This approach transforms ordinary monochrome images into compelling, high-contrast photographs with depth and visual impact.
Watch the Full Tutorial
Video by Brendan Williams. Any links or downloads mentioned by the creator are available only on YouTube
Essential Tips for Advanced Black and White Editing
- Start with smart objects – Convert your layer to a smart object before applying Camera Raw filters to maintain non-destructive editing capabilities
- Use luminance range masking for precision – Target specific tonal ranges by sampling shadows, midtones, or highlights, then intersect with brushes or gradients for selective control
- Layer your adjustments strategically – Edit sky, foreground, and reflection areas separately to build depth rather than applying uniform contrast across the entire image
- Apply low-flow brush techniques – Use 20-30% flow when dodging and burning to build up contrast gradually and avoid harsh transitions
- Intersect masks for complex selections – Combine radial gradients with luminance ranges to target specific areas like water reflections while excluding unwanted objects
More Black and White Photography Tutorials
Explore additional techniques for working with monochrome and color manipulation in Photoshop.
Best Way to Colorize Black and White Photos in Photoshop
This video demonstrates a precise method for colorizing black and white photographs using Adobe Photoshop. It focuses on a non-destructive workflow that preserves image quality while adding realistic color.
Viewers will discover how to transform monochrome images into vibrant, full-color renditions, enhancing details and bringing new life to vintage or historical photographs with careful selection and color application techniques.
Watch the Full Tutorial
The Art and Precision of Digital Col
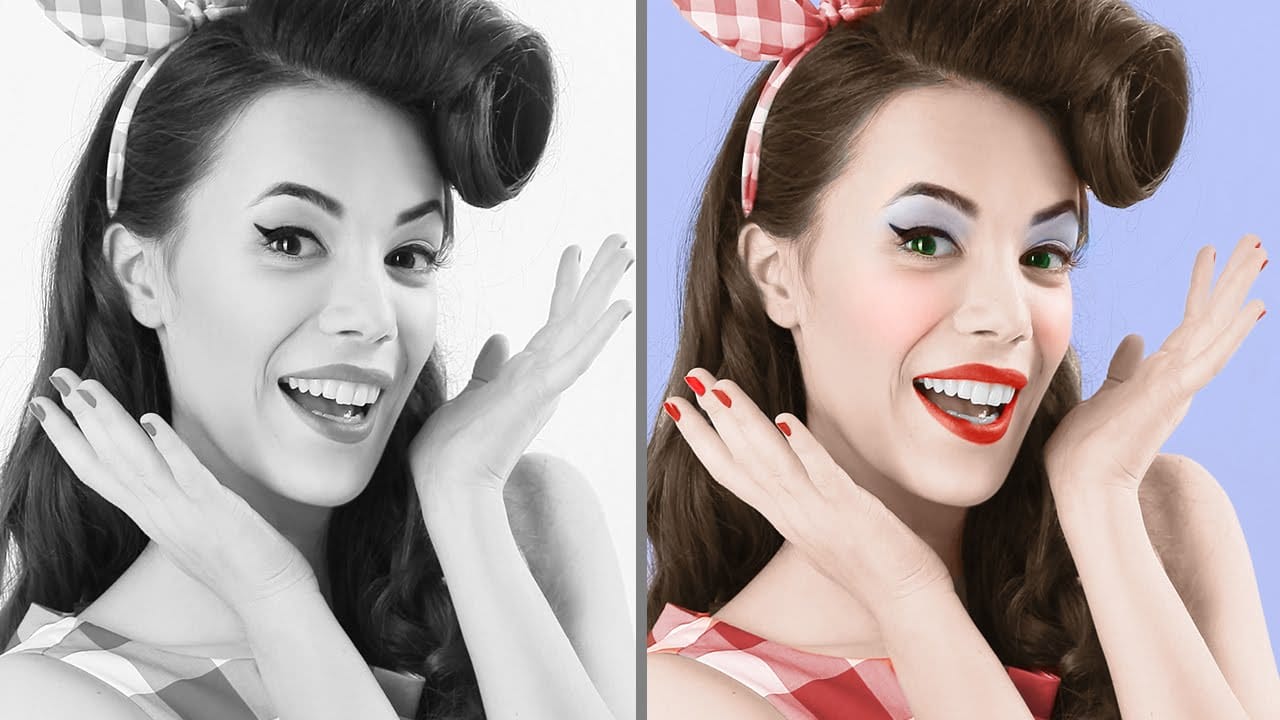
How to Change Black and White to Any Color in Photoshop
Standard color adjustment tools fail when you try to change pure black or white elements in your photos. These neutral tones lack the hue and saturation data that typical color replacement methods require.
This technique uses Hue/Saturation adjustment layers with strategic lightness modifications to transform both black and white areas into any color you need.
Watch the Tutorial
Essential Tips for Changing Black and White Colors
* Use the Object Selection tool with rectangle mode for fast

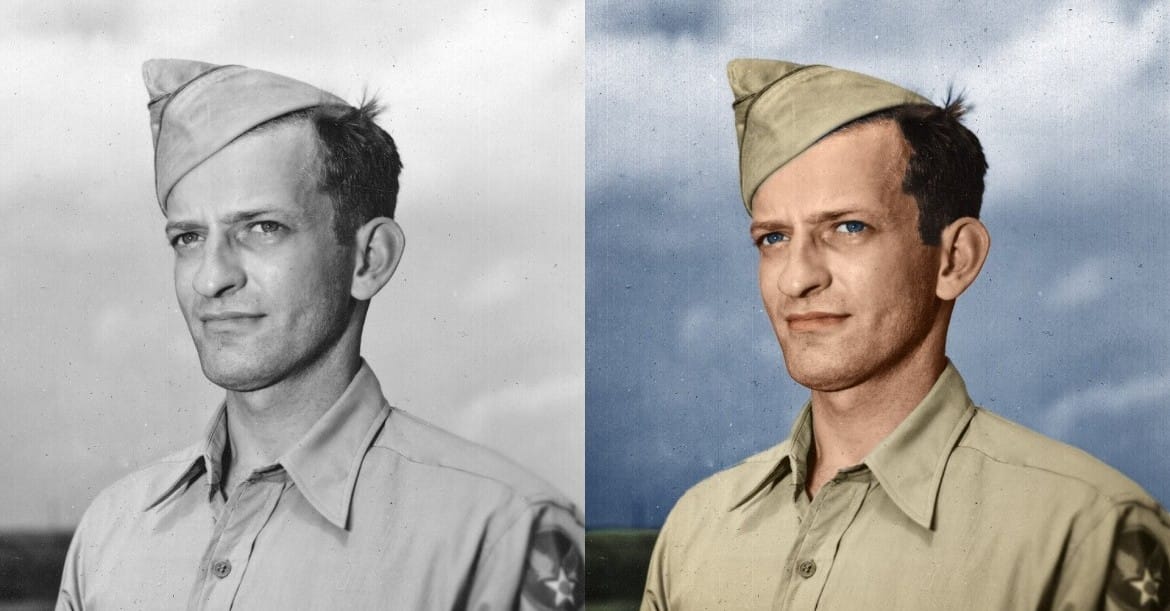
How to Colorize a Old Black and White Photo in Photoshop
Bringing vintage photos into life in Photoshop is fun, especially if it involves old family pictures and portraits. Your first attempts probably were a mess. Don't worry, it's not that simple without the proper knowledge, but it isn't a complex task either. In fact, after watching this video tutorial chances are that you'll become a serial colorizer.
John Shaver from Photoshop Video Academy, explains in this detailed tutorial how to colorize photos using a 100% non-desctrucive technique, wich w
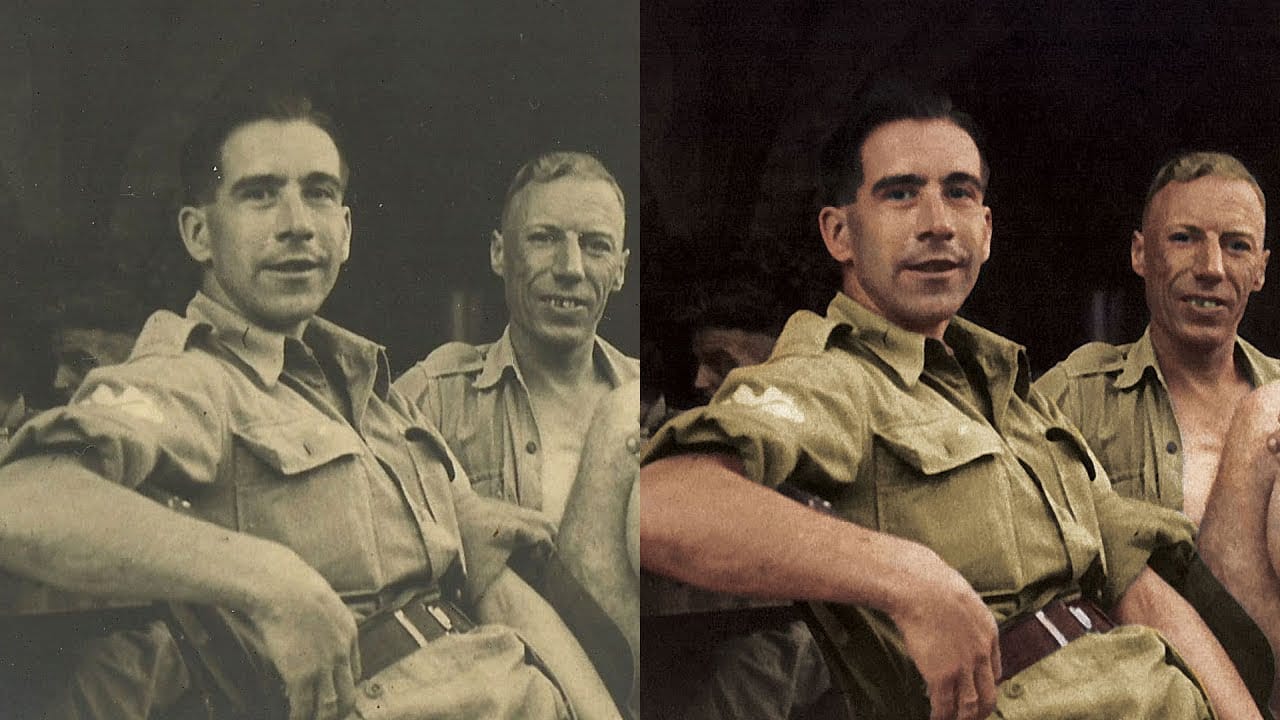
How To Colorize a Black and White Photo in Photoshop
In this tutorial, Chris Spooner from Spoon Graphics shares his process for colorizing a black and white photograph. The author worked on a photo of his Grandad during World War II, which had the characteristic sepia tone of a snapshot from the 1940s. After scanning and processing the image in Photoshop, the author was able to bring the photograph to life in full color and with improved contrast. This transformation allows the viewer to better imagine the scene as it would have appeared in realit