Colorful Graffiti Text Effect in Photoshop

Colorful Graffiti Text Effect in Photoshop

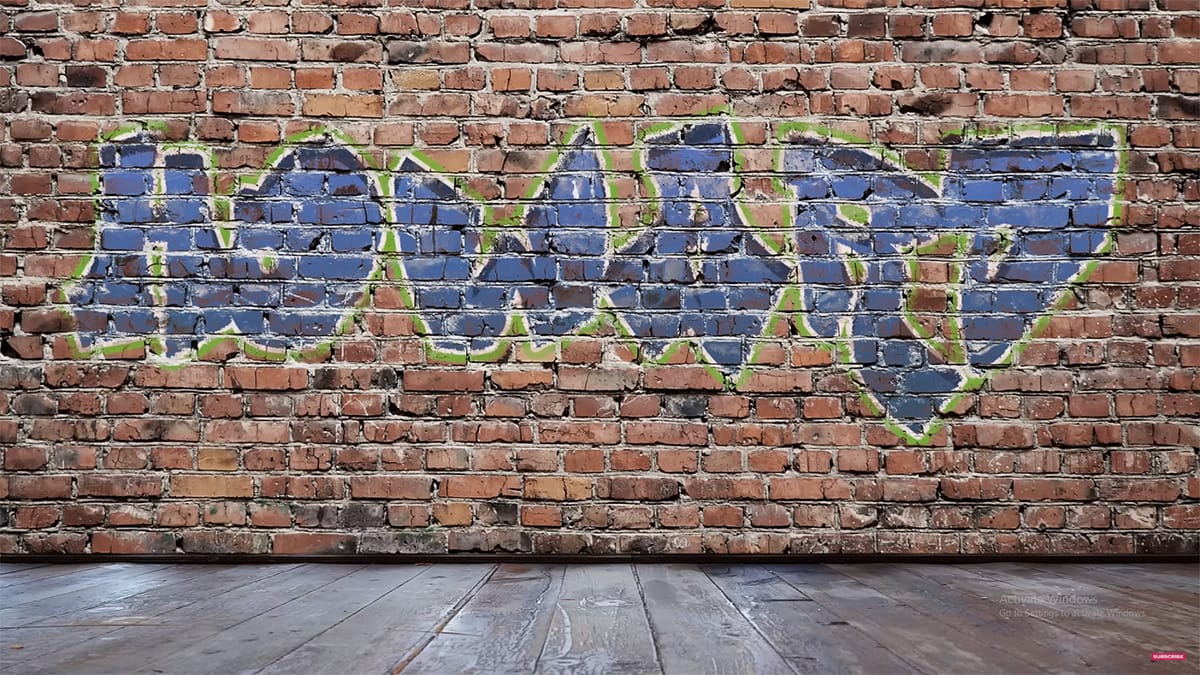
Graffiti art, a vibrant urban expression, transforms ordinary text into dynamic statements with bold lines and unique textures. This tutorial teaches you to create an editable graffiti text effect in Photoshop, adding style, depth, and texture for an authentic, street-inspired design.

Watch the Video

Video by PhoTuts. Any links or downloads mentioned by the creator are available only on YouTube

Mastering Layer Styles for Dynamic Text Effects

Creating a compelling graffiti text effect in Photoshop primarily involves the strategic use and layering of non-destructive layer styles. These styles enable designers to apply complex visual attributes like shadows, gradients, and bevels directly to text layers without altering original pixels.

Stacking and adjusting multiple instances of styles, such as inner shadow or color overlay, offers granular control over depth, lighting, and color, which is crucial for achieving graffiti's distinct multi-dimensional look.

Additionally, converting the text to a smart object preserves all effects as editable, allowing for easy content modifications while retaining intricate styling.

Important concepts include:

  • Layering multiple instances of blending options.
  • Utilizing Smart Objects for non-destructive editing.
  • The interplay of gradients and color overlays for vibrant effects.
  • Creating depth with bevel and emboss and drop shadow.
  • Employing extrude techniques for dimensional text.

Practical Tips for Crafting Graffiti Text

  • Start with a new document at `3500x2500` pixels and `300` resolution for high-quality output.
  • Choose a bold, graffiti-style font like Dumb Nerd and increase its size significantly (e.g., `1020 pixels`) for impact.
  • Use the `Create Warp Text` tool with an `Arc` style (e.g., `Bend +25%`, `Vertical Distortion -16%`) to add a dynamic curve to your text.
  • Convert your text layer to a Smart Object early in the process to maintain editability while applying numerous layer styles.
  • Experiment with multiple inner shadows and gradient overlays within the blending options to achieve complex lighting and vibrant color transitions.

Explore more creative approaches to text design, from grungy styles to painted dimensions, to further enhance your Photoshop skills.

Grungy Ink Bleed Text Effect Tutorial in Photoshop
Street art and underground design capture attention through their raw, imperfect textures that feel authentic and rebellious. The ink bleed effect transforms clean typography into something that appears weathered and organic, as if ink has spread naturally on wet paper. This technique combines blur effects with texture overlays to create text that looks genuinely distressed and handcrafted, perfect for urban-themed designs, band merchandise, or any project needing gritty character. Watch the
Colorful Painted 3D Text Effect Tutorial in Photoshop
In this tutorial by Angelo Konofaos, you'll explore how to create a 3D-style text effect in Photoshop, alongside techniques like adding shadows, highlights, shines, and colors. Utilizing a variety of Photoshop tools such as the Mixer Brush, Pen Tool, clipping masks, and adjustment layers, the tutorial demonstrates the process of refining text to achieve a polished and dimensional look. For optimal results, Konofaos recommends using a pen tablet like the Wacom Intuos to enhance precision and fl
Create a Fire and Rust Text Effect in Photoshop
If you're looking to add some fiery flair to your text, this tutorial has you covered. The team at TutsPlus walks you through the process of creating a striking fire and rust text effect in Photoshop. First, you'll learn how to style and texture a rusty, weathered look for your text. This involves using various tools and techniques to achieve an authentic, gritty appearance. Once the base is set, the tutorial then demonstrates how to incorporate flames using the Flame filter, as well as other s
Create a Colorful Graffiti on a Grungy Brick Wall in Photoshop
Graffiti text in Photoshop has been a popular request over the years. In this tutorial, Howard Pinsky demonstrates how to create vibrant graffiti on a grungy brick wall using Layer Styles, a displacement map, and Layer blending modes. This tutorial is designed to show just how simple it is to achieve a striking graffiti effect, making it accessible even for beginners. Follow along to bring your graffiti art to life with vivid colors and realistic textures. Watch tutorial

Get tutorials & freebies delivered to you.

Subscribe to the Photoshop Roadmap newsletter, a weekly roundup of new tutorials, insights and quality downloads, trusted by 6500+ readers.

You might also like

Professional Portrait Retouching with the B.S.T. Method in Photoshop

Professional portrait retouching requires artistic choices that automated tools can't make. The B.S.T. method breaks retouching into three focused steps: removing blemishes with precision, smoothing skin while preserving natural texture, and equalizing skin tones throughout the image. This systematic approach gives you complete control over every...

Create Motion Blur Light Effects in Photoshop

Transform ordinary portraits into dynamic, cinematic images by combining path blur effects with creative background textures. This technique creates the illusion of camera movement while maintaining focus on key elements like the subject's eyes, resulting in professional-looking motion blur effects that add energy and visual interest to static...

How to Paint Realistic Jewelry on Portraits in Photoshop

Adding painted jewelry to portraits transforms ordinary photos into fantasy portraits with ornate accessories that never existed. This digital painting technique uses careful layering, proper lighting, and realistic shadows to create convincing rings, earrings, and decorative headpieces. The method combines basic brush work with advanced blending techniques to build up...

How to Sharpen Images Using the High Pass Filter in Photoshop

The High Pass filter method remains one of the most versatile sharpening techniques in Photoshop, offering precise control over which image areas receive enhancement. This non-destructive approach works by identifying edge details and allowing you to selectively apply sharpening exactly where it's needed most. Unlike automated sharpening tools,...

How to Find Missing Actions in the New Photoshop Actions Panel

The redesigned Actions panel in Photoshop can catch users off guard when their custom actions seem to disappear. With the new tabbed interface, your previously created actions are still there—they're just located in a different tab than before. Understanding the new layout will help you quickly access...

Fast Portrait Retouching: Remove Stray Hairs, Clothing Wrinkles, and Fix Backgrounds

Every portrait photographer knows the feeling: you've captured a beautiful shot, but stray hairs, wrinkled clothing, and messy backgrounds turn editing into hours of tedious work. These common retouching challenges can drain your time and energy, especially when dealing with high-volume projects or tight deadlines. This tutorial demonstrates...

You’ve successfully subscribed to Photoshop Roadmap
Welcome back! You’ve successfully signed in.
Great! You’ve successfully signed up.
Success! Your email is updated.
Your link has expired
Success! Check your email for magic link to sign-in.