Need a reusable book-cover mockup in Photoshop? Smart Objects let you swap in new cover and spine designs while keeping them warped to match the book photo.
Follow the video to build the mockup, adjust its perspective, and update it for another project.
Video by Graphic Design How To. Any links or downloads mentioned by the creator are available only on YouTube.
Practical Tips & Workflow Insights
Build a reusable book mockup with these key adjustments for cleaner alignment, convincing lighting, and easy artwork changes.
- Make the cover and spine separate Smart Objects: Draw each shape over the matching area of the photograph, then convert its layer to a Smart Object. Keeping the cover and spine separate lets you replace each design independently.
- Match the photograph’s perspective and edges: Use
Cmd/Ctrl+Tto rotate and distort each shape, then choose Edit > Transform > Warp to follow curved edges. Check all four corners and allow a slight overhang so the original cover color doesn’t show through. - Replace artwork inside the Smart Object: Double-click its layer thumbnail, fit the new design to the edges of the
.psbdocument, then save and close it to update the mockup. For a more realistic spine, add a Hue/Saturation adjustment layer, darken it, and clip it to the spine layer.
Related Articles and Tutorials
Here are some related articles and tutorials from Photoshop Roadmap that you may find useful.
Basic Photoshop techniques you really need to learn
Photoshop hasn’t changed as much as it looks. New features come and go, but the same core techniques keep showing up in real work. If you skip them, everything feels harder than it should. This post focuses on those basics, not as isolated tricks, but as skills you’ll keep using no matter what you create.
You don’t need dozens of tutorials. You need a small set of techniques you actually understand and can reuse.
Non-destructive editing fundamentals
Most beginner frustration comes from editi
10 little-known Photoshop features you should really learn
Photoshop's true power isn't just in its headline features—it's in the hidden gems that can transform your workflow overnight. While everyone knows about layers and the healing brush, these lesser-known capabilities can save you hours and open up creative possibilities you never knew existed.
If you're a seasoned professional or an ambitious beginner, these 10 features will give you that unfair advantage that separates efficient creators from those still clicking through endless menus.
1. Ble

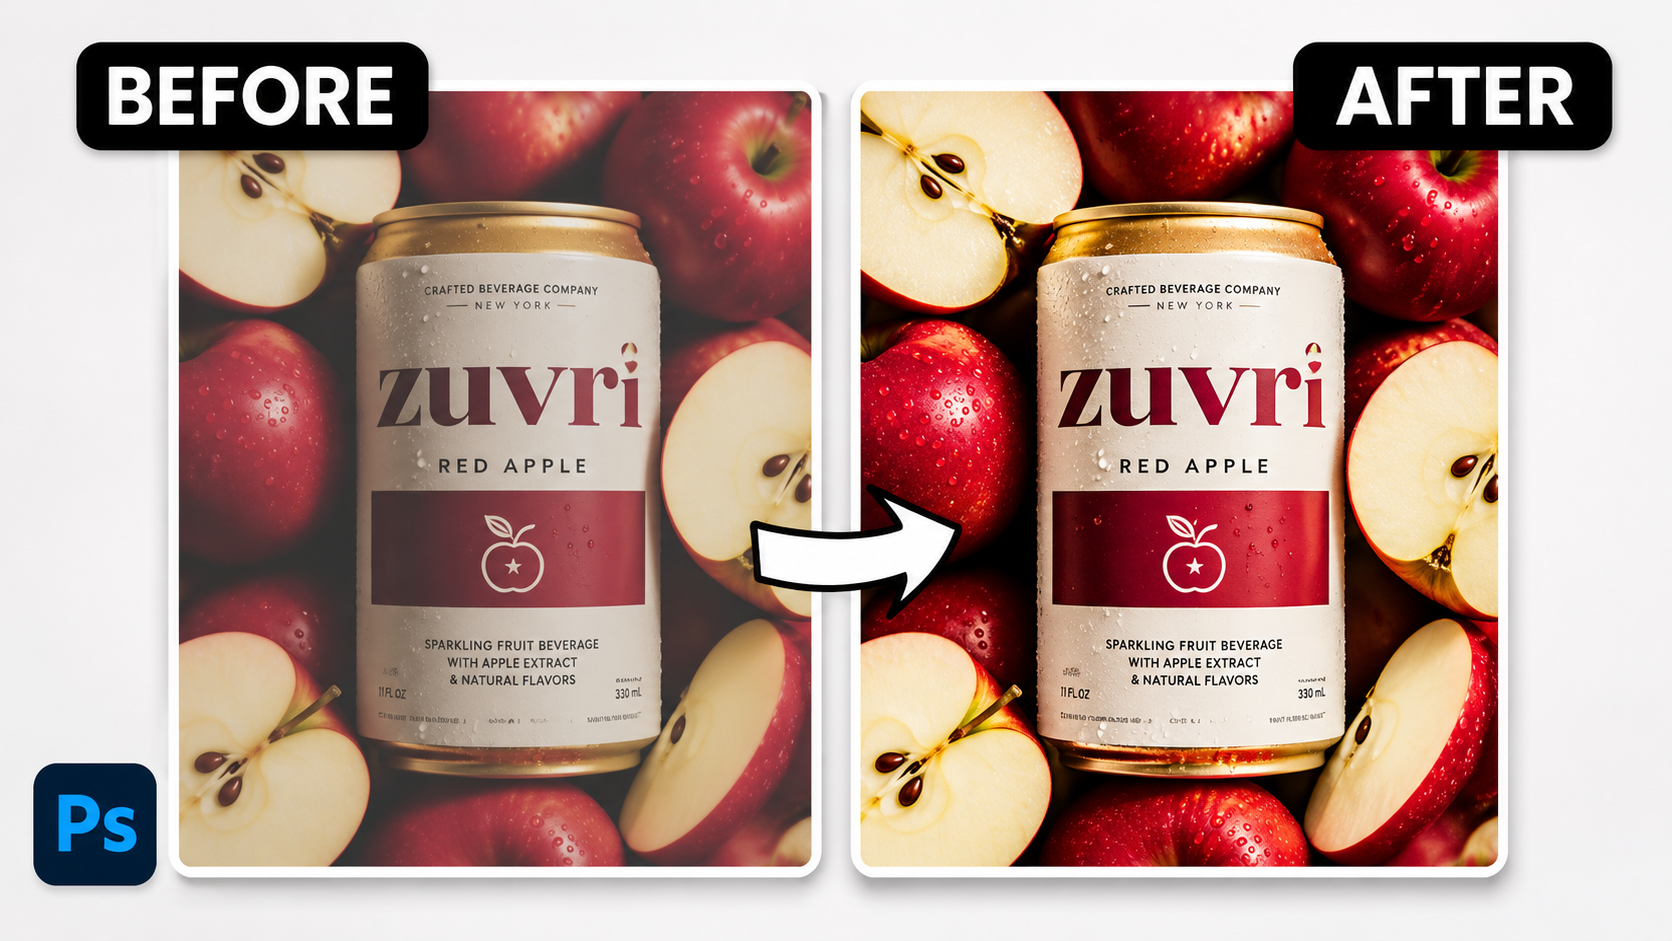
Use Photoshop’s Light Adjustment Layer to Add Depth to Packaging Designs
Guide attention to your product with selective lighting and editable tonal adjustments. Keep the original artwork untouched while refining exposure, contrast, shadows, and highlights.
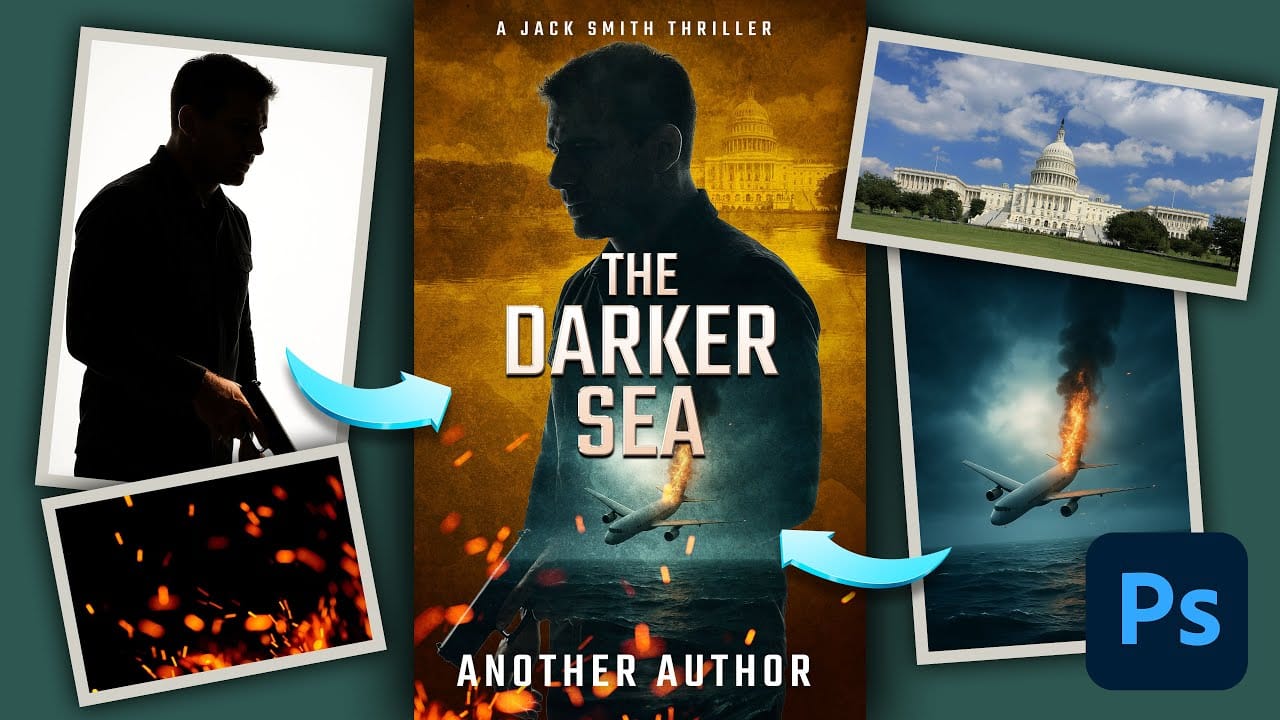
How to Create a Professional Thriller Book Cover in Photoshop
Effective book cover design combines visual storytelling with technical precision to capture a reader's attention in seconds. Thriller covers rely on atmospheric elements, dramatic lighting, and compelling typography to convey suspense and intrigue.
This tutorial demonstrates the complete process of recreating a professional thriller book cover using fundamental Photoshop techniques. You'll see real-time problem-solving as various tools and methods are explored to achieve the desired atmospheri