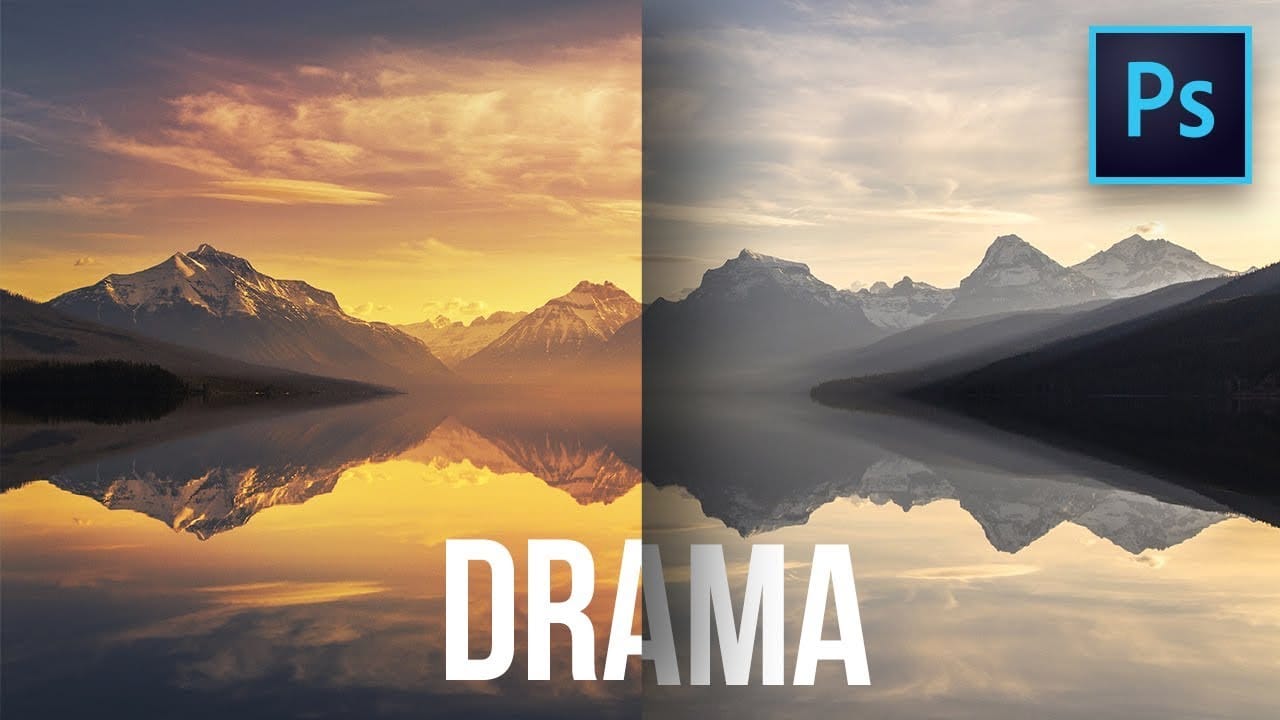
Sunrays streaming through windows create some of photography's most captivating moments. Natural sunbeams add drama, warmth, and visual interest that can transform an ordinary interior scene into something magical.
This tutorial demonstrates how to recreate those stunning light effects in Photoshop using selection techniques, radial blur, and layer masking. You'll learn to build convincing sunrays that enhance your photos with realistic lighting drama.
Watch the Video Tutorial
Video by Photoshop Arthouse. Any links or downloads mentioned by the creator are available only on YouTube
Practical Tips for Creating Sunrays
- Start with photos that have existing light sources like windows or doorways for the most convincing results
- Use
Color Rangewith Highlights selected to quickly isolate the brightest areas of your image - Apply the
Radial Blurfilter multiple times rather than using extreme settings once for smoother, more natural-looking rays - Set your blur center point carefully in the preview window to match where sunlight would naturally originate
- Use
Screenblend mode for sunray layers to create realistic light interaction with the underlying image
Related Articles and Tutorials
Discover more techniques for enhancing lighting and atmosphere in your photos.
Create a Sunset in Photoshop
This tutorial by Phlearn teaches how to add a warm "sunset style" to your images using Photoshop.
The key is selecting a photo shot later in the day with visible light sources, ideally backlit or side-lit. The process involves using Levels and the Gradient Tool to darken details and add red to shadows, then warming up the highlights. The Gradient Tool centers the effect over the light source.
Additionally, to add a sense of motion, the Radial Blur filter is used, set to "Zoom" to create moveme

Create colorful dramatic skies with a simple blending trick in Photoshop
In this Photoshop tutorial by Unmesh Dinda from PiXimperfect you will learn how to extract amazing details from the sky, bring out the clouds, and add brilliant colors just using the Blend If sliders in Photoshop. Learn how to add drama, mood, and details to your skies by utilizing the power of Blending Options, Blend Modes, and Layers. In this video, we will simply paint the sky with the colors we desire and the details will simply follow.
Whether you want to add the colorful sunset lights or
Add clouds to a sky in Photoshop
In this Photoshop tutorial by Phlearn, you'll learn how to replace the sky in an image, ensuring it complements the original photo in terms of color, contrast, and tone.
Start by using the Move Tool to drag and drop the new sky onto your image, then turn off the layer. Select the old sky using a selection tool like the Magic Wand Tool. Once the selection is refined, turn the new sky layer back on and click the Layer Mask button to mask in just the sky. Unlink the layer from its mask to position

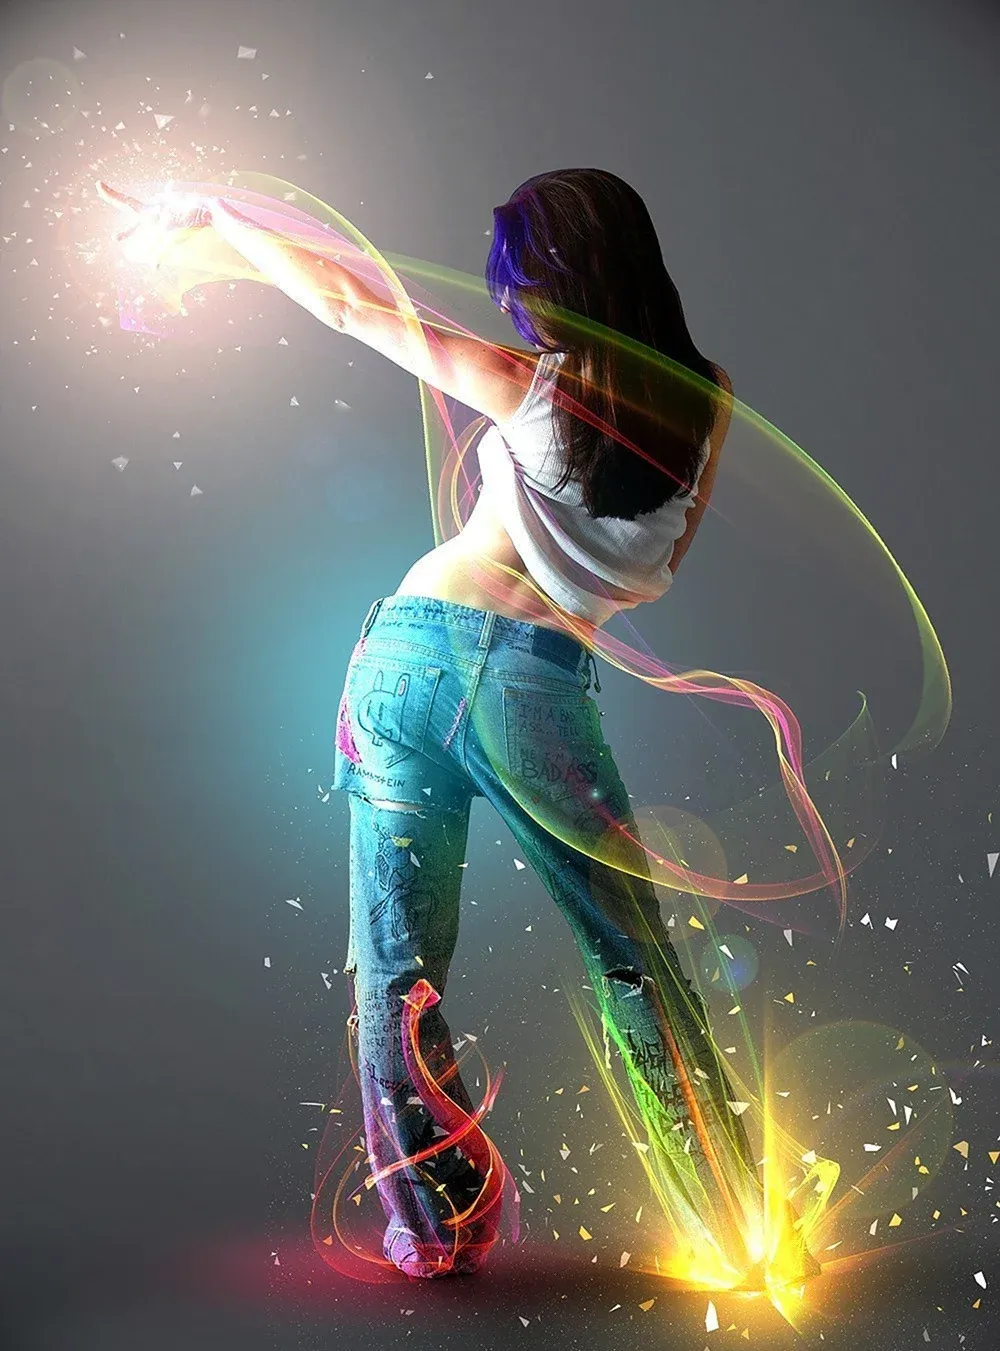
Add Striking Light Effects to Your Photos in Photoshop
In this Photoshop tutorial from PSD Box, using the "Colors in Motion" textures pack and a model image from deviantArt or ISO Stock, you'll create a vibrant digital artwork.
Start by meticulously removing the background with the Pen Tool and placing the model on a new canvas with a gradient backdrop. Enhance the image with non-destructive adjustments for color and contrast, adding realistic shadows for depth. Integrate various light effects from the packs, adjusting blending modes and using tool