How to Quickly Create a Monochrome Double-Exposure Photo Portrait in Photoshop

How to Quickly Create a Monochrome Double-Exposure Photo Portrait in Photoshop

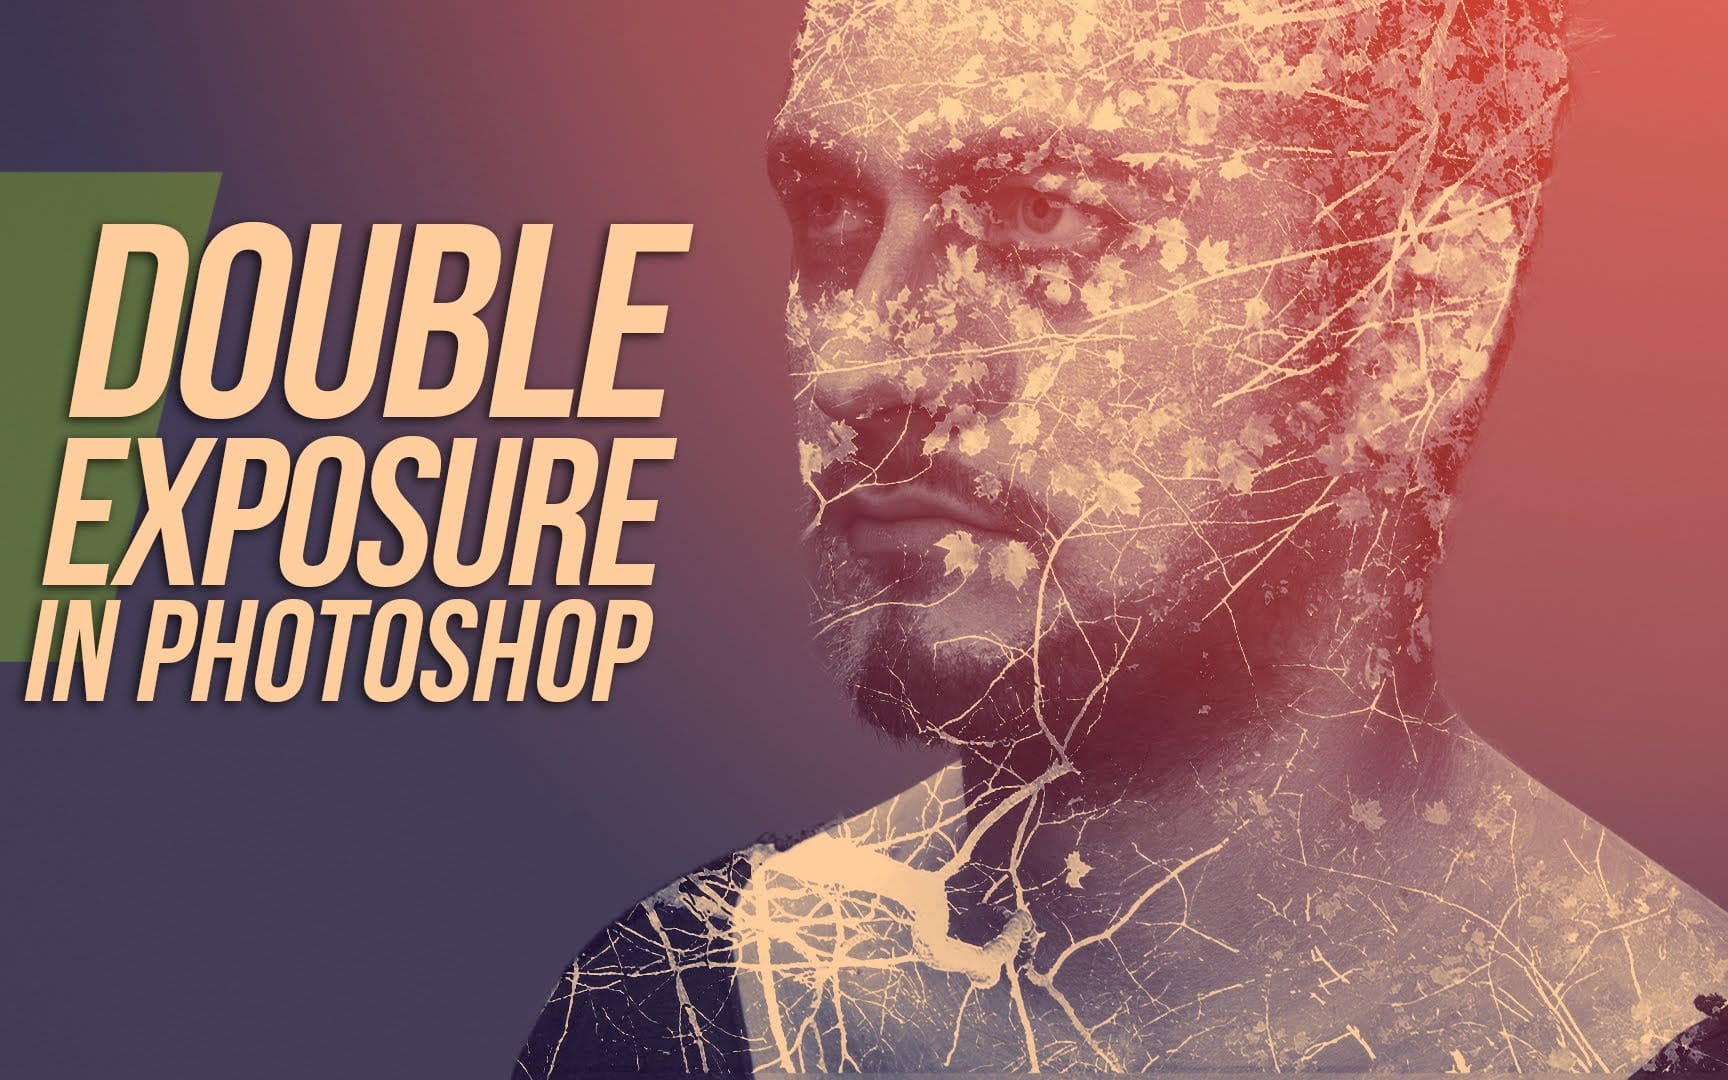
The double exposure effect, a classic technique originating from film photography, allows for the striking fusion of two distinct images into a single, cohesive composition. This method is particularly effective for creating surreal and evocative portraits, blending a subject with landscapes, textures, or abstract elements to convey deeper meaning or artistic vision.

This video tutorial provides a practical guide to achieving a powerful monochrome double-exposure photo portrait using Adobe Photoshop. You will learn essential techniques for subject isolation, image blending, and applying high-contrast black and white effects to create visually compelling results.

Watch the Tutorial

Video by Blue Lightning. Any links or downloads mentioned by the creator are available only on YouTube

Exploring the Monochrome Double Exposure

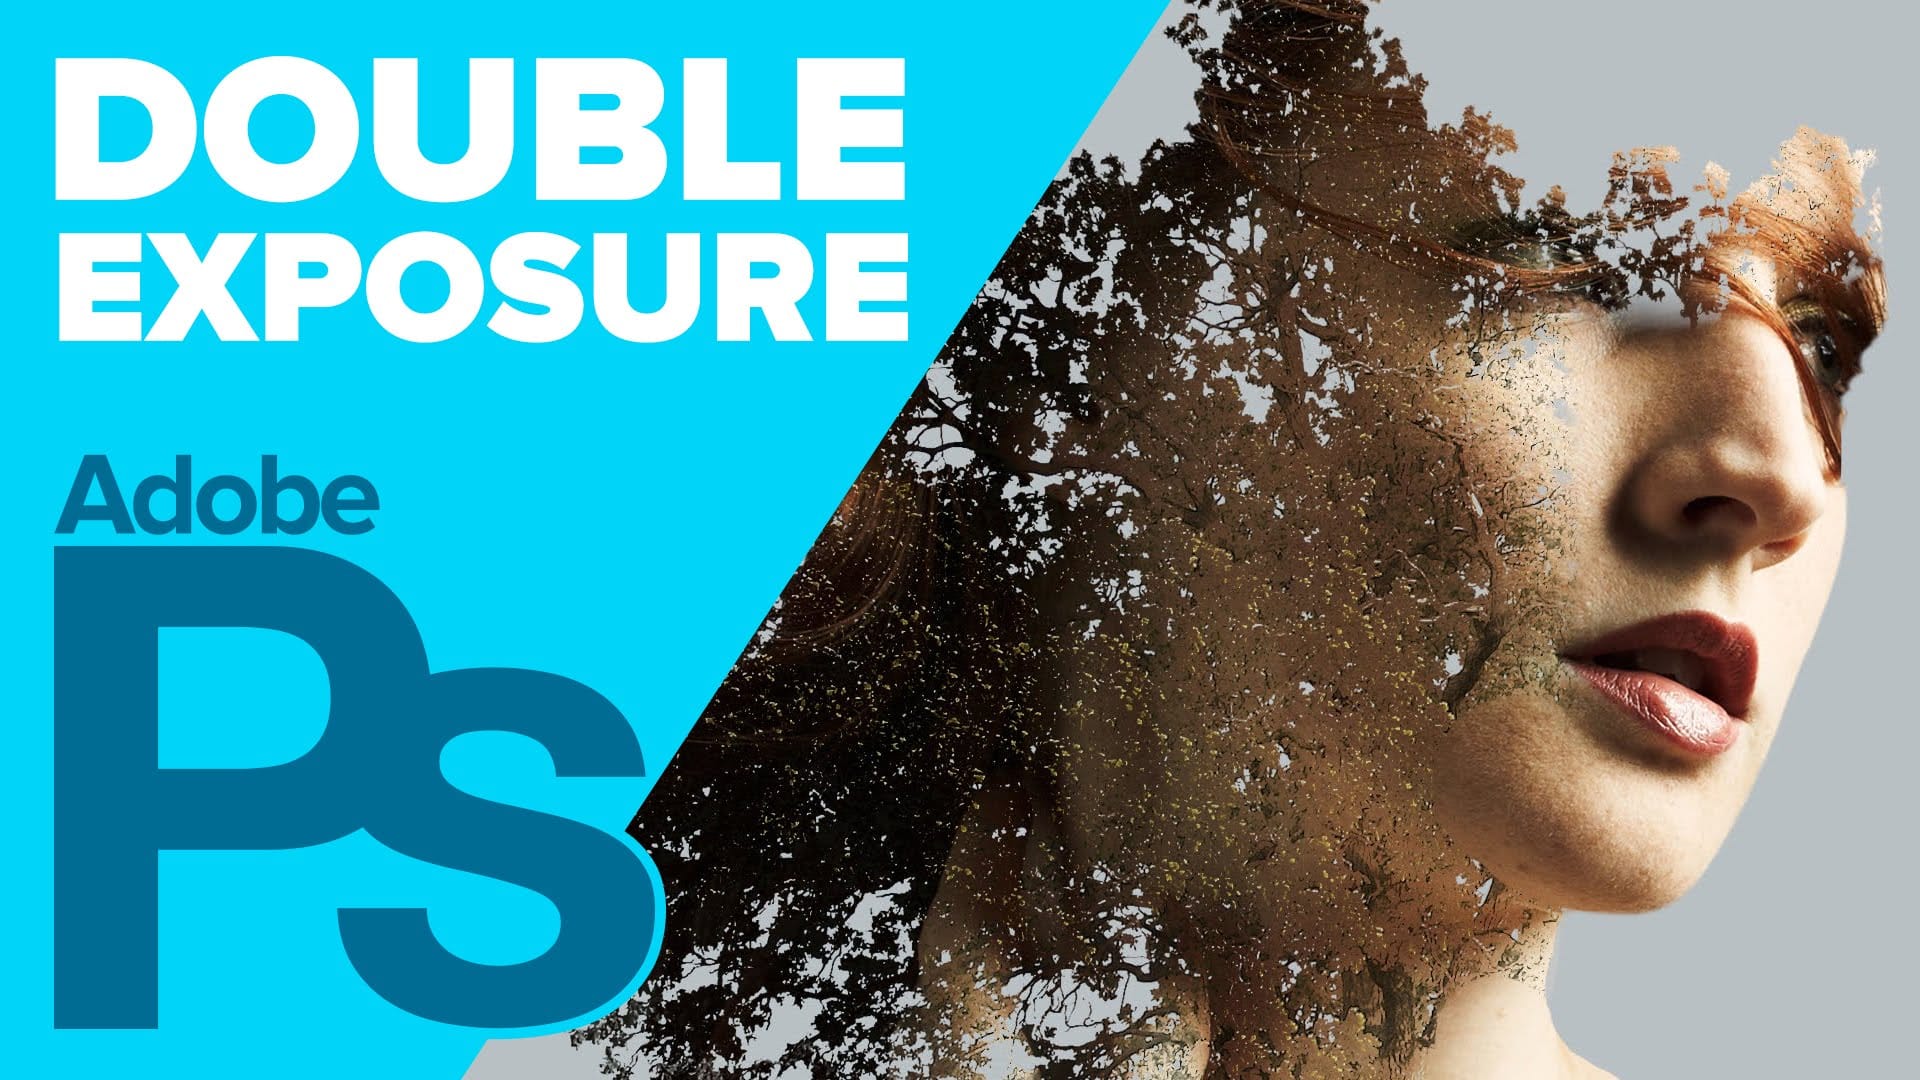
Double exposure, at its core, involves layering two or more images on top of each other to create a single, unified visual. Historically, this was achieved by exposing the same frame of film multiple times. In digital image editing, this effect is simulated by blending layers in software like Photoshop, offering artists precise control over opacity, blend modes, and adjustments that were not possible with traditional methods.

Choosing a monochrome palette for double exposure significantly alters the aesthetic and emotional impact. By removing color, the focus shifts entirely to form, texture, light, and shadow, enhancing the interplay between the two superimposed images. This can lend a timeless, dramatic, or introspective quality to the portrait, emphasizing the connection between the subject and the overlaid element without the distraction of color.

The success of a double exposure often hinges on thoughtful image selection. For portraits, it is common to pair a clear subject with an abstract element, a landscape, or another figure. The monochrome treatment helps to unify disparate elements, allowing for a seamless integration that highlights the artistic narrative.

Practical Tips for Double-Exposure Portraits

  • Quickly isolate your subject by using Photoshop's Quick Selection Tool and the Select Subject button.
  • Utilize a layer mask to non-destructively separate the subject from its background, allowing for flexible adjustments.
  • Apply a high-contrast black and white adjustment layer, such as "High Contrast Blue Filter," to create a strong monochrome effect.
  • Set the blend mode of your second photo layer to Screen to effectively overlay it onto your subject while maintaining highlights.
  • Employ the Brush Tool with a layer mask on the overlaid image to selectively reveal or conceal parts of your subject or the second image.

More Tutorials about Double Exposure Effects

Explore additional resources and tutorials to further enhance your skills in creating captivating double exposure effects in Photoshop.

Create a double exposure effect in Photoshop
In this Photoshop tutorial, you'll learn how to create a double exposure effect. The process is quite straightforward and can be applied to various images. The best part is that you can be as creative as you want. The tutorial will guide you through the necessary steps to achieve this unique visual effect. You'll discover how to blend two images seamlessly, allowing you to experiment with different combinations and explore your artistic vision. Whether you're a beginner or an experienced Photos
How to Create a Double Exposure in Adobe Photoshop
Howard Pinsky from IceFlowStudios shares a Photoshop tutorial on creating a double exposure effect. The author guides users through the process, which involves working with two images, using selection tools, layer masks, and Adjustment Layers. The tutorial walks the reader step-by-step through the techniques needed to achieve this effect. By following the instructions, users can learn how to seamlessly blend two photographs to create a visually striking double exposure image. Pinsky's clear and
Create a Typographic Portrait in Photoshop
This Photoshop tutorial by Blue Lightning TV takes you through crafting a stunning portrait built entirely from words. Learn to prep your photo, create a text cloud filled with the subject's special words, and position and manipulate the text to perfectly follow the contours of the face. The video guides you through using displacement maps, smart objects, and adjustment layers to achieve a cohesive and personalized final image. It's a creative twist on portraiture, perfect for adding a unique t
Double Exposure Effect Photoshop Tutorial
In this tutorial, learn to create a surreal double exposure effect in Adobe Photoshop, inspired by the authentic technique used by photographers. Traditionally, this involves exposing two photographs onto the same film to blend the images. This digital version guides you through selecting the right photos and blending them seamlessly using Photoshop's powerful tools. The result is a striking and artistic effect that adds depth and creativity to your projects. Perfect for both beginners and seas

Get tutorials & freebies delivered to you.

Subscribe to the Photoshop Roadmap newsletter, a weekly roundup of new tutorials, insights and quality downloads, trusted by 6500+ readers.

You might also like

Basic Photoshop techniques you really need to learn

Photoshop hasn’t changed as much as it looks. New features come and go, but the same core techniques keep showing up in real work. If you skip them, everything feels harder than it should. This post focuses on those basics, not as isolated tricks, but as skills you’ll...

How to Use Select Subject for Background Removal and Edge Refinement

Background removal becomes effortless when you know how to use the right tools. AI-powered selection can instantly isolate subjects from their backgrounds, but the real skill lies in refining those selections to create professional results. This guide covers the complete workflow from initial selection to edge refinement, plus creative techniques...

How to Wrap Text Around Any Shape in Photoshop

Creating text that flows naturally around irregular shapes transforms static layouts into dynamic, professional designs. This technique works particularly well for posters, magazine layouts, and editorial designs where text needs to integrate seamlessly with complex subjects rather than simply sitting in rigid rectangular boxes. The process combines selection tools, path...

How to Edit Text in Images Using Generative Fill

Changing text within existing images has traditionally required complex masking and reconstruction techniques. Modern AI-powered tools now make it possible to seamlessly replace words and phrases in photographs while maintaining realistic typography, lighting, and perspective that matches the original scene. This technique works particularly well for signs, storefronts, billboards, and...

How to Remove Dust and Sensor Spots Using Photoshop Tools

Dust spots and sensor particles are inevitable challenges in digital photography, appearing as dark specks that distract from otherwise clean images. Camera sensors collect dust over time, creating consistent spots that show up across multiple photos, particularly in bright sky areas or uniform backgrounds. Both Lightroom and Photoshop offer specialized...

Photoshop vs Affinity Photo: Feature Comparison and Professional Analysis

When choosing professional photo editing software, the decision often comes down to comparing features, performance, and value. This detailed comparison examines the core capabilities of both applications across noise reduction, smart selections, object removal, masking, and AI-powered tools. The analysis covers real-world scenarios that professionals encounter daily, from complex background...

You’ve successfully subscribed to Photoshop Roadmap
Welcome back! You’ve successfully signed in.
Great! You’ve successfully signed up.
Success! Your email is updated.
Your link has expired
Success! Check your email for magic link to sign-in.