How to Remove Backgrounds from Transparent Objects in Photoshop

How to Remove Backgrounds from Transparent Objects in Photoshop

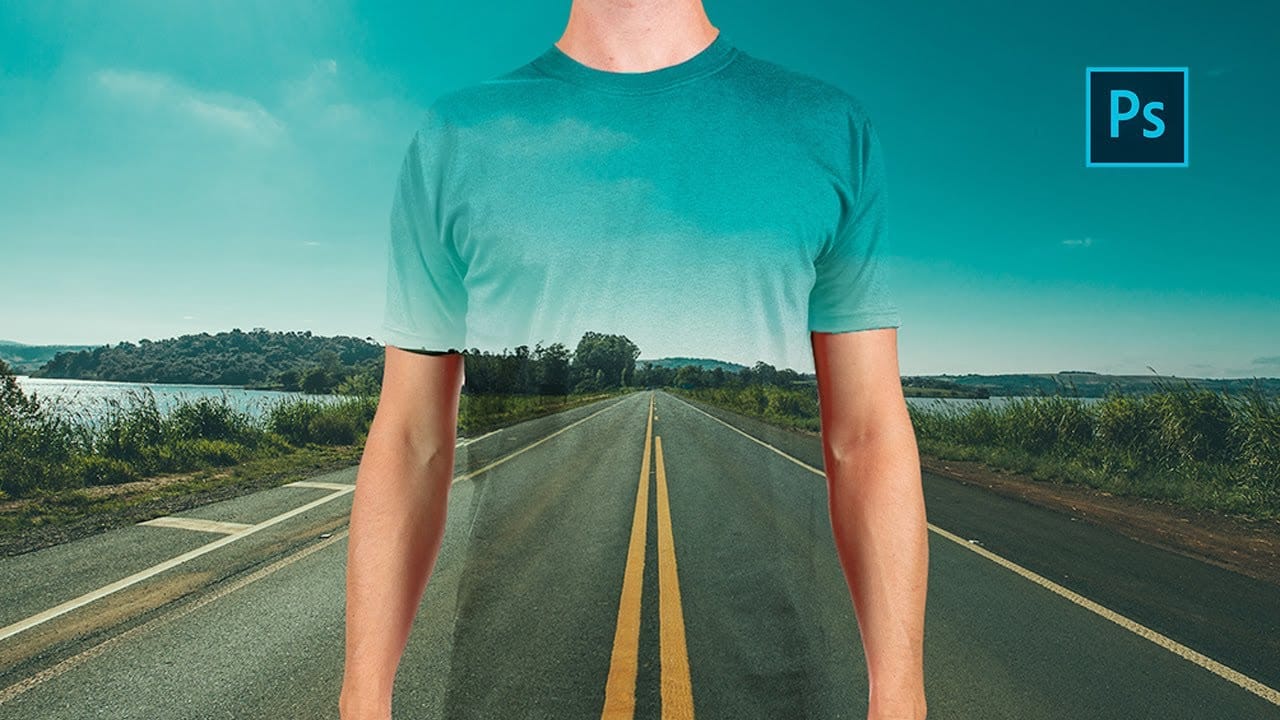
Transparent objects like glass, water, and crystal present unique challenges when removing backgrounds in Photoshop. Standard selection tools often produce unsatisfactory results, either creating overdone transparency or eliminating essential pixels that give these objects their realistic see-through qualities.

This tutorial demonstrates a comprehensive technique for preserving the natural transparency of glass and similar objects while cleanly removing their backgrounds. You'll learn how to combine layer masks, channel selections, and adjustment tools to maintain the authentic look of transparent materials.

Watch the Tutorial

Video by Kepo Art Studio. Any links or downloads mentioned by the creator are available only on YouTube

Understanding Transparency in Digital Images

Transparent objects interact with light in complex ways that challenge traditional masking techniques. Unlike opaque subjects, glass and crystal refract, reflect, and transmit light simultaneously, creating visual effects that standard background removal tools struggle to interpret correctly.

The key lies in understanding that transparency isn't binary—it exists on a spectrum. Different areas of a transparent object may be completely clear, partially visible, or contain reflections that need preservation. This complexity requires a layered approach that combines multiple Photoshop techniques.

Professional retouchers often use channel-based selections combined with luminosity masks to capture the subtle tonal variations that define transparent materials. This method preserves the natural light transmission while maintaining clean edges against new backgrounds.

Practical Tips for Transparent Object Masking

  • Always duplicate your original layer before starting—this preserves the full object information for restoration if needed
  • Use the RGB channel as a selection source by Ctrl/Cmd-clicking it to capture luminosity-based transparency
  • Adjust levels with the shadows slider to control which areas become transparent—darker areas will show more transparency
  • Apply layer masks with 50% gray and paint with low-flow white brushes to gradually reveal transparent areas
  • Export as PNG with transparency enabled to preserve the alpha channel information in your final image

More Tutorials about Transparent Object Selection

Explore additional techniques for working with see-through materials and advanced selection methods.

How to select transparent objects in Photoshop
In this tutorial, PiXimperfect shares two simple techniques to mask transparent or translucent objects in Photoshop. The tutorial explains how to select and cut out see-through objects using the Refine Edge Tool and advanced selection features like Color Range. The author first demonstrates how to use the Refine Edge Tool to refine the selection and create a clean, detailed mask for the transparent object. This method is particularly useful for objects with intricate details or soft edges. Nex
How to use the object selection tool for easy background removal in Photoshop
There are many different ways to cut out images and remove backgrounds in Photoshop, but one of the easiest options is with the object selection tool. This tool allows you to create accurate selections, remove backgrounds, and cut out images with very little effort. It's the perfect tool for both the beginner and advanced photoshop user. In this video, you'll learn everything you need to know about how to use the object selection tool and how you can refine selections in both the rectangle and
Create a transparent clothes effect in Photoshop
In this Photoshop tutorial you will to achieve a camouflage photo effect where we make t shirt look transparent. It's a super simple tutorial, quite easy for beginners to learn some things. We will cut out the background and and than separate t-shirt from body and will change the blending mode to make it mix with background. The real trick is to make t-shirt black and white before making it transparent so we don't have any trouble with miss matching colors. Also we will use displacement map, wh
Add A Transparent Text Area To An Image With Photoshop
In this tutorial, you will discover how to add cutout text on a transparent text area to an image using Photoshop. This technique is particularly useful for images that are too busy, making regular text hard to read. You will start by selecting your image to work with, ensuring it has the right elements for your design. Then, you will create a text box and adjust its transparency. This allows the text to stand out without overwhelming the image. The tutorial guides you step by step, making it

Get tutorials & freebies delivered to you.

Subscribe to the Photoshop Roadmap newsletter, a weekly roundup of new tutorials, insights and quality downloads, trusted by 6500+ readers.

You might also like

How to Expand Photos Beyond Their Edges Using AI Generative Expand in Photoshop

Sometimes your best photos need more breathing room or a different aspect ratio. Generative Expand in Photoshop lets you extend your canvas beyond the original image boundaries, using AI to intelligently fill in missing areas with content that matches your scene. This technique works for changing portrait photos to landscape...

How to Create Digital Scrapbook Carousels in Photoshop

Digital scrapbook pages capture memories beautifully, but a single page limits your storytelling. Creating a carousel format lets you design multiple connected panels that work together as one cohesive piece while giving viewers more content to explore. This technique uses frames, custom shapes, and smart export settings to build templates...

How to Use Auto Align Layers in Photoshop for Perfect Layer Alignment

When working with multiple layers that need perfect alignment, manual positioning often falls short. Slight camera movement, different crops, or rotated images can make precise alignment seem impossible through visual adjustment alone. Auto Align Layers automatically handles rotation, scaling, and positioning to create perfect layer alignment, even when images have...

How to Use Nano Banana Pro in Adobe Firefly for Advanced AI Image Generation

Adobe Firefly now includes Gemini 3 with Nano Banana Pro, offering sharper 2K image generation with improved text clarity and precision blending. This advanced AI model works seamlessly within Firefly's generative workspace, enabling powerful workflows like multi-image composition and virtual try-on effects. The integration provides access to sophisticated...

Create Colorful Retro Text Compositions in Photoshop

Retro design trends continue to captivate audiences with their bold colors and geometric shapes. This tutorial demonstrates how to build a complete vintage-inspired composition using text, geometric elements, and vibrant color schemes that capture the essence of classic graphic design. You'll learn to combine typography with custom shapes,...

You’ve successfully subscribed to Photoshop Roadmap
Welcome back! You’ve successfully signed in.
Great! You’ve successfully signed up.
Success! Your email is updated.
Your link has expired
Success! Check your email for magic link to sign-in.