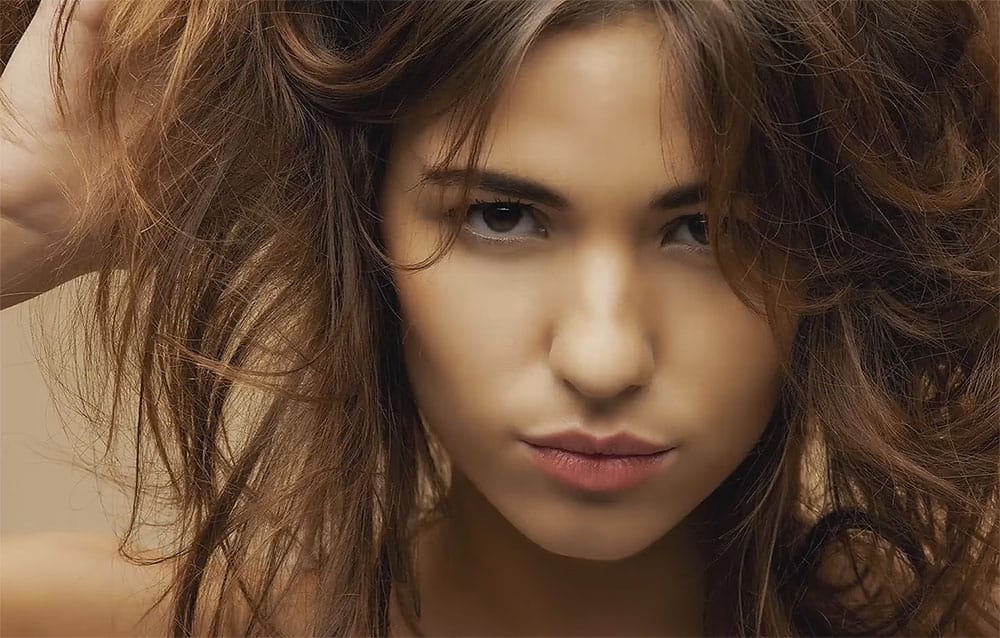
Clothing wrinkles, hair that lacks volume, and awkward fabric bunching can distract from an otherwise great portrait. Photoshop's Liquify tool offers a powerful solution for smoothing out these issues while preserving the natural look of your subject.
This tutorial demonstrates how to use the Liquify tool non-destructively with smart objects, focusing on clothing adjustments and hair enhancement while maintaining ethical retouching practices.
Watch the Tutorial
Video by PHLEARN. Any links or downloads mentioned by the creator are available only on YouTube
Essential Liquify Tool Tips
- Convert to smart object first: Go to Filter > Convert for Smart Filters before applying Liquify to make all changes reversible and adjustable
- Match brush size to target area: Use brackets [ ] to resize your brush to match the size of wrinkles or areas you want to adjust for better control
- Use the Forward Warp tool primarily: This is the most versatile tool in the Liquify panel and handles 90% of retouching tasks effectively
- Paint with the Reconstruct tool: When you've pushed an adjustment too far, use this tool to selectively undo parts of your liquify work
- Apply global reconstruction slider: Use the Revert Reconstruction slider to dial back the overall intensity of all your adjustments at once
More Tutorials About Portrait Retouching
Explore additional techniques for enhancing portraits and working with facial features in Photoshop.
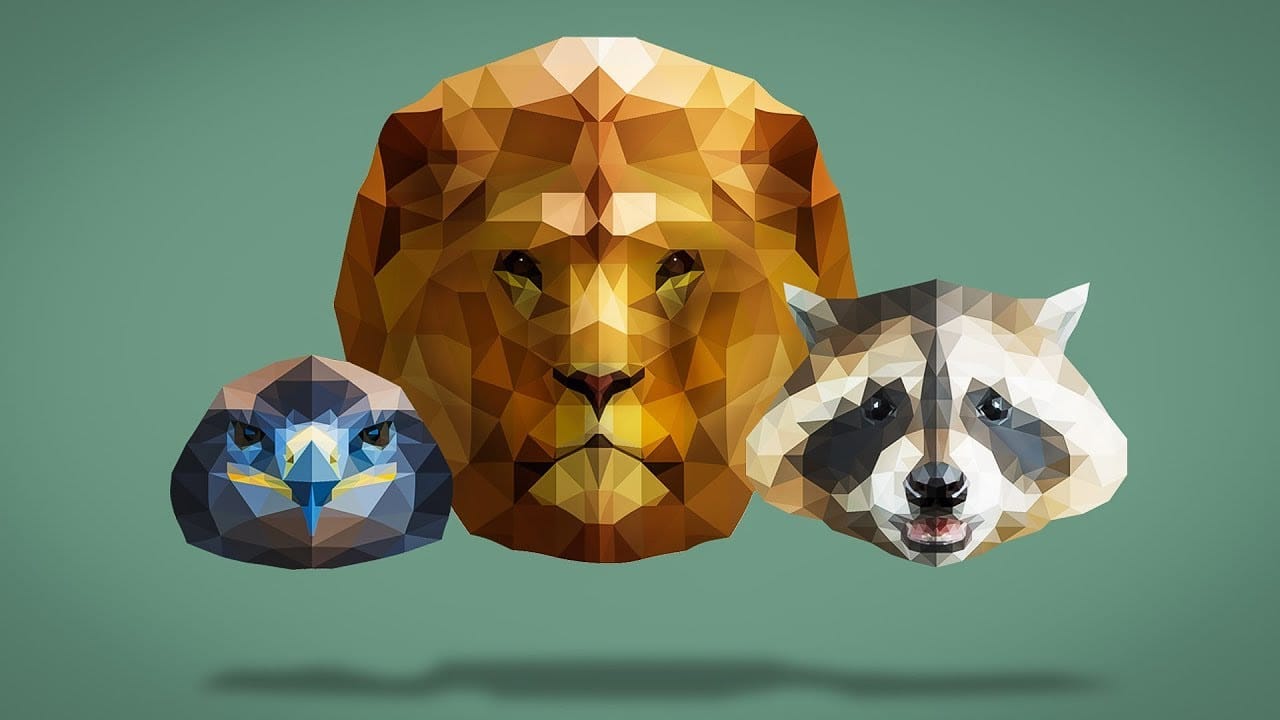
How to create low-poly portraits in Photoshop
Nemanja Sekulic, a talented Serbian artist, will teach you how to create a low-poly portrait effect in Photoshop. The artist explains that the key is to cover the model with a series of triangles, rather than squares or other polygon shapes.
The tutorial guides users through the process of achieving this unique paper mask or origami-like effect. By following the steps outlined by the artist, individuals can transform their portraits into striking low-poly masterpieces. The author's expertise in
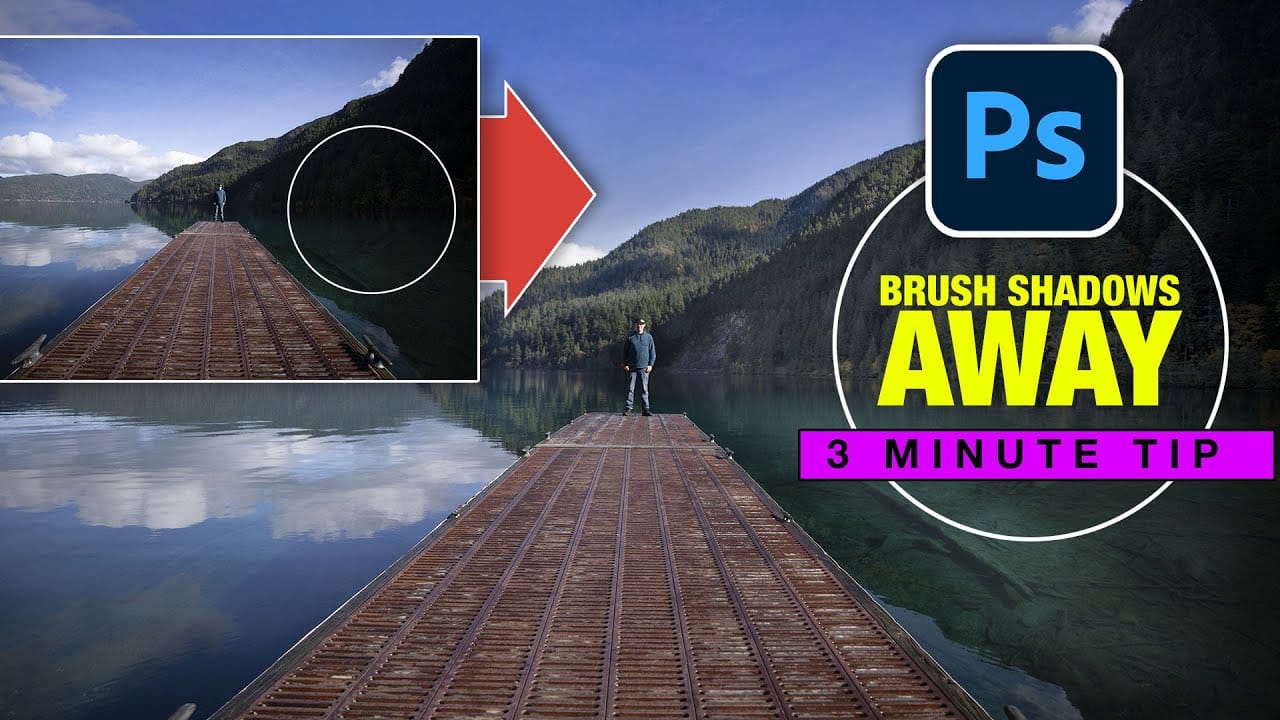
Instantly Recover details in photos with Photoshop
In this tutorial, Colin Smith reveals an effective technique for recovering hidden details in photos using Photoshop. The focus is on a method known as reverse dodge and burn, which allows you to selectively enhance shadow and highlight areas to bring out fine details.
Colin demonstrates how to paint over shadows and highlights in a realistic manner, blending the adjustments seamlessly into the image. This approach helps to restore lost details and improve the overall dynamic range of your phot
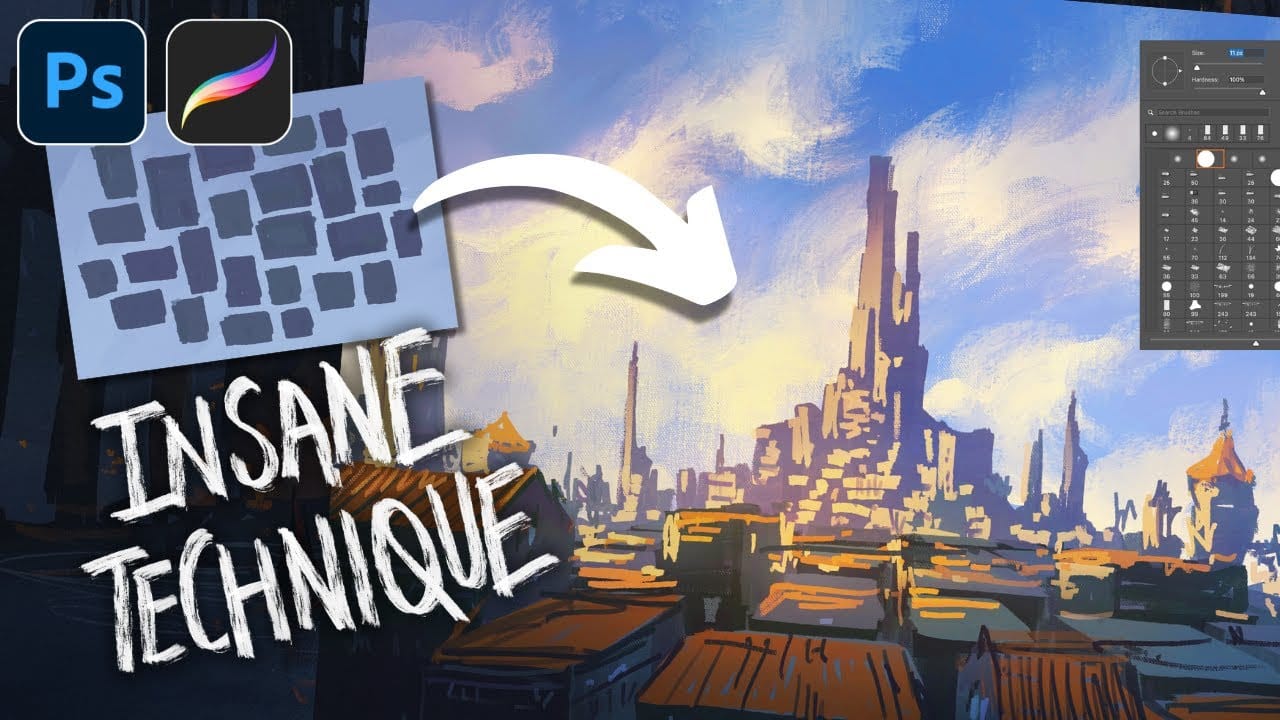
Paint Complex Scenes in Minutes Using Photoshop Painting Techniques
Creating complex cityscapes in just 30 minutes is entirely possible with the right Photoshop painting techniques. This presentation outlines a method to simplify imagery and effectively communicate ideas using minimal brushwork.
By focusing on basic shapes like rectangles, triangles, and domes, you can build a recognizable silhouette of a city. Start with a black-and-white image to clearly define light and shadow areas. This approach allows you to see where buildings are located and how light i
How to make any photo look better in seconds in Photoshop
Many photographs, despite good composition, can often lack that captivating polish or depth. Achieving a professional and visually appealing aesthetic often seems like a complex or time-consuming endeavor for photographers and digital artists.
This tutorial introduces a simple yet powerful Photoshop technique, sometimes referred to as the "euro glow" or "euro tint," designed to quickly elevate the quality of any image. Readers will learn how a few clicks can add contrast, vibrance, and a subtle