Mastering Skin Smoothing with Frequency Separation

Mastering Skin Smoothing with Frequency Separation

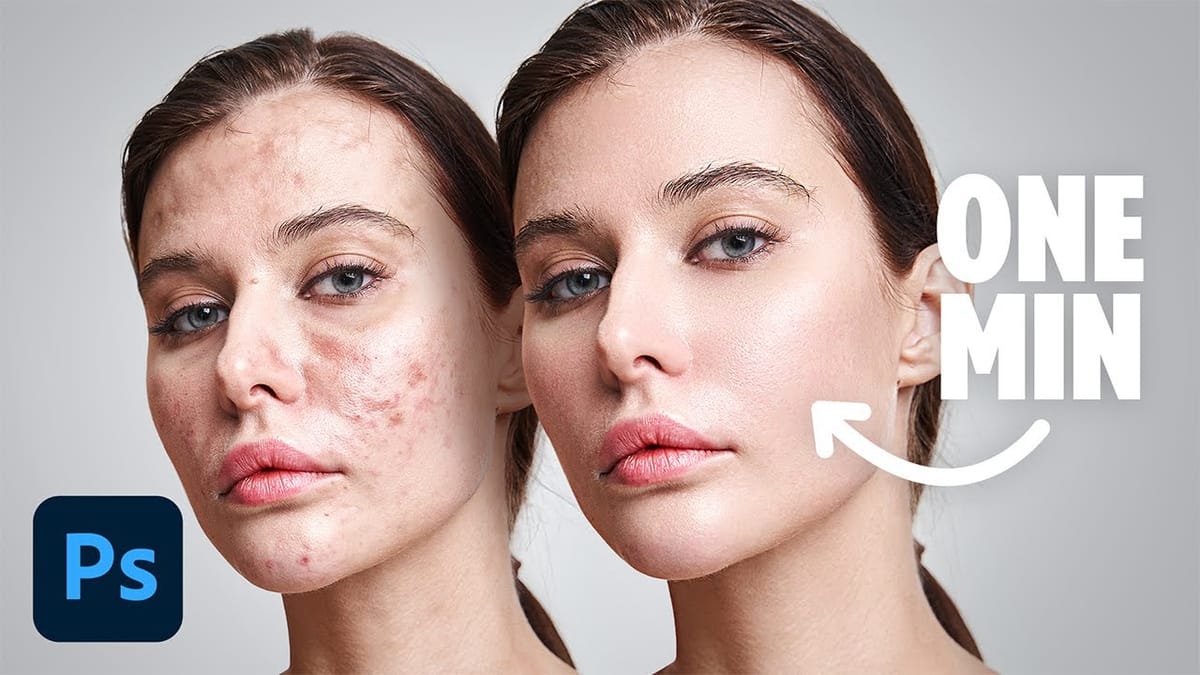
In photography, achieving flawless subject skin can often be a challenge. Blemishes, uneven tones, and harsh shadows frequently detract from an otherwise great photo, leading to frustration for both photographers and subjects.

This guide explores frequency separation, a powerful technique that allows precise skin retouching without sacrificing natural texture. Learn how to apply this method, enhance it with advanced steps, and integrate tools that streamline your workflow for professional results.

Watch the video

Any links or downloads mentioned by the creator are available only on YouTube

Breaking It Down

Frequency separation is a Photoshop technique that separates the image into two distinct layers: one containing color and tone information (low frequency), and another holding fine details and textures (high frequency). This separation enables you to smooth skin while preserving crucial details like pores and skin texture, avoiding an artificial, plastic look.

Before applying frequency separation, it is crucial to perform blemish removal. This non-destructive step uses tools like the Remove Tool, often accessed by pressing J.

Ensure you work on a new layer, with Sample All Layers enabled and Remove After Each Brush Stroke disabled in the options bar, allowing for efficient, single-pass cleanup.

The core of frequency separation involves creating specialized layers. Begin by duplicating your merged base layer twice, naming the top layer texture and the bottom blur. Apply a Gaussian Blur (Filter > Blur > Gaussian Blur) to the blur layer, setting the radius until textures are just out of view.

For the texture layer, use Image > Apply Image, select Subtract as the blending mode, target the blur layer, and set Scale to 2 and Offset to 128. Finally, change the texture layer's blending mode to Linear Light to reveal the separated texture.

Practical Tips

  • Perform all blemish removal on a dedicated, non-destructive layer before initiating the frequency separation process to prevent unwanted artifacts.
  • Utilize the Lasso Tool with a feather radius (e.g., 10 pixels) on the blur layer to isolate and selectively smooth areas of uneven tone, ensuring natural transitions.
  • To expedite iterative smoothing, create a custom keyboard shortcut for Gaussian Blur via Edit > Keyboard Shortcuts, allowing quick reapplication of the filter within selections.
  • After applying Gaussian blur, refine skin tones and shadows using the Mixer Brush Tool. Set all blend settings (Wet, Load, Mix, Flow) to 20% for subtle, buildable blending, particularly effective for blending hot spots or blotchiness.
  • Exercise caution when applying blur near hard edges like hairlines or clothing, as over-blurring can lead to undesirable color bleeding or an unnatural appearance.

Explore further resources and enhance your Photoshop skills with more in-depth tutorials and helpful downloads.

Start to finish high-end skin retouching in Photoshop
Complete high-end beauty retouching in Photoshop. Explore the power of advanced frequency separation for flawless skin retouching with smooth skin and amazing texture. In this tutorial by PiXimperfect, you’ll go through the complete process of portrait retouching beginning from basic adjustments in Lightroom to Photoshop, and ’till exporting the final image. Download sample image here… More
Frequency Separation Beauty Retouch With The Mixer Brush
In this Photoshop tutorial by Kevin Roodhorst you will learn the professional way to soften skin for high-end retouching in Photoshop using the amazing technique of frequency separation and the Mixer Brush. More
High-End Skin Retouching in Photoshop
Combining the power of Frequency Separation along with manual Sampling and Painting, learn how to recreate and sculpt the skin, maintaining a beautiful skin texture, in this tutorial by PiXimperfect. Using this technique, you will not only achieve a smooth skin but also will have the control to naturally remove wrinkles, lift up the cheekbones, […] More
Flawless 1-Min Skin Retouch Action in Photoshop
In this tutorial, you will learn a fast and effective technique for retouching skin using Photoshop. This method focuses on creating smooth, beautiful skin in under a minute. You’ll discover how to generate a brand new skin texture from scratch and apply advanced blurring techniques. The goal is to achieve
Removing Makeup with Frequency Separation in Photoshop
In this tutorial by Michael Woloszynowicz, learn how to remove makeup using Frequency Separation in Photoshop. The video demonstrates how to scale back eye-shadow and replace it with natural skin tones. This technique is perfect for removing makeup like blush or eye-shadow, providing a clean, natural look. Enhance your Photoshop

Get tutorials & freebies delivered to you.

Subscribe to the Photoshop Roadmap newsletter, a weekly roundup of new tutorials, insights and quality downloads, trusted by 6500+ readers.

You might also like

How to Create Collage Text Effects in Photoshop

Collage text transforms simple typography into visually striking artwork by combining wrapped paper textures, strategic warping, and careful masking techniques. This creative approach gives letters dimension and character, perfect for artistic projects and unique design elements. The technique involves layering textured materials within letter shapes, then using Photoshop's...

How to Convert Low-Resolution Graphics to Vector Shapes in Photoshop

Pixelated logos and graphics lose their impact when scaled up for print or web projects. Photoshop's Creative Cloud Libraries feature offers a built-in solution for transforming low-resolution black and white images into crisp, scalable vector shapes. This technique works particularly well for simple graphics, logos, and icons that...

How to Use Photoshop's Select Subject Tool for One-Click Selections

Complex selections in Photoshop just became effortless. The Select Subject tool uses advanced AI to automatically identify and select main subjects in images, even those with intricate details like bicycle spokes or hair. This tutorial demonstrates how to achieve professional-quality selections with a single click, saving hours of manual masking...

Understanding Photoshop Blending Modes: A Complete Guide to Layer Blending

Blending modes transform how layers interact in Photoshop, letting you seamlessly combine images without complex masking. This technique reveals only light areas, dark areas, or specific colors from each layer. Master these essential blending groups to create professional composites and artistic effects with just a few clicks. Watch the Tutorial...

Photoshop 2026 New Features: AI Tools and Credit System Overview

Photoshop 2026 introduces powerful AI-driven features including advanced generative fill models, sophisticated upscaling tools, and seamless harmonization effects. These updates promise to streamline complex editing tasks while delivering professional-quality results. The software now operates on a credit-based system that divides features into standard and premium tiers, fundamentally changing how users...

How to Add Objects to Photos Using Photoshop's Generative Fill

Photoshop's Generative Fill transforms photo editing by letting you add realistic objects using simple text descriptions. This AI-powered feature creates seamless additions that match your image's lighting, perspective, and style. The process requires just a basic selection and a descriptive prompt to generate professional-looking results in...

You’ve successfully subscribed to Photoshop Roadmap
Welcome back! You’ve successfully signed in.
Great! You’ve successfully signed up.
Success! Your email is updated.
Your link has expired
Success! Check your email for magic link to sign-in.