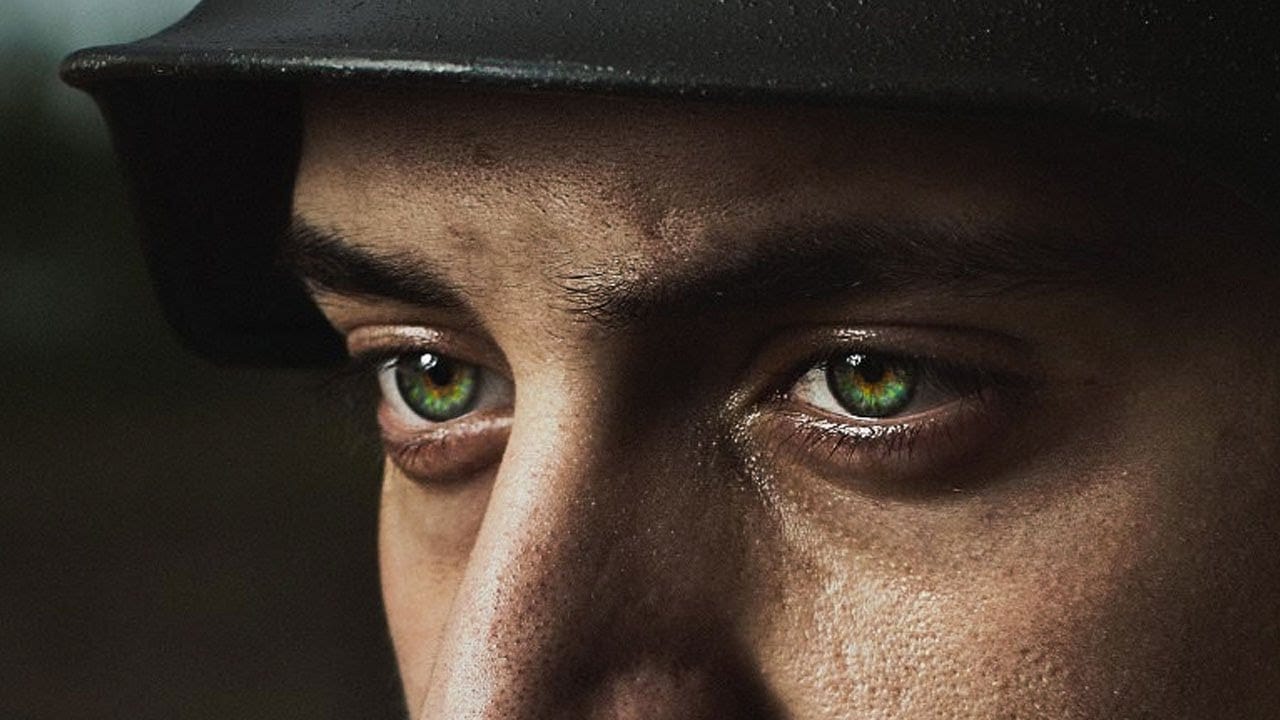
Creating convincing black eyes in Photoshop requires more than simply painting over them with black. The key to believable results lies in preserving light reflections and creating realistic depth through strategic layering techniques.
This tutorial demonstrates how to achieve this dramatic effect while maintaining the natural lighting and shadows that make eyes appear three-dimensional rather than flat.
Watch the Tutorial
Essential Tips for Blacked-Out Eyes
Success with this technique depends on proper preparation and layering methods:
- Choose images with visible catch lights in the eyes - these light reflections are crucial for creating realistic depth
- Use curves adjustment layers instead of painting black directly to preserve natural color transitions in the eyelids
- Extract highlights from the blue channel to create convincing light reflections on the black surface
- Paint individual eyelashes and hair strands over the black areas to maintain natural layering
- Apply subtle gaussian blur to painted details to match the eye's natural depth of field
More Tutorials About Eye Enhancement in Photoshop
Explore additional techniques for dramatic eye effects and enhancement methods.
Learn how to freak people out in Photoshop
In this tutorial, follow along during a photoshoot where Aaron Nace's head gets black liquid poured on. Aaron then takes the image into Photoshop for finishing touches to get the proper lighting to black out his own eyes.
The key to making a black eye ball look believable in Photoshop is lighting. Be sure your subject is facing a large window or other lighting source that will create light reflections in their eyes. If there is no reflection in the person's eye, the effect will look flat and li

How to Enhance Dark Eyes in Photoshop Using Traditional and AI Techniques
Portrait photographers often face the challenge of completely dark, featureless eyes that resist traditional brightening techniques. When standard exposure adjustments fail to reveal detail, specialized methods can restore life and interest to these challenging areas.
This tutorial demonstrates two powerful approaches: a traditional texture-building technique using Photoshop's classic tools, and a modern AI-powered method that generates realistic iris patterns.
Watch the Tutorial
Essential

How to Color, Brighten and Sharpen Eyes in Photoshop
In this tutorial by Aaron Nace from Phlearn, learn how to enhance eyes in Photoshop to make them captivating and sharp.
Techniques include coloring the eyes by sampling natural hues and adjusting lightness and saturation, using blending modes like "Soft Light" or "Overlay" for a natural look, and softening edges with Gaussian Blur. Dodge and Burn techniques are used to enhance depth and light in the pupils, while selective sharpening draws attention to the eyes, making them stand out in portrai
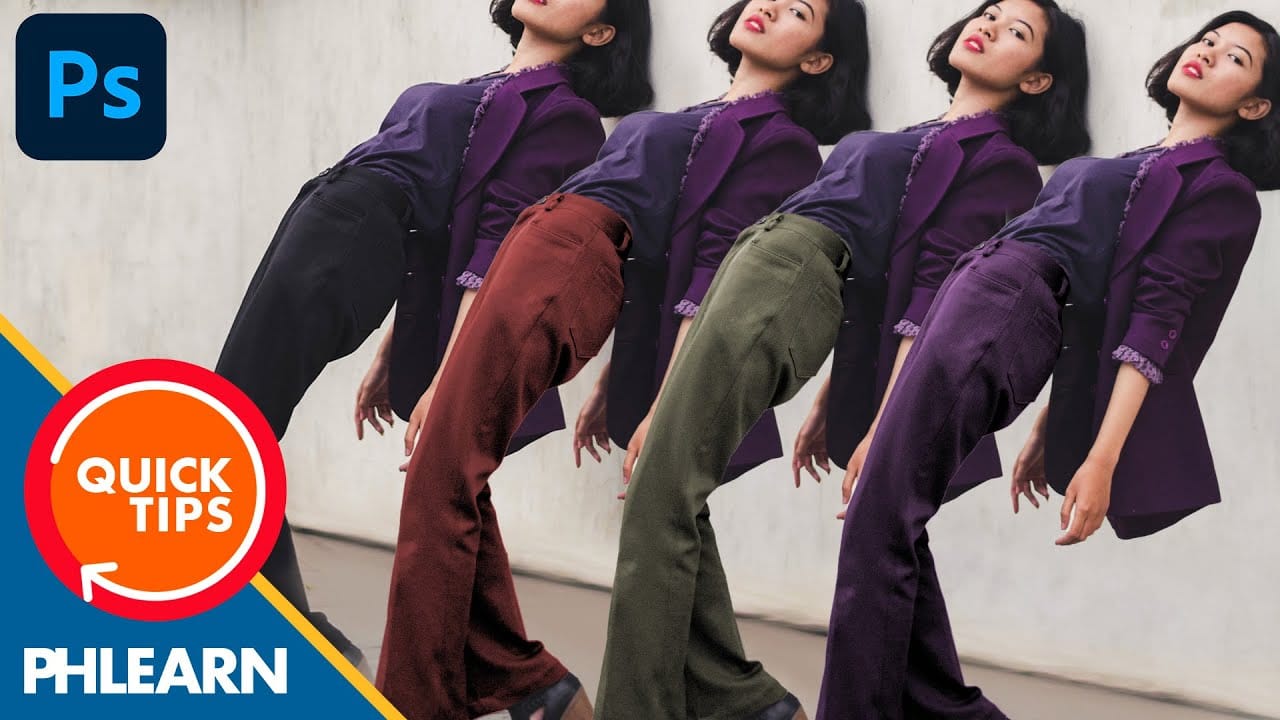
How to Change Black into Any Color in Photoshop
In this tutorial, Aaron Nace demonstrates how to transform black elements in your images into any color using Photoshop. This technique involves utilizing Levels and Hue/Saturation Adjustment Layers to achieve the desired color changes.
Aaron guides you through the process of adjusting these settings to effectively modify black areas in your photos. This method is particularly useful for fashion and product photo retouching, allowing you to customize colors for creative or branding purposes.
T