


Solarisation has been used since the very beginning of photography but was made famous by Man Ray when he rediscovered the technique by accident in the 1930’s. The effect consists mainly of partially reversed tones in an image recorded on a negative or a photographic print. Basically the dark areas appear light or the light areas appear dark. The effect was usually caused by accidentally exposing an exposed plate or film to light during developing. That said, results were usually unpredictable and good results were obtained by luck and lots of practice. In this tutorial, I’m going to show you a simple way of getting similar results in Photoshop without having to lock yourself in the darkroom!
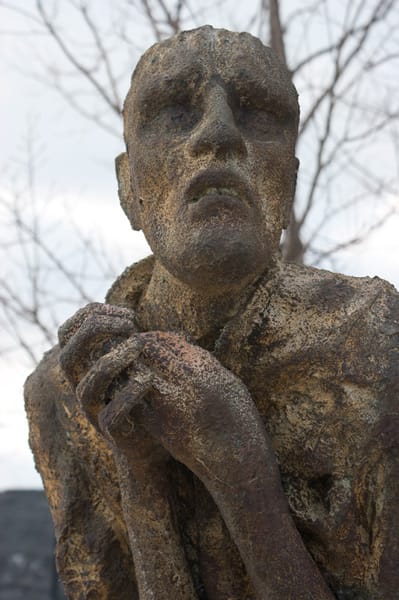
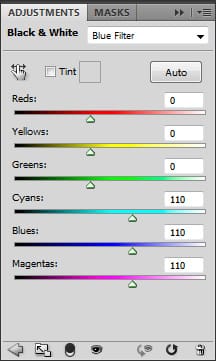
To start things of, we’re going to convert our image to black and white by using the Black & White layer adjustment found at the bottom of your layers palette. This will bring up the Black and White conversion window from where you can choose a variety of predefined adjustments that simulate different photo filters. Choose the filter setting most suitable for your image. You can also leave it in “Default” and tweak each color rendition separately. For my image, I set it to Blue Filter.
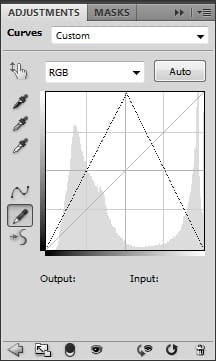
Now that we have our black & image, we’re going to soloraize it using our curves adjustment layer. Go to the bottom of your layers palette open the Curves window. On your left you will see a pencil icon. If you hover over it it will say “Dray to modify the curve”. That’s exactly what we want to do. Select it and make a point at the very bottom of the left corner while holding down the SHIFT key. Now go to the top center and make another point. Finally go back to the bottom, this time to the right corner. You should now have an inverted “V” curve.
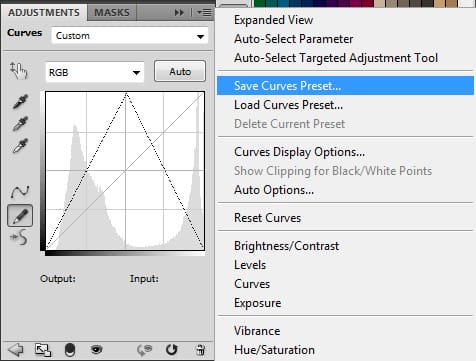
You can save this Curves Adjustment as a preset if you want. That way, every time you want to solarize an image, all you have to do is select this Curves Adjustment from the dropdown menu in your Curves window. Do this by going to the top-right corner of the Curves window and selecting “Save Curves Preset”. Call it Solarisation and that’s it!
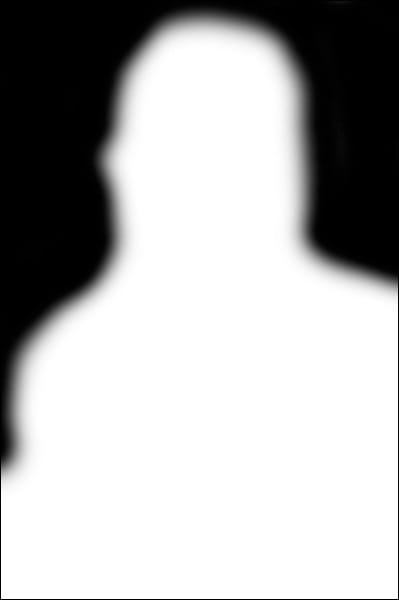
Now what we need it to give it some contrast. You can give it as much as you like but for this image I didn’t want to loose too much detail in the dark sky in order to keep those interesting branches. To do that, I masked out that area so that my Levels Adjustment did not take effect in those specific areas. The way you do that is after you have finished with your Levels Adjustment, click on the Layers Mask beside it. It will be white, so pick your brush and make sure your foreground is set to black. Paint the areas you want to block and leave white the areas you want to continue having the Levels Adjustment. You can use opacity on you brush for a more subtle effect. To have a better view of your Layer’s Mask, hold down the ALT key and click on the mask. My layer mask looks like this:
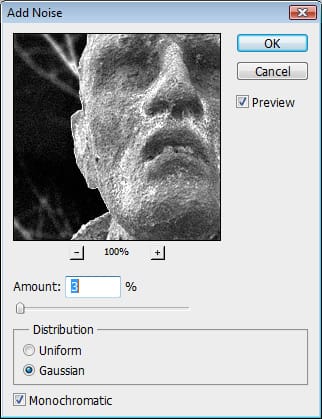
The last thing I want to do is add some film grain to make it look like a proper B&W print that has been solarized. Merge everything on to a new layer by clicking SHIFT + CTRL + ALT + E. Now with this layer selected go to Filter > Noise > Add Noise. For this small web image, with an amount of 3% I’m fine but if your image is large you will probably need a higher amount. Just make sure it’s subtle, not overpowering. Also make sure to check monochromatic to avoid colored grain and to select Gaussian in the Distribution Box for a more natural looking grain texture.
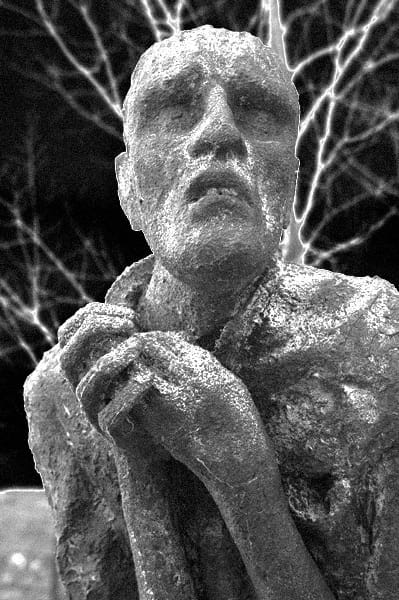
This is a pretty strong effect and will take quiet a particular image to do it justice so experiment! Hope you found it useful. Here’s the before and after:
Thanks for Reading — Want More Like This?
Subscribe to the Photoshop Roadmap newsletter for more expert tutorials and insights delivered directly to your inbox.





