

Most of us aren’t lettering artists, and creating ornamental text for holiday designs can be tough. The usual alternative is browsing through marketplaces, hoping to find the perfect style—only to discover it’s pricey, locked behind a subscription, or bundled with things we don’t need.
Free decorative fonts help a little, but they don’t offer the flowing curves, swirls, and ornaments that give Christmas designs that magical, elegant look.
The good news is that AI tools have changed a lot. What once required complex prompts can now be done through friendly, natural conversation—and the results are better than ever.
Gemini Nano Banana was one of the first tools to offer this kind of conversational image creation, and Version 3 has taken a big step forward in quality. Even better, Adobe now includes Nano Banana as one of the external models available inside Adobe Firefly and Photoshop.
In this tutorial, I’ll show you how to add your own messages to the empty frames included in my Holiday Splendor collection. Using Photoshop and Nano Banana, you can create beautiful Christmas lettering that fits perfectly inside any frame—no drawing skills or advanced software knowledge needed.
If you’d like to follow along, you can download the free Holiday Splendor collection here. It’s completely free to use, and if you enjoy it, you’re welcome to leave a small donation to help me keep creating high-quality freebies.
The Tutorial
Step 1
Go to the Adobe Firefly website and make sure you’re logged into your Adobe account.
- Open the Model menu and choose Gemini 3 Nano Banana.
- Set the Aspect Ratio to Landscape (4:3), which matches the format of the frame we’ll be using.
- Click the Reference Image button and upload your frame. If you want to follow along with the same file (FRAME-04.jpg), you can download it from the free Holiday Splendor collection

At the bottom of the screen, you’ll see the prompt box along with the reference image you just uploaded.
Step 2
Now it’s time to write the request that Nano Banana will use to create your lettering. It doesn’t have to be perfect—just a simple, clear instruction. If you’re not sure what to say, you can even ask your favorite chatbot to help you write it and then paste it into Firefly.
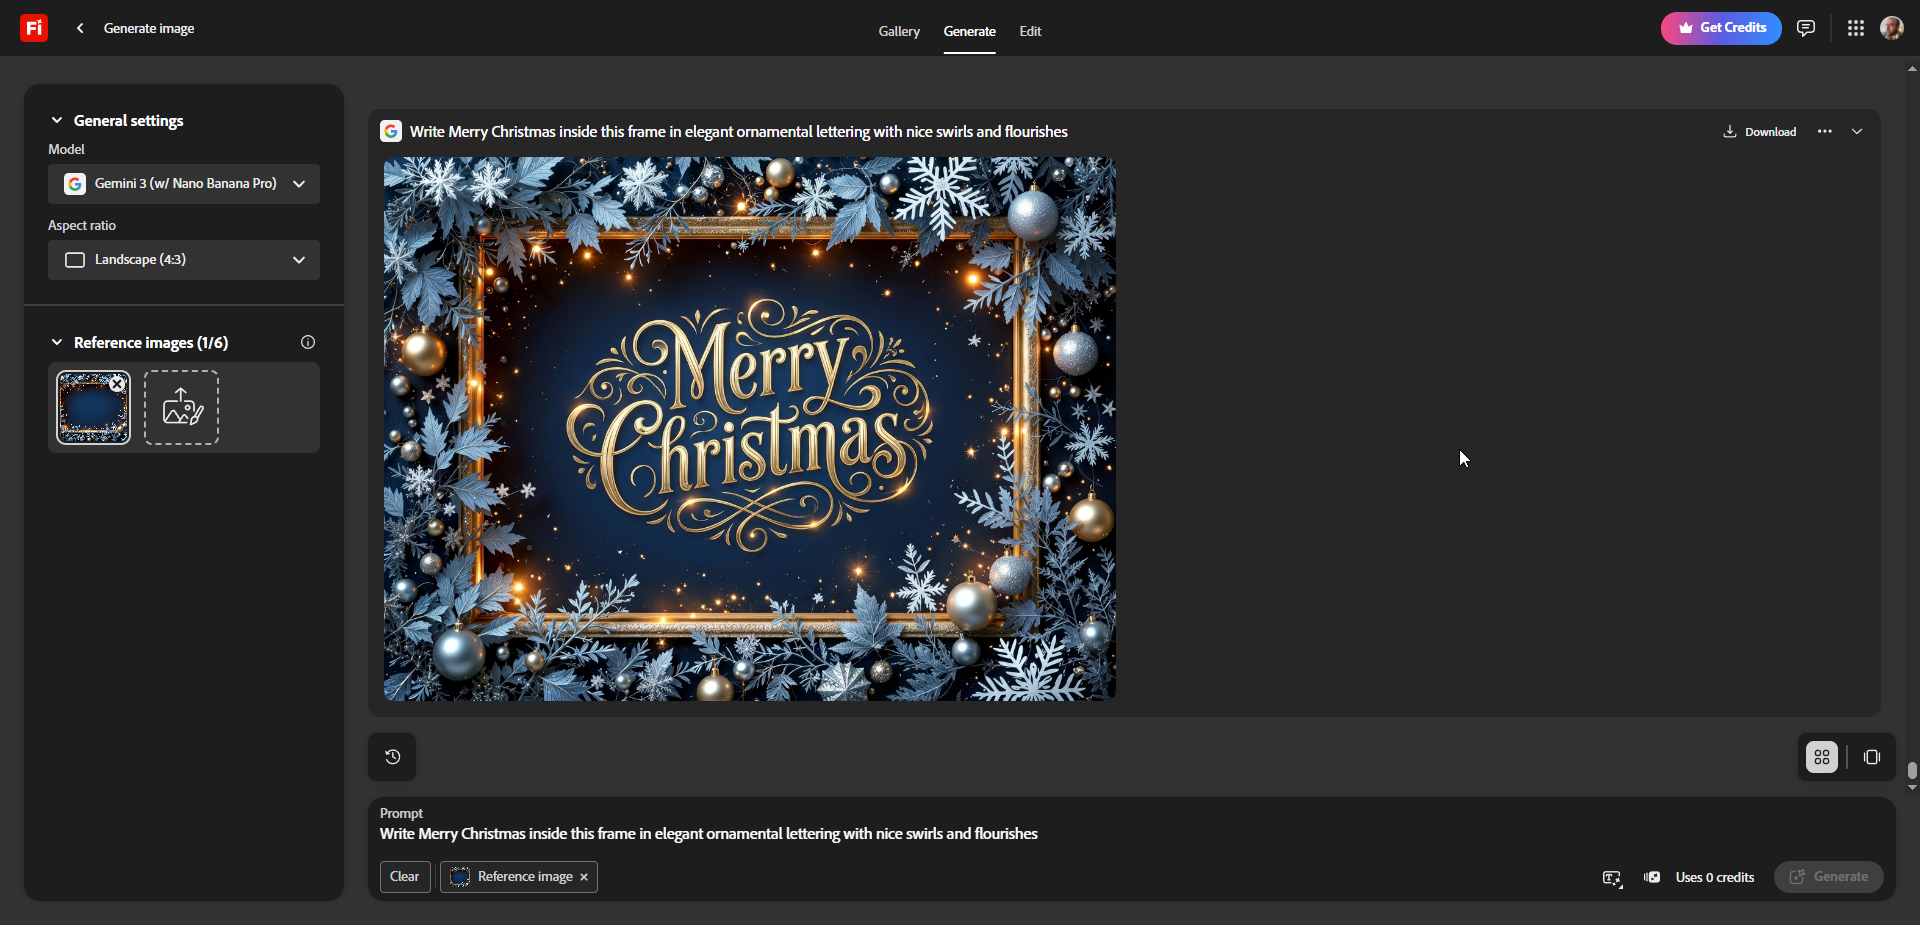
For this example, we’ll start with a classic “Merry Christmas” message. Here’s the request I’m using:
“Write Merry Christmas inside this frame in elegant ornamental lettering with nice swirls and flourishes.”
Then click the Generate button. In just a moment, Nano Banana will create a beautiful lettering design—almost like magic.
Step 3
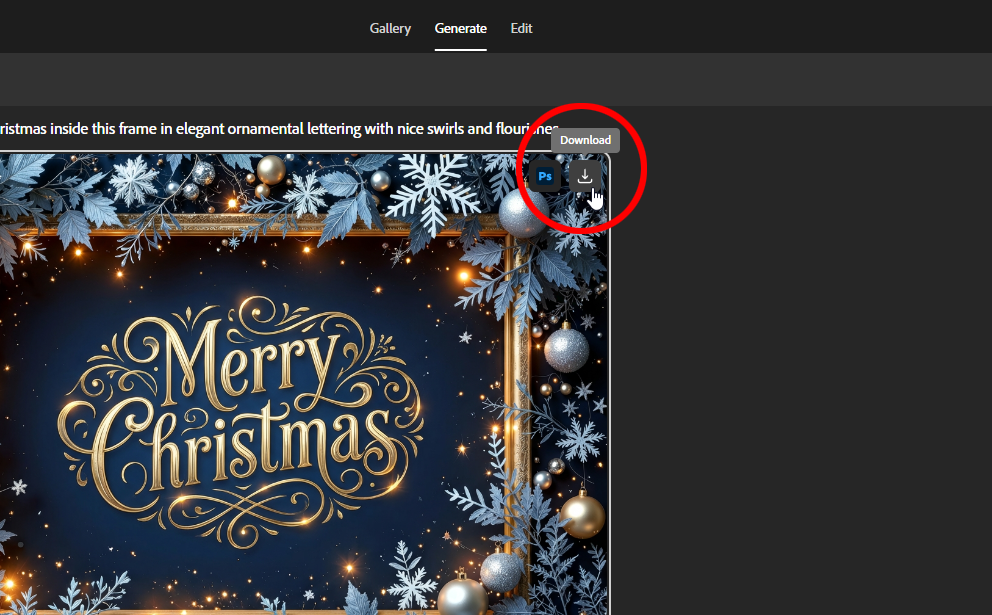
Click the download icon to save the image to your computer or to your Creative Cloud storage.
Final Result
And that’s all there is to it. With just a few clicks and a simple request, you’ve created a beautiful, detailed lettering design. You can now open the image in Photoshop to make any adjustments or add it to your final layout.

Other examples


Why Nano Banana 3?
I’ll let the results speak for themselves. Below are examples created with the exact same request, but generated using Firefly 5 (Preview) and Flux.1 Kontext (Pro). Both are conversational image-generation models, just like Nano Banana 3.


To be fair, I didn’t try adjusting the request for these other models. The results were so poor that I didn’t feel motivated to experiment further. You might get better results if you spend some time testing and refining your prompts.
Helpful Tips and Final Thoughts
Resolution
Adobe Firefly’s web version limits Gemini Nano Banana 3 to a maximum output of about one megapixel. That means your final image will be reduced to that size, no matter how large your reference frame is. From what I understand, Nano Banana inside Photoshop can generate at a higher resolution, but the interface feels slow and a bit clunky to me—your experience may be different.
If one megapixel (around 1200 pixels wide for a 4:3 image) isn’t enough for your project and you still prefer working with the Firefly web interface, there’s an easy workaround. After generating the lettering, you can open the result in Photoshop and upscale it using the Generative Upscale feature available in recent versions. It does a surprisingly good job of enhancing small images without losing too much detail.
It’s similar to the traditional Image Size tool, but much stronger. Instead of simply stretching pixels, it uses AI to rebuild and enhance the image as it increases the size.
Adobe currently offers three Generative Upscale models: Firefly Upscale, Topaz Gigapixel, and Topaz Bloom. Firefly Upscale isn’t the best option for this kind of work, so I don’t recommend it.
Topaz Gigapixel delivers excellent high-quality upscaling, but the new standout is Topaz Bloom. Bloom not only sharpens and enhances the image—it adds creative detail and intelligently rebuilds areas that look soft, blurry, or undefined.
Topaz Gigapixel vs. Topaz Bloom Comparison:
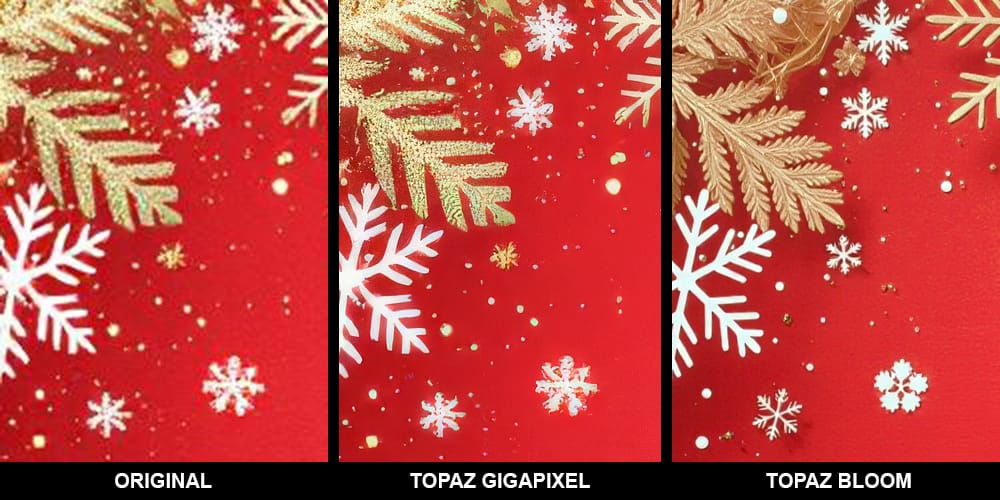
The original image was low quality, and you can clearly see that when you zoom in. Unless your artwork has a painterly or grungy style where softness or roughness are intentional, those missing details really stand out. When I used Topaz Gigapixel to upscale the image, it did an impressive job, but there’s only so much it can fix when the source is already poor.
With Topaz Bloom, the results were completely different. I applied Bloom to the same low-resolution image, and the last example shows what it produced. Bloom didn’t just enlarge the image—it understood the shapes and textures and rebuilt them with fresh detail.
Topaz Gigapixel and Topaz Bloom have been included inside Photoshop for a few months now, but they come with some limits. If you want higher resolution and more features, it’s worth checking out the full standalone versions from Topaz Labs.
Cost
Nothing is truly free, of course—but Adobe does a great job of giving Creative Cloud users plenty of value. If you want to use Nano Banana 3, Topaz Gigapixel, or Topaz Bloom outside of Photoshop or Firefly, each one requires a separate subscription.
However, Creative Cloud members get a generous amount of free credits to use these tools directly inside Adobe apps. Even better, there’s nothing extra to install. No plugins, no beta versions—these models are already built into Photoshop and Firefly. And from time to time, Adobe even offers unlimited use promotions for certain external models. Internal Adobe models remain completely free and unlimited.

Be sure to check your available credits. Adobe shows your usage and remaining credits inside each app, so you always know where you stand.
Control over your output.
This tutorial focuses on a quick method that delivers impressive, eye-catching results with just a simple request. The real magic of Nano Banana 3 is not only the beautiful lettering it creates, but also the way it understands the frame and blends everything together so naturally. Even with short keywords like “playful,” “joyful,” or “ornamental”, Nano Banana 3 outperformed Firefly 5 and Flux Kontext by a wide margin.
That said, this approach gives you limited control over the final look. If you want more precision and fewer surprises, you’ll need to upload additional reference images—not only the frame, but also examples of the lettering style you want. You can also write a longer, more specific request to guide the model in a tighter direction.
But that isn’t the goal of this tutorial. The idea here is to relax, have fun, and create something beautiful to share with the people you care about.
During the holidays, spreading a little joy is what matters most.
More Inspiration for Your Holiday Projects
Here you’ll find more holiday-themed tutorials, downloads, and ideas to help you spark new designs and bring extra magic to your seasonal projects. Feel free to explore, experiment, and create at your own pace.
Creative Assets


Design tutorials


Useful tools


