Rim lighting transforms ordinary portraits into dramatic, professional-looking images by adding bright highlights around the edges of your subject. This technique simulates light hitting the outer contours of a person, making them stand out from their background with a natural, glowing effect.
The key to convincing rim light lies in careful color sampling, proper layer blending, and strategic masking to create highlights that follow the natural contours of hair and skin.
Watch the Video
Video by Nikki Harrison. Any links or downloads mentioned by the creator are available only on YouTube
Practical Tips
Master these essential techniques for creating believable rim lighting effects:
- Sample colors from your light source and lighten them rather than using pure white for more realistic highlights
- Use clipped layers above your subject to keep rim light effects contained within the subject boundaries
- Apply the blur tool to soften harsh edges and create natural light transitions
- Add individual hair strokes with small brushes to enhance realism and avoid the cutout look
- Build rim light in multiple layers with different blend modes for better control and refinement
Related Articles and Tutorials
Explore more advanced lighting techniques to enhance your portrait photography skills.
Create Fake Rim Lights in Photoshop
Rim lighting adds dramatic atmosphere to portraits by creating bright highlights around the edges of your subjects. This technique simulates light hitting the outer contours of people or objects, making them stand out from their background with realistic glowing effects.
Using Photoshop's Inner Glow layer style with the Color Dodge blend mode, you can create convincing rim lights that wrap naturally around your subjects, then fine-tune the placement with layer masks for professional results.
Lighting Effects to Create Drama in Photoshop
In this tutorial, John Whitehead demonstrates how to add dramatic lighting effects in Photoshop to transform flat lighting into something much more dynamic. You'll learn how to use various tools such as lighting effects filters, lens flare, smart objects, and LUTs to completely alter the mood and appearance of your image.
If you want to follow along with the tutorial, you can download the provided image and apply the same techniques. This guide is perfect for photographers and digital artists l

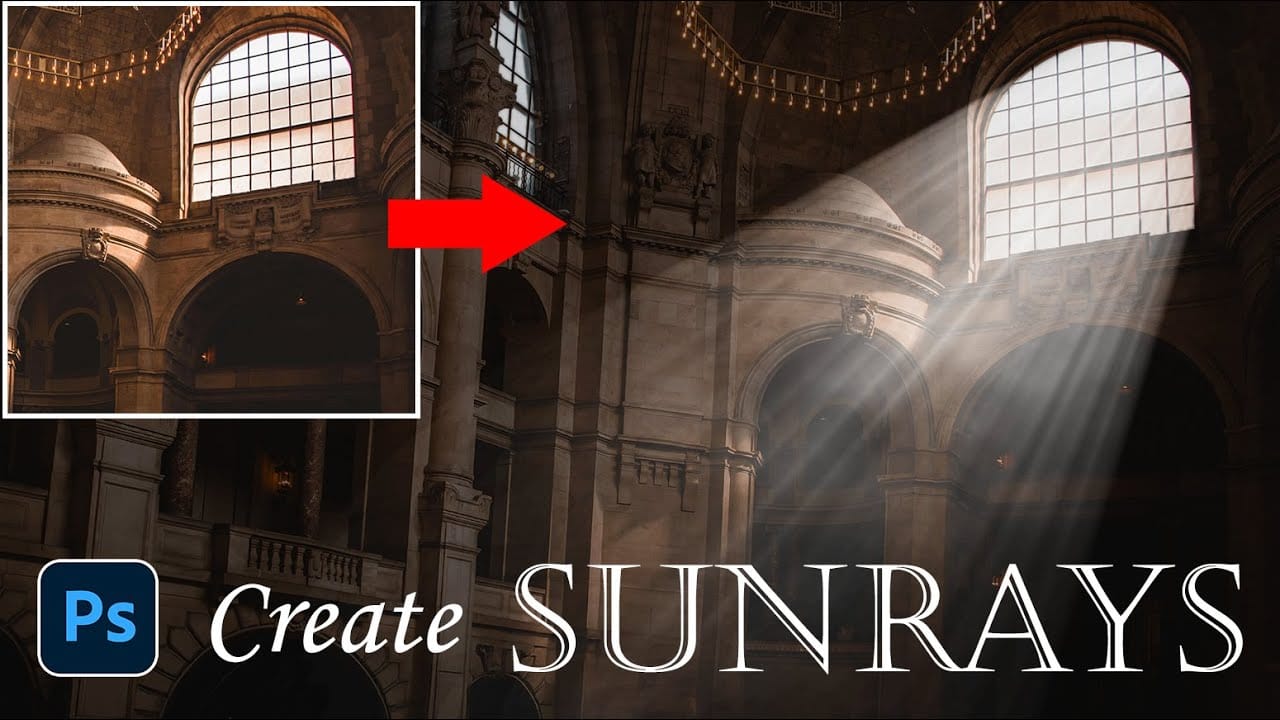
How to Add Dramatic Sunrays and Sunbeams to Photos in Photoshop
Sunrays streaming through windows create some of photography's most captivating moments. Natural sunbeams add drama, warmth, and visual interest that can transform an ordinary interior scene into something magical.
This tutorial demonstrates how to recreate those stunning light effects in Photoshop using selection techniques, radial blur, and layer masking. You'll learn to build convincing sunrays that enhance your photos with realistic lighting drama.
Watch the Video Tutorial
Practical Tip
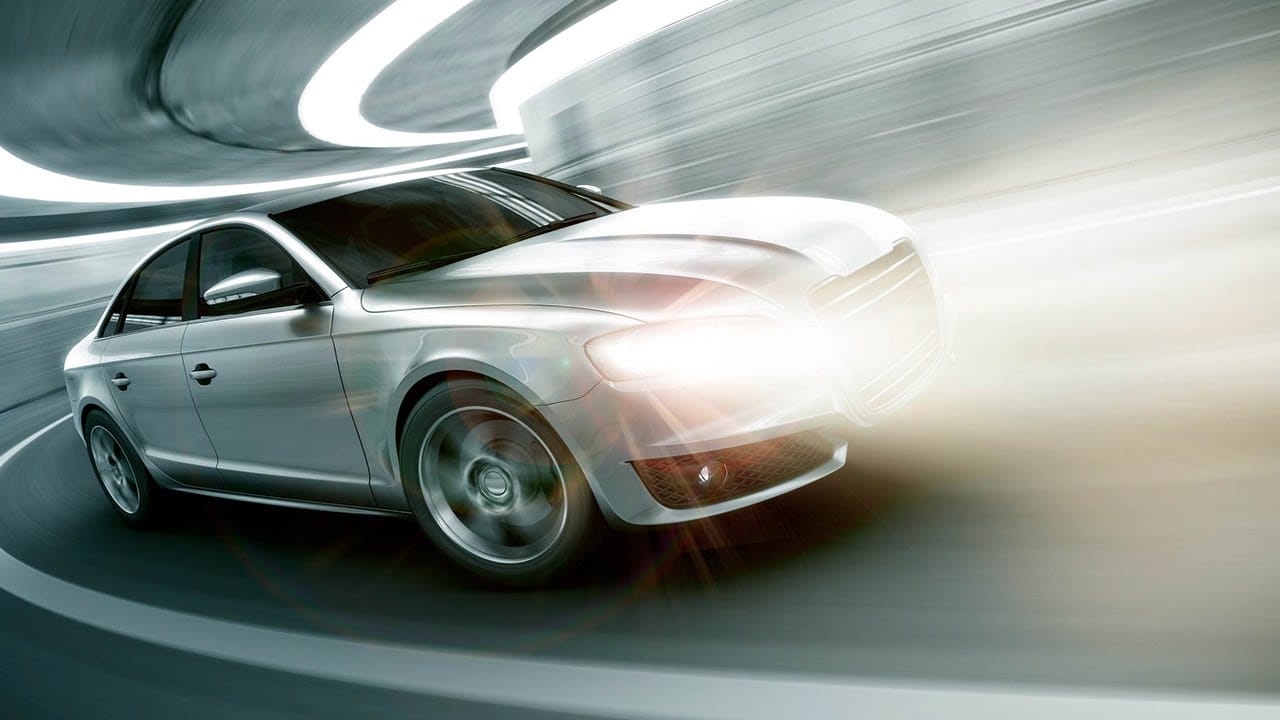
Add headlights to a car photo in Photoshop
Creating believable headlight effects transforms a static car image into something dynamic and eye-catching. This technique combines selection tools, blur filters, and layer effects to simulate realistic light beams that appear to project from the vehicle into the surrounding environment.
The process involves building light beams from scratch, adding atmospheric effects, and creating ground illumination to sell the illusion that the headlights are actually turned on.
Watch the Video
Practic
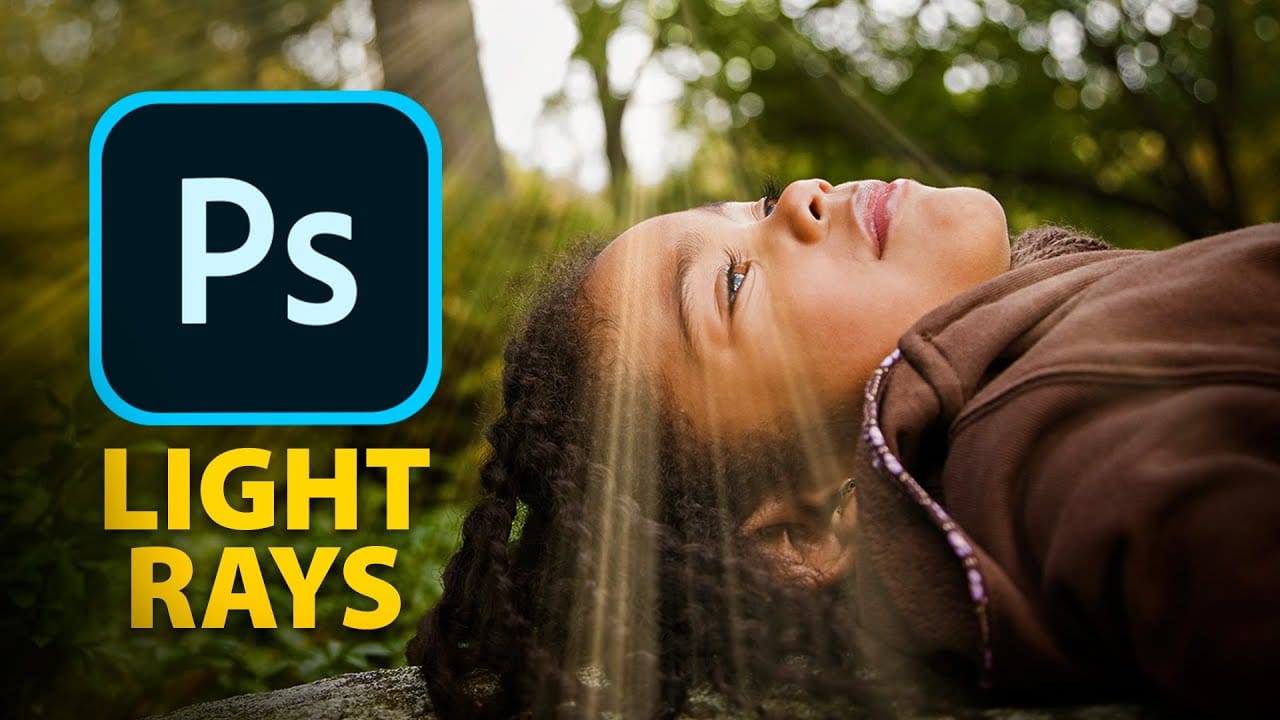
Epic gradient trick for beautiful light rays in Photoshop
In this tutorial, Jesus Ramirez teaches you how to create stunning light rays in Photoshop using an ingenious gradient trick. By utilizing a Gradient Fill layer in an unconventional way, you can achieve a mesmerizing light ray effect that adds a dramatic touch to your photos. This method is straightforward and effective, making it accessible even for beginners.
Part of the Photoshop in-app tutorials, this guide allows you to open the tutorial image directly from Photoshop and follow along with
Add beautiful natural background light effects in Photoshop
In this Photoshop tutorial by Unmesh Dinda from Piximperfect you will learn how to make the subject stand out by adding realistic light effects on the background. Learn to create beams of light pouring in from a source (like a window) and falling on the background naturally in Photoshop.
We'll create the light by using Step and Repeat and then apply blend modes and masking to make it as realistic as possible.
Watch tutorial
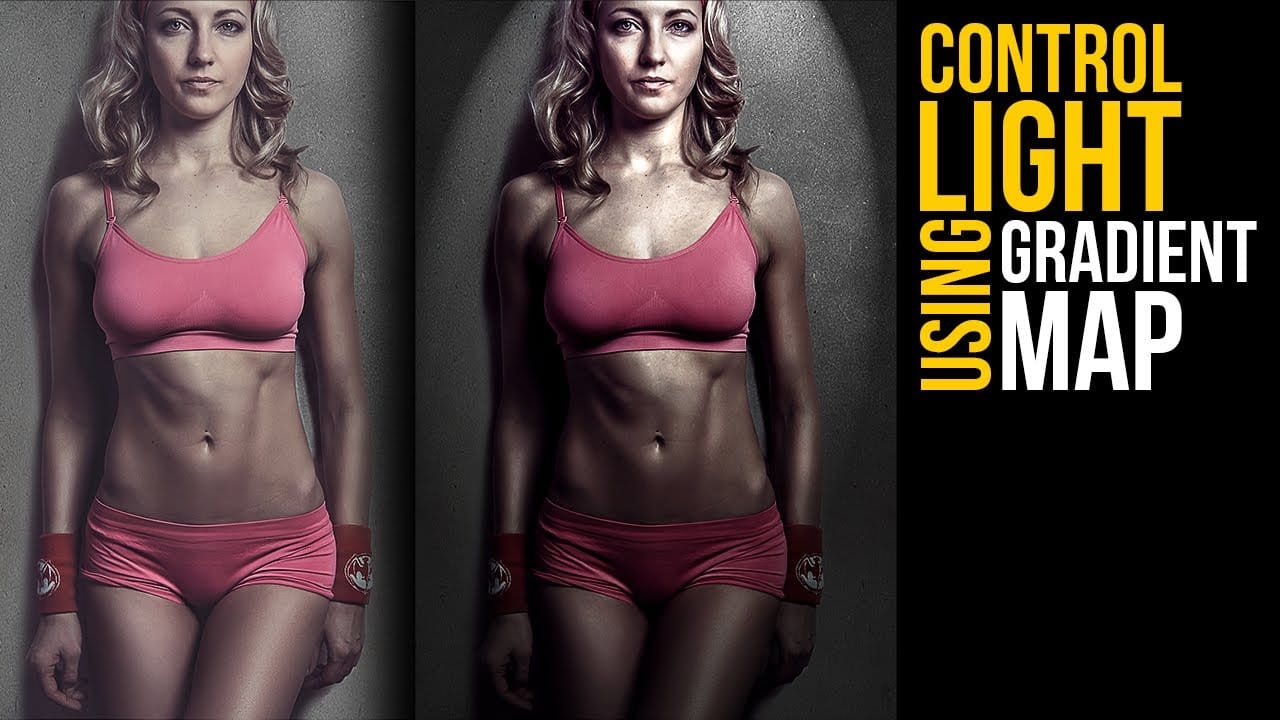
Create lighting effects using Gradient Maps in Photoshop
In this Photoshop tutorial by Unmesh Dinda from Piximperfect you will learn an interesting technique to completely mold and control light in Photoshop using Gradient Maps along with amazing light effects to add drama, depth, and dimension.
In this video, learn how to manipulate multiple levels of light. Whether you want to remove shiny flash hotspots or add more shine, make harsh light soft or soft light harsh, with Gradient Maps, you can control almost everything. Gradient Map allows you to co
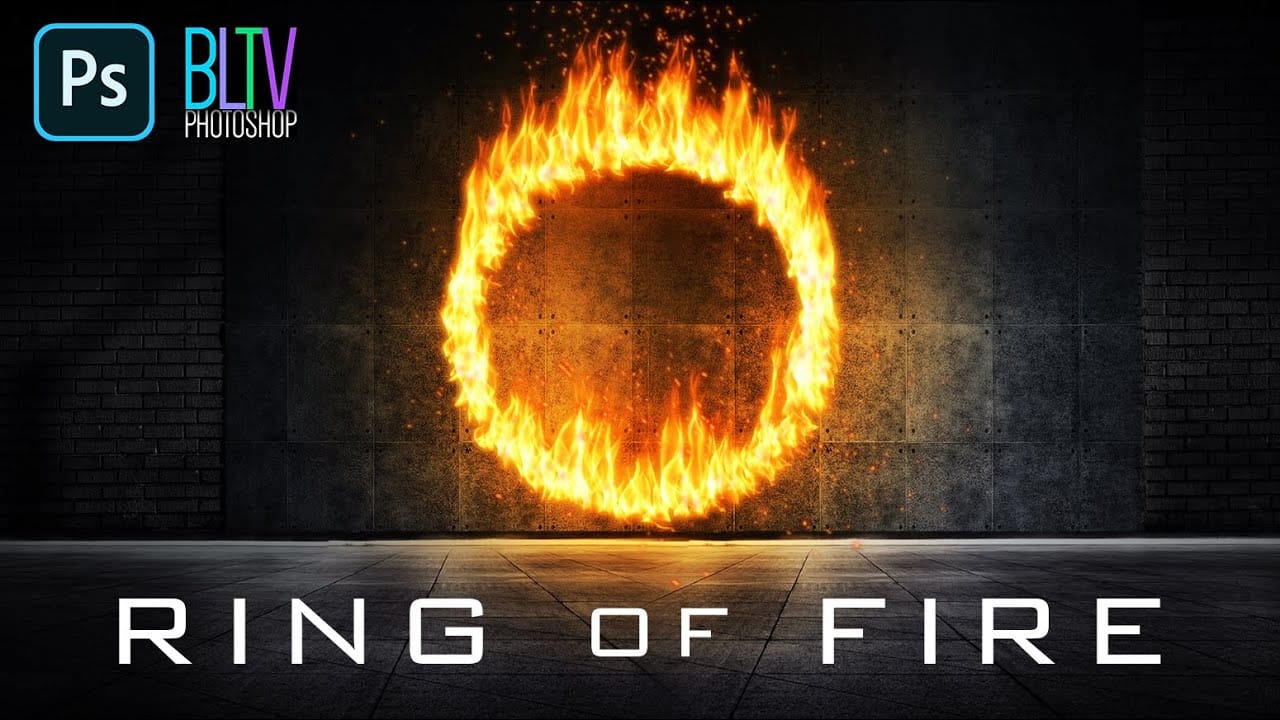
Create a Powerful Ring of Fire in Adobe Photoshop
Adding realistic fire effects can dramatically enhance digital art and photo manipulations, bringing a sense of energy and intensity to any scene. Mastering these techniques allows designers to transform ordinary images into captivating visual narratives.
This tutorial demonstrates how to construct a powerful ring of fire in Photoshop, covering essential steps from path creation to applying dynamic flame and spark effects. Viewers will gain practical skills for integrating complex visual elemen