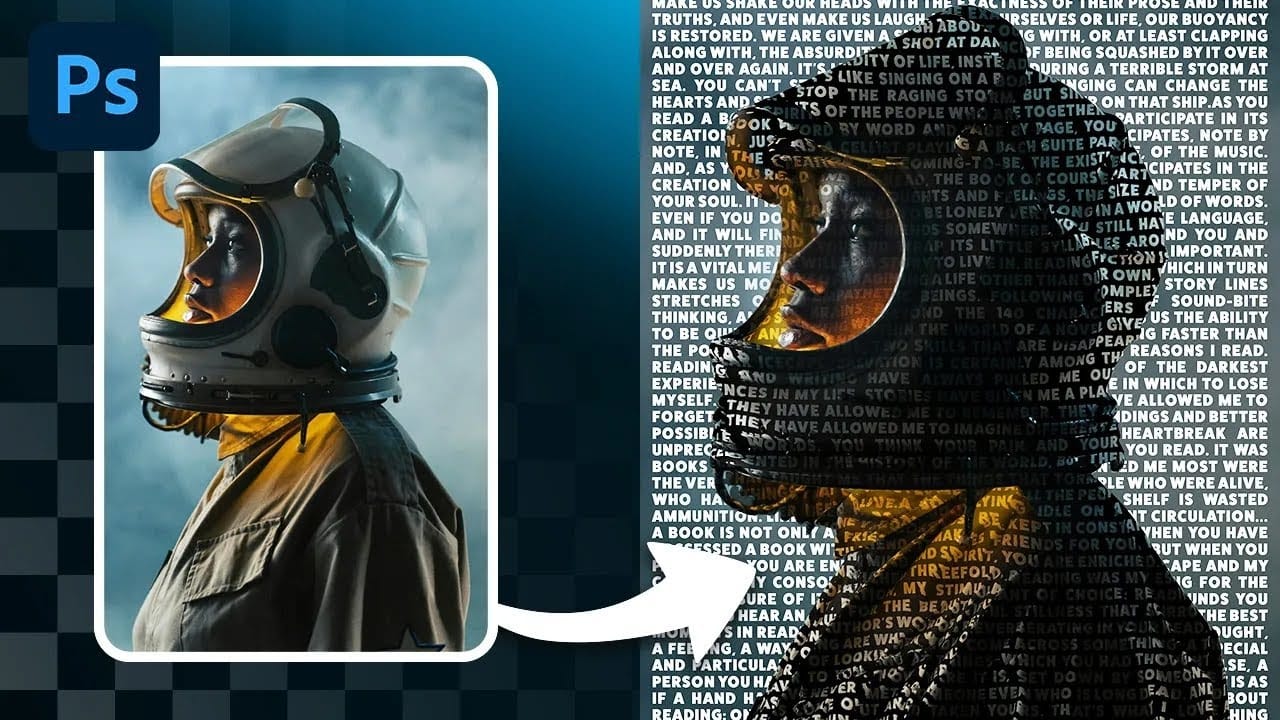
Transform an ordinary portrait into striking artwork where newspaper clippings define every shadow and highlight. This technique combines precise selections with creative layering to create a unique collage effect that maintains the subject's recognizable features.
The process involves separating a stylized portrait into distinct tonal levels, then replacing each level with newspaper imagery that matches the original lighting structure.
Watch the Video
Practical Tips for Newspaper Portrait Effects
Master this collage technique with these focused workflow strategies.
- Choose portraits with strong contrast and interesting facial features - subjects that naturally complement the newspaper aesthetic work best for this effect
- Apply the Cutout filter after desaturating to create distinct tonal levels, adjusting the number of levels and edge simplicity based on your portrait's complexity
- Uncheck Contiguous in the Magic Wand tool settings to select all matching tones throughout the image, not just connected areas
- Create separate layer groups for each tonal level, then add layer masks based on your Magic Wand selections to control newspaper visibility
- Use Command/Ctrl + I to invert newspaper layers for darker areas, and adjust levels to match the original tonal values of each selection
More Tutorials about Portrait Effects
Explore additional techniques for transforming portraits into artistic compositions.
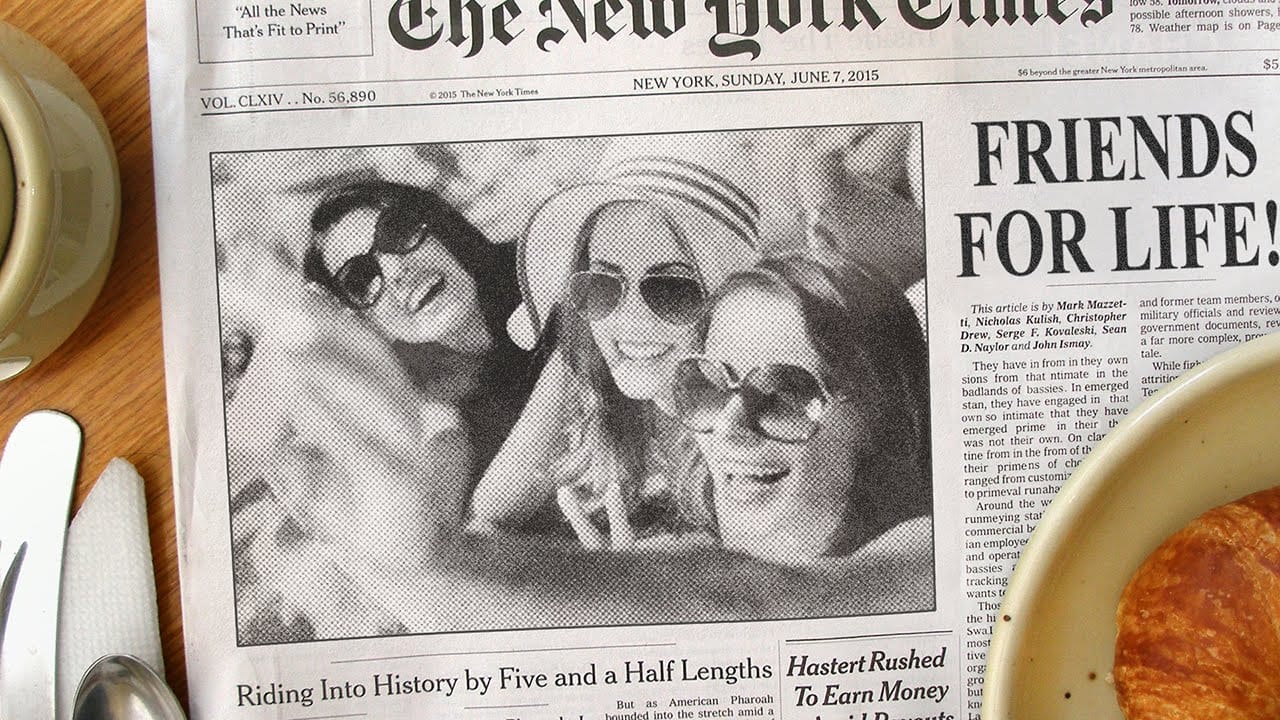
Create a Newspaper Photo Effect and Custom Headline in Photoshop
This tutorial explores how to give any digital photograph the distinctive appearance of a newspaper image within Adobe Photoshop. It delves into the specific techniques required to transform a standard photo into a vintage-style print, complete with a custom headline.
Viewers will learn the step-by-step process for converting a color or black-and-white photo into a halftone pattern, complete with a custom, editable headline, emphasizing non-destructive editing techniques for quick modifications
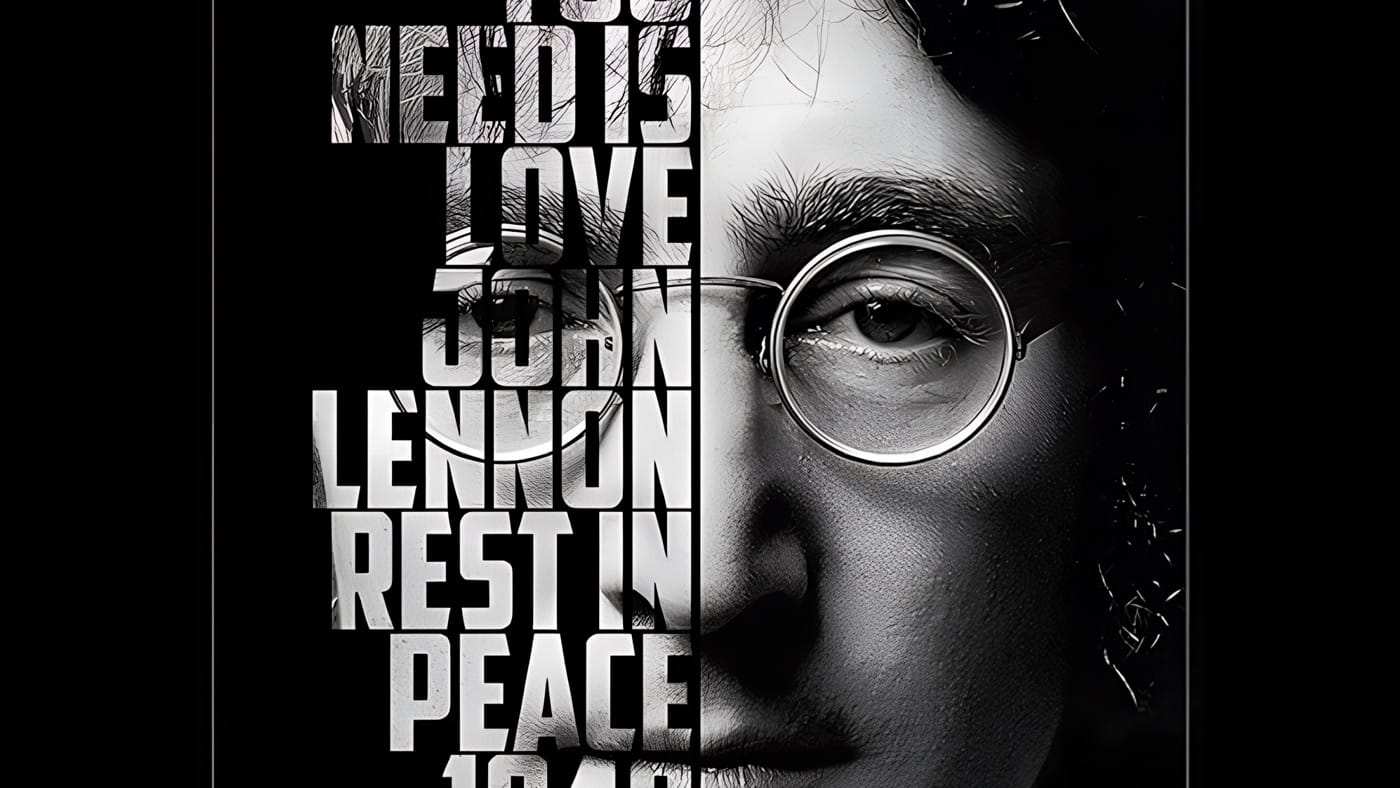
How to make a text poster of a portrait in Photoshop
One surprising technique in creating a text portrait poster involves generating a specific displacement map. The process requires saving a composite snapshot of the subject's head and shoulders as a separate file, then intentionally darkening its levels between 110 and 120.
This approach allows for the dynamic integration of lyrics, prose, or poetry, transforming a simple portrait into a visually rich and thematic artwork.
Watch the Full Tutorial
Practical Tips for Text Portrait Design
*

Create a cool text portrait in Photoshop
Learn how to create a striking typographic portrait poster in Adobe Photoshop, transforming a standard photo into an artwork where text defines the contours of the subject's face. You'll practice essential techniques: precise subject selection, background preparation, thoughtful text integration, and subtle refinements to enhance legibility and visual impact.
Watch the Video
Practical Tips for Text Portrait Posters in Photoshop
* Desaturate your base image to black and white early in the p
Create a Striking Text Portrait Poster in Photoshop
Transforming an ordinary portrait into a captivating text-based artwork presents a unique creative challenge in Photoshop. Often, the frustration lies in making text appear to organically wrap around a subject's contours rather than just sitting flat over the image. Achieving this seamless integration, especially when dealing with complex shapes, can feel like navigating an intricate technical puzzle.
This tutorial offers a clear pathway to mastering text portrait effects using advanced masking