How to Fix Color Fringing in Subject Cutouts Using Clipping Masks

How to Fix Color Fringing in Subject Cutouts Using Clipping Masks

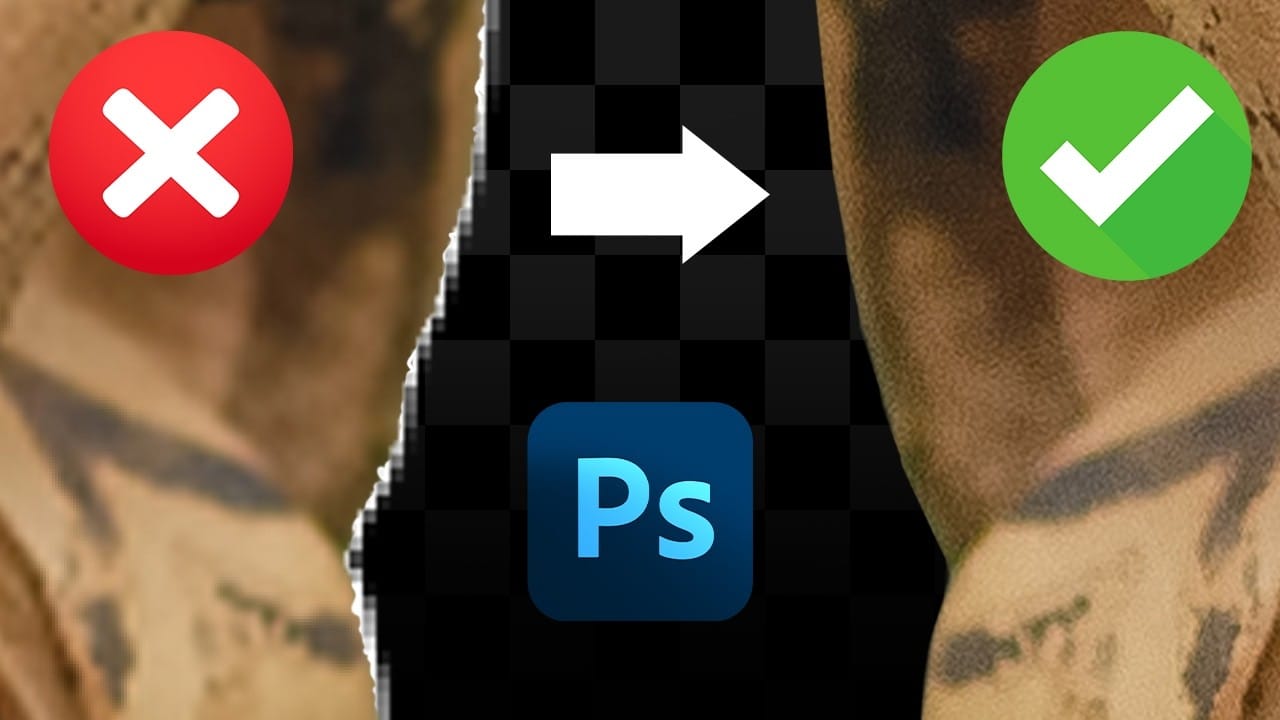
Perfect layer masks can still produce disappointing results when color fringing appears around hair and fur edges. This common problem isn't caused by poor masking technique—it's the original background bleeding through at the edges.

Clipping masks offer a powerful solution by allowing you to paint directly over these problem areas while automatically constraining your edits to the masked subject area. This technique works with any layer type and eliminates fringing without requiring AI tools.

Watch the Video

Video by PHLEARN. Any links or downloads mentioned by the creator are available only on YouTube

Practical Tips

Master these essential clipping mask techniques to eliminate fringing and create professional cutouts:

  • Create clipping masks by holding Alt/Option and clicking between layers—this constrains any edits to only the visible areas of the underlying layer
  • Use the Clone Stamp tool set to "Current and Below" to sample hair detail from inside the subject and paint it outward to the edges
  • Set Clone Stamp or Brush tool flow to 20% for gradual, natural-looking edge repairs that blend seamlessly
  • Sample hair colors with Alt/Option while using the Brush tool to paint new strands that match the subject's natural tones
  • Transform and warp cloned hair sections on separate layers to fit curved areas where direct cloning doesn't match the hair direction

Explore more advanced selection and edge refinement techniques for professional photo editing:

How to Use Select Subject for Background Removal and Edge Refinement
Background removal becomes effortless when you know how to use the right tools. AI-powered selection can instantly isolate subjects from their backgrounds, but the real skill lies in refining those selections to create professional results. This guide covers the complete workflow from initial selection to edge refinement, plus creative techniques for backgrounds, adjustments, and color changes that transform your images. Watch the Video Practical Tips Master these essential techniques to a
How to Cut Out a Person fast with Select & Mask in Photoshop
Removing backgrounds and isolating subjects quickly requires the right approach in Photoshop. Simple backgrounds make this process much easier, allowing automated tools to work more effectively than with complex scenes. This technique demonstrates a two-step workflow that combines quick selection with refined edge processing, making it ideal for portrait cutouts and background replacements. Watch the Video Practical Tips These essential tips will help you achieve cleaner selections and bet
How to Remove People From Photos in Photoshop: Easy and Advanced Methods
Removing unwanted elements from photographs, especially people, is a common task in digital image editing. Whether you're a professional photographer or an enthusiast, the ability to clean up a scene can transform an ordinary shot into a compelling visual, allowing the true subject or landscape to shine without distractions. This video explores two distinct approaches to achieve this in Photoshop. Viewers will discover how to use the automated features for simpler scenarios involving crowds, an
How to Remove Objects from Photos Using Photoshop's Remove Tool and Clean Plate Technique
Professional photo editing often requires removing unwanted objects while maintaining natural-looking results. The challenge lies in creating seamless edges and realistic backgrounds, especially around complex subjects like hair or intricate details. This tutorial demonstrates both basic object removal using Photoshop's Remove Tool and an advanced "clean plate" technique used in professional TV and movie poster production. Watch the Tutorial Essential Tips for Object Removal * Create a ne
How to Cut Out Complex Hair and Fur in Photoshop Without Fringing
Sharp, clean cutouts separate amateur photo edits from professional composites. Subjects with hair or fur challenge even experienced Photoshop users because standard selection tools often leave noticeable color fringing around delicate edges. This tutorial demonstrates a complete workflow that combines Photoshop's cloud-powered selection tools with manual refinement techniques to create flawless cutouts ready for any background. Watch the Tutorial Advanced Selection Methods for Complex Subj
How to select and remove specific colors from images in Photoshop
Color removal can transform any image, from isolating subjects against clean backgrounds to creating dramatic artistic effects. The challenge lies in making precise selections that capture only the colors you want to eliminate while preserving the integrity of your main subject. The Magic Wand tool offers powerful solutions for color-based selections, especially when combined with layer masks and selection refinement techniques. This approach gives you the control needed to achieve professional
How to Use Photoshop's Select Subject Tool for One-Click Selections
Complex selections in Photoshop just became effortless. The Select Subject tool uses advanced AI to automatically identify and select main subjects in images, even those with intricate details like bicycle spokes or hair. This tutorial demonstrates how to achieve professional-quality selections with a single click, saving hours of manual masking work. Watch the Video Practical Tips for Using Select Subject * Access Select Subject through the Contextual Task Bar for quickest results - find
How to Smooth Pixelated Selection Edges in Photoshop
Automatic selections in Photoshop often create jagged, pixelated edges that look unprofessional when zoomed in. These blocky borders can ruin an otherwise perfect cutout, making your work appear amateurish regardless of how carefully you made the initial selection. Three simple sliders in Photoshop's Select and Mask workspace can transform these rough edges into clean, professional results. Combined with selective blur techniques, these tools create realistic cutouts that blend seamlessly into
5 hidden Tips to make perfect Photoshop mask edges
Achieving flawless cutouts and seamless composites in Photoshop often depends on one crucial element: clean mask edges. Rough fringes, jagged lines, or semi-transparent halos can instantly undermine the realism of any image. This video demonstrates powerful techniques to transform your selections from good to truly professional. It provides five actionable tips, allowing you to meticulously refine and perfect your mask edges, ensuring your subjects blend effortlessly into any new background wit
How to make difficult selections easy in Photoshop
In this detailed Photoshop tutorial by TutVid, you will be guided through the process of making intricate selections within the software. The focus is on selecting a person and accurately cutting them out using the Select and Mask tool in a two-step approach. This method ensures precise selection edges, making it effective for both clean, straight lines and complex details such as hair. The tutorial aims to equip users with comprehensive knowledge about making refined selections in Photoshop, e

Get tutorials & freebies delivered to you.

Subscribe to the Photoshop Roadmap newsletter, a weekly roundup of new tutorials, insights and quality downloads, trusted by 6500+ readers.

You might also like

Create Realistic Rim Light Effects on Portraits in Photoshop

Rim lighting transforms ordinary portraits into dramatic, professional-looking images by adding bright highlights around the edges of your subject. This technique simulates light hitting the outer contours of a person, making them stand out from their background with a natural, glowing effect. The key to convincing rim light lies in...

How to Use Photoshop's Layer Cleanup Tool to Organize Messy Projects

Complex editing projects with Generative Fill and Expand often result in dozens of unnamed layers cluttering your workspace. The new Layer Cleanup tool automates the tedious process of renaming layers and removing empty ones, transforming chaotic layer panels into organized, manageable structures. This workflow improvement saves significant time during post-production...

How to Use Curves for Composite Color Matching in Photoshop

Curves adjustments are essential for making composite elements look natural and cohesive. Understanding how curves manipulate light values and color channels gives you precise control over matching different elements to their new backgrounds. The key to successful color matching lies in analyzing the color temperature and brightness relationships between your...

Create Beautiful Floral Oval Frames for Portraits in Photoshop

Transform ordinary portraits into elegant artwork with decorative floral oval frames that blend seamlessly with your subject. This technique combines traditional framing with digital floral elements, creating a painterly effect that's perfect for fine art prints and creative portraits. The process involves creating an oval cutout, adding custom...

How to Use Dynamic Text Shapes in Photoshop 2026

Photoshop 2026's Dynamic Text tool transforms text formatting with new shape options that go beyond traditional block layouts. The updated tool includes circular, arch, and bow configurations that automatically format text while maintaining professional typography standards. This feature eliminates the complex manual work previously required for curved text...

You’ve successfully subscribed to Photoshop Roadmap
Welcome back! You’ve successfully signed in.
Great! You’ve successfully signed up.
Success! Your email is updated.
Your link has expired
Success! Check your email for magic link to sign-in.