Give Your Photos a Color Ink Sketch Effect

Give Your Photos a Color Ink Sketch Effect

No matter how good the photos we take are, we always feel the urgent need to turn them into a drawing effect. The standard installation of Adobe Photoshop gives you a wide range of artistic plugins that have very specific names, but fail to deliver when used with the default settings.

πŸ‘οΈ
This is an older tutorial, and some external links or data sources mentioned may no longer be accessible. However, the content covers a unique topic and remains valuable despite any broken connections. We’ve kept the post intact for its educational and informative value.

That's the case of the Graphic Pen plugin. The resulting image is far from acceptable. Perhaps it looked good, many years ago, when it was part of the revolutionary Artistic Effects collection published by the now defunct, Aldus Software. But now, with the vast amount of artistic effects plugins and applications you should have to find a way to make the most of those plugins.

In this tutorial you will learn how to use the Photocopy and Sharpen More filters, and the Overlay blending mode to archieve colored ink drawings.
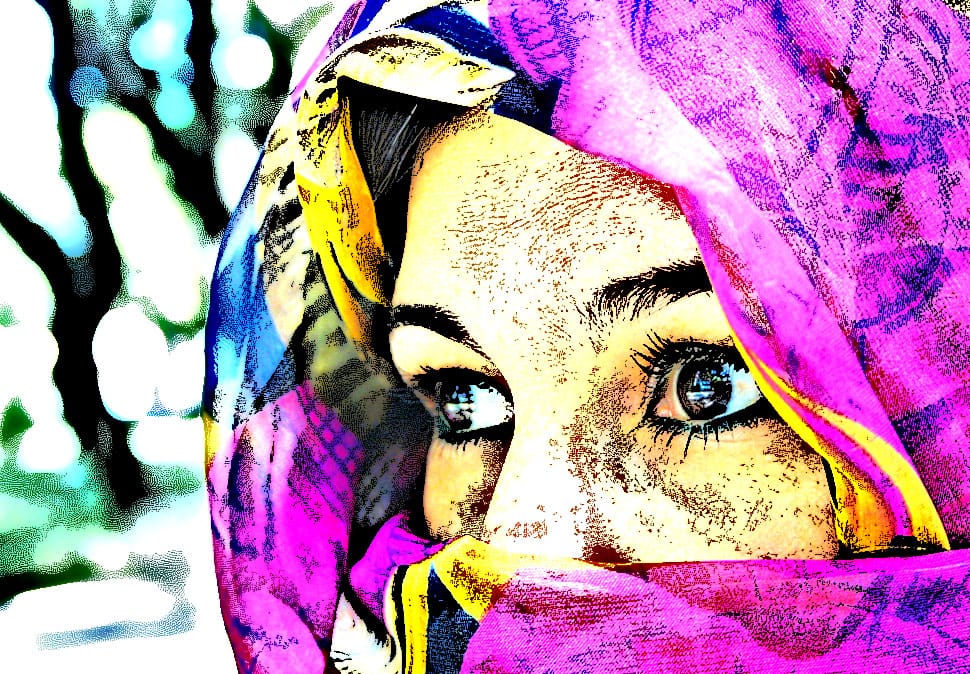
colorinklarge

Creating the ink sketch effect

For this tutorial we will use images from MorgueFile, an incredible repository of free images. Download and open this image named One Look by Luis C. Tejo from Argentina.
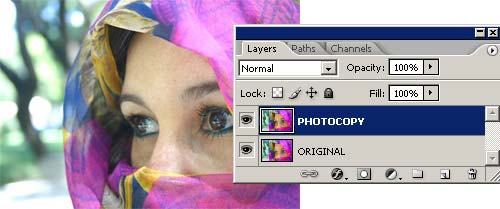
Step 1: Make a copy of the image in a different layer and select that layer.
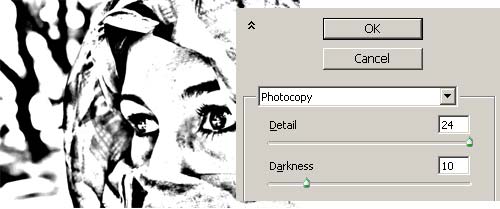
Step 2: Apply the Photocopy filter (FILTERS >> SKETCH >> PHOTOCOPY) to the topmost layer using the settings shown in the image above. Click on the image to se a larger version of the result.
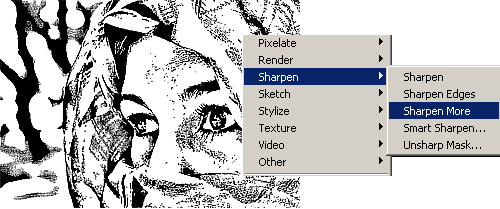
Step 3: Apply the Sharpen More filter (FILTERS >> SHARPEN >> SHARPEN MORE ) three times. Click on the image to se a larger version of the result.
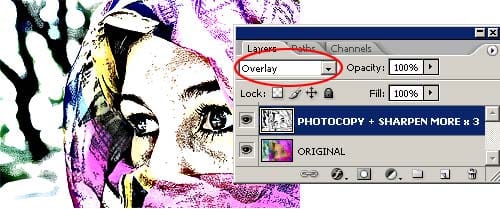

Step 4: Select Overlay as the blending mode of the layer. This will make the underlying colors visible. Click on the image to se a larger version of the result.
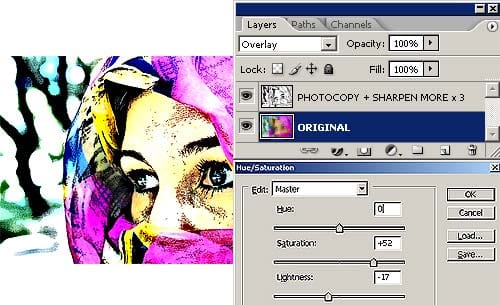

Step 5: Select the Original layer and modify the colors using the Hue/Saturation command (IMAGE >> ADJUSTMENTS >> HUE/SATURATION).

The final image will look like this one:

colorinklarge

A little explanation and other examples

The secret of this technique relies in the Photocopy filter. The settings used in the example outlined previously, shouldn't be used as is. You should try different Photocopy filter settings for each image, even for the same image when used at different resolutions. The same goes to the Sharpen More filter. If the Photocopy filter results are light and thin, then applying the Sharpen More filter once or twice will be enough. But if the results are dark and thick, then you should apply the Sharpen More filter three or more times. You will have to play with those settings for a while with each image.

The Overlay blending mode was chosen because the Multiply blending mode reveals all the imperfections and textures of the image below through the white areas of the sketched face.

The Overlay blending mode, instead, is like applying a Lighten and Darken blending modes at the same time. This results in a mixture of contrast and saturation increase.

In the end it doesn't matter why, the point is that it looks good in this case.

Other examples
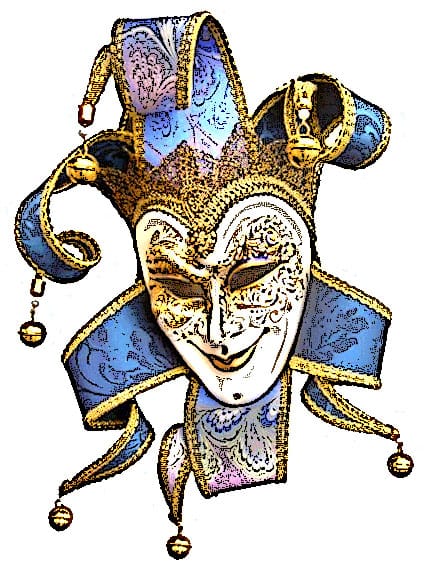
inkcolor1
inkcolor2
inkcolor3

Get tutorials & freebies delivered to you.

Subscribe to the Photoshop Roadmap newsletter, a weekly roundup of new tutorials, insights and quality downloads, trusted by 6500+ readers.

You might also like

Create an Old Masters Painting Effect from a Studio Portrait in Photoshop

Old Masters paintings capture drama and character through rich textures, dramatic lighting, and warm color palettes. By combining strategic dodging and burning with selective color adjustments and composite backgrounds, you can transform a simple studio portrait into a classical painterly masterpiece. This technique focuses on enhancing natural textures rather than...

How to Use AI Depth Masking in Photoshop for Targeted Subject and Background Editing

AI depth masking revolutionizes how you select and edit specific areas of your photos by analyzing three-dimensional space rather than shapes or colors. This powerful feature uses artificial intelligence to calculate depth layers, allowing you to brighten subjects while darkening backgrounds or apply targeted adjustments based on distance from the...

9 Lazy Photoshop Habits You Need to Break Right Now

Photoshop has added incredible AI features and smarter workflows over the last few years to save you time. Yet, you might still be stuck using clunky, manual workarounds you learned years ago. If you are constantly repeating tedious tasks, you are losing time and actively limiting the quality of your...

Professional Portrait Retouching with the B.S.T. Method in Photoshop

Professional portrait retouching requires artistic choices that automated tools can't make. The B.S.T. method breaks retouching into three focused steps: removing blemishes with precision, smoothing skin while preserving natural texture, and equalizing skin tones throughout the image. This systematic approach gives you complete control over every...

Create Motion Blur Light Effects in Photoshop

Transform ordinary portraits into dynamic, cinematic images by combining path blur effects with creative background textures. This technique creates the illusion of camera movement while maintaining focus on key elements like the subject's eyes, resulting in professional-looking motion blur effects that add energy and visual interest to static...

How to Paint Realistic Jewelry on Portraits in Photoshop

Adding painted jewelry to portraits transforms ordinary photos into fantasy portraits with ornate accessories that never existed. This digital painting technique uses careful layering, proper lighting, and realistic shadows to create convincing rings, earrings, and decorative headpieces. The method combines basic brush work with advanced blending techniques to build up...

You’ve successfully subscribed to Photoshop Roadmap
Welcome back! You’ve successfully signed in.
Great! You’ve successfully signed up.
Success! Your email is updated.
Your link has expired
Success! Check your email for magic link to sign-in.