Hair Selection in Photoshop: Modern AI Tools vs Traditional Techniques

Hair Selection in Photoshop: Modern AI Tools vs Traditional Techniques

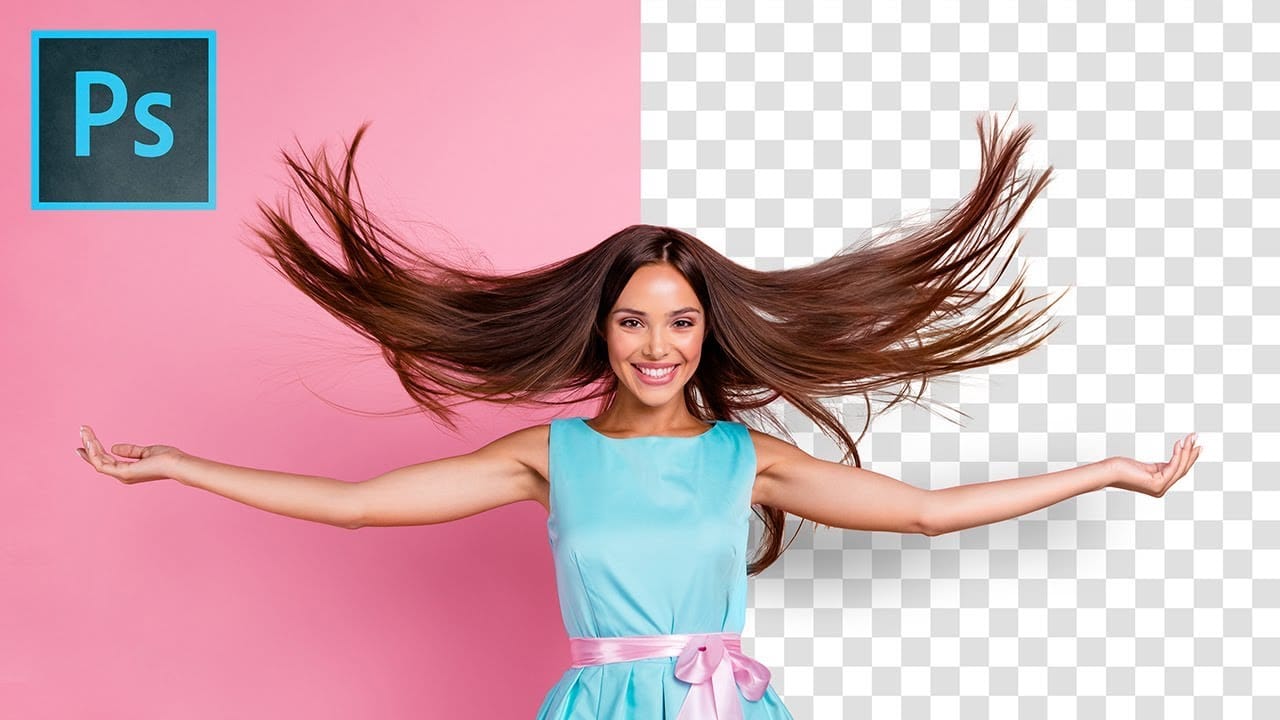
Hair selection remains one of Photoshop's most challenging tasks, even with AI-powered tools. The new Select Subject feature with cloud processing offers impressive results, but often sacrifices fine hair details that make selections look natural.

This comprehensive comparison reveals when to use modern AI tools versus traditional channel-based methods, and how combining both approaches creates the most accurate hair masks for professional composites.

Watch the Tutorial

Video by PiXimperfect. Any links or downloads mentioned by the creator are available only on YouTube

The Evolution of Hair Masking Technology

Photoshop's AI-driven Select Subject tool represents a significant leap forward in automated selection technology. The cloud-based processing analyzes millions of images to recognize hair patterns and create intelligent masks. However, this convenience comes with trade-offs that professional retouchers need to understand.

Traditional channel-based masking remains the gold standard for precision work. The red channel typically provides the highest contrast between hair and background, allowing for manual control over every strand. This method requires more time and skill but preserves the finest details that AI often overlooks.

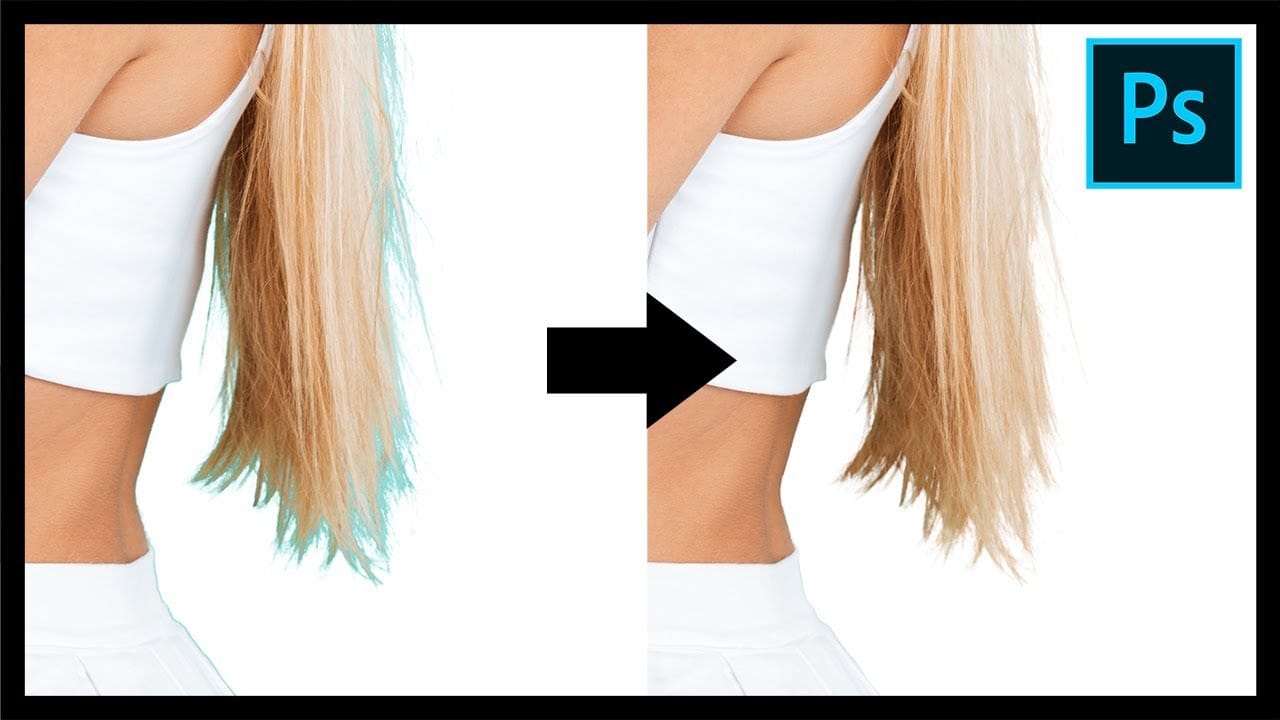
Complex backgrounds present the greatest challenge for any selection method. When dealing with busy or similarly-colored backgrounds, even the most advanced AI struggles to distinguish hair from environmental elements. Manual painting techniques become essential for achieving broadcast-quality results.

Practical Tips for Hair Selection

  • Enable cloud processing in Photoshop preferences under Image Processing to access the most accurate AI selections
  • Check the red channel first for traditional masking, as it typically offers the best contrast between hair and background
  • Use Overlay blend mode when painting mask refinements with black to avoid affecting pure white areas while cleaning up gray zones
  • Apply Screen blend mode to the subject layer when dealing with dark edge fringing from the original background
  • Create custom hair brushes for manual painting when backgrounds are too complex for automated methods

More Tutorials about Hair Selection

Explore additional techniques for mastering complex hair selections in Photoshop.

How to Cut Out Hair in Photoshop
This Photoshop tutorial by Phlearn will teach you some interesting techniques for cutting out hair from a background. The process involves using the color channel with the highest contrast to create a selection, then applying a layer mask to isolate the hair. The tutorial also covers how to handle fringing around the hair using clipping masks and tools like the brush and clone stamp to ensure a natural look. This method is particularly effective with dark hair against a light background or vice
Add Shine, Color and Volume to Hair in Photoshop
The author, Aaron Nace from Phlearn, shares his expertise in this tutorial. Hair can be a tricky element to retouch and enhance, but there are some quick tricks to give it more volume and vibrant color. Nace demonstrates how to use the Liquify Tool to increase the volume of hair. This technique allows you to manipulate the strands and add more body and movement. Additionally, Nace shares one of his favorite methods for coloring hair - the Gradient Map. This technique provides a seamless and nat
Precisely Cut Out Hair Using Color Range in Photoshop!
Mastering the Right Way to Use Color Range for Hair Masking in Photoshop! In this comprehensive guide, you'll discover how to accurately select and eliminate the background, even around challenging hair textures and styles. We will delve into crucial tips and techniques to enhance the quality of the mask so that it seamlessly blends with your new background. Throughout this tutorial, we will also focus on effectively removing any unsightly edge fringes or halos that may occur, ensuring you achi
Remove Fringes After Cutting Out Hair in Photoshop
This tutorial by PiXimperfect addresses the crucial challenge of removing edge fringes that frequently arise during hair masking in Photoshop, a common issue that can compromise the integrity of composite images. For design professionals, achieving a flawless finish is paramount, and understanding how to eliminate these distracting color edges is essential for creating high-quality visuals. In this guide, the focus is on utilizing Clipping Masks to enhance hair selection, allowing for a more pr

Get tutorials & freebies delivered to you.

Subscribe to the Photoshop Roadmap newsletter, a weekly roundup of new tutorials, insights and quality downloads, trusted by 6500+ readers.

You might also like

Create a Liquid Gel Logo Effect in Photoshop

Liquid gel effects transform flat logos into dimensional, glossy designs that appear to bubble and flow. This technique uses multiple layer styles and strategic duplication to build depth, creating surfaces that catch light like thick, viscous liquid. The method combines gradient overlays, bevel effects, and inner glows across several duplicated...

How to Use Photoshop's AI Sharpen Filter and When It's Worth the Cost

Photoshop's new AI Sharpen filter promises one-click sharpening powered by advanced algorithms. This tool uses technology from Topaz Labs to enhance image details without manual adjustments, but it comes with a significant cost in credits. Understanding when to use this automated approach versus traditional methods like the High...

How to Use Harmonize and Generative Upscale Tools in Photoshop

Creating realistic photo composites requires matching lighting and color between different images—a traditionally time-consuming process. Two new AI-powered tools in Photoshop solve these challenges: Harmonize automatically adjusts lighting and shadows to blend subjects seamlessly into backgrounds, while Generative Upscale enlarges small images without losing detail. These tools work together...

How to Create Convincing Scale Effects in Photoshop Composites

Creating believable scale effects requires more than simply resizing objects—it demands understanding how light, perspective, and atmospheric conditions change with distance. When tiny subjects appear massive or giant objects seem miniature, viewers should feel the illusion is completely natural. This technique combines careful attention to lighting consistency, depth cues,...

How to Flip Images Horizontally and Vertically in Photoshop

Flipping images is a fundamental technique that can dramatically change the composition and impact of your photos. Whether you need to correct the orientation of a subject, create mirror effects, or simply improve the visual flow of your design, knowing how to quickly flip images both horizontally and vertically gives...

How to Use Nano Banana Pro in Photoshop for Background Replacement and Scene Changes

Nano Banana Pro transforms how you place subjects into new environments in Photoshop. This advanced AI model maintains perfect subject likeness while seamlessly integrating them into any background you can imagine. The tool excels at matching lighting, preserving facial features, and even adapting clothing to complement new scenes, all through...

You’ve successfully subscribed to Photoshop Roadmap
Welcome back! You’ve successfully signed in.
Great! You’ve successfully signed up.
Success! Your email is updated.
Your link has expired
Success! Check your email for magic link to sign-in.