How to Create a Liquid Acid Melting Effect in Photoshop

How to Create a Liquid Acid Melting Effect in Photoshop

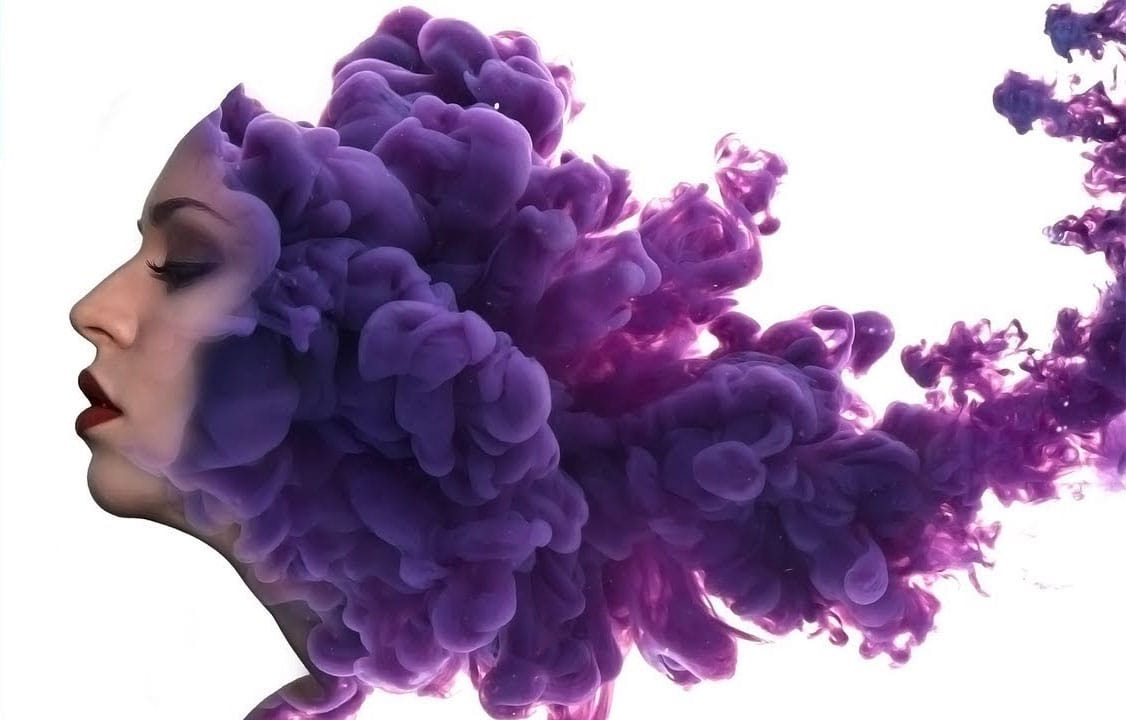
The liquid acid effect transforms ordinary portraits into surreal, otherworldly visuals that seem to melt and flow across the canvas. This distinctive distortion technique creates an organic, fluid appearance that suggests corrosive forces reshaping reality itself.

This tutorial demonstrates how to achieve this striking visual using Photoshop's smudge tool combined with strategic color grading and noise textures to enhance the melting illusion.

Watch the Video Tutorial

Video by P A N T E R. Any links or downloads mentioned by the creator are available only on YouTube

The Psychology of Distortion Effects

Liquid distortion effects tap into our fascination with transformation and decay. The melting aesthetic suggests powerful forces at work, whether supernatural, chemical, or psychological. This visual language has deep roots in surrealist art and horror imagery, where distorted human features represent altered consciousness or external threats.

Digital artists often use these techniques to convey themes of change, vulnerability, or otherworldly influence. The organic flow patterns mimic natural processes like erosion or dissolution, creating an unsettling but compelling visual narrative. The effect works particularly well on facial features because viewers instinctively recognize the distortion as unnatural.

Modern applications range from album covers and movie posters to social media art and conceptual photography. The technique bridges traditional artistic concepts with digital manipulation capabilities, allowing precise control over what appears to be chaotic transformation.

Essential Tips for Liquid Acid Effects

  • Use images sized around 1080p for optimal smudge tool performance and processing speed
  • Set the smudge tool to zero hardness and 90% strength for smooth, flowing distortions
  • Add noise layers with screen blend mode to create realistic texture variations in smooth areas
  • Apply gradient maps with yellow, red, purple, and gray stops to achieve the characteristic acidic color palette
  • Use layer masks to selectively remove unwanted distortion areas while preserving important details

Explore more creative distortion and surreal portrait techniques.

Create a surreal ink in water portrait effect in Photoshop
This tutorial by Photoshop Tutorials Channel will show you how to create surreal portraits. Learn how to seamlessly blend a human face with an "ink in water" stock photo, crafting a dreamlike and captivating image. The video will guide you through using layer masks and filters to achieve a harmonious fusion, where the textures of the ink and the details of the face intertwine for a truly surreal effect. Unleash your creativity and explore the possibilities of photo manipulation in this unique t
How to make stuff float in Photoshop
You can easily make stuff float on photos by searching for a stock image, cutting the object and pasting it in a layer of your psd file. There are millions of drawbacks in using that technique, being the correct lighting and the getting the exact object the main ones. In this video tutorial by Patrick McKinnon, you will learn, in detailed steps, how to make a photoshoot of your object and how to apply some Photoshop magic to create the perfect floating object scene, with the perfect lighting an
Create Creepy Lighting and Mysterious Atmosphere Effects in Photoshop
This tutorial offers a clear guide on creating eerie lighting and mysterious atmospheric effects in Photoshop. You will learn how to enhance your photos by manipulating different lighting techniques. The author explains the process step by step, starting with how to select the right colors and apply various effects to a chosen stock image. Each technique is thoroughly detailed, making it easy for you to follow along. The end results are impressive, showcasing how these methods can transform an
How to create a dripping paint text effect in Photoshop
In this tutorial, you will discover how to create a striking paint-dripping effect using Adobe Photoshop. This guide breaks down the process into clear, manageable steps, making it easy for you to follow along, regardless of your skill level. First, you will start by preparing the base image, where you will add the paint element. Then, you'll learn how to manipulate and position the paint to achieve the desired dripping effect. Each step includes helpful tips and tricks to enhance your work. F

Get tutorials & freebies delivered to you.

Subscribe to the Photoshop Roadmap newsletter, a weekly roundup of new tutorials, insights and quality downloads, trusted by 6500+ readers.

You might also like

When to Use Saturation vs Vibrance for Better Color Enhancement

While vibrance gets praised for being "gentler" than saturation, the reality is more nuanced. Saturation works like a universal volume knob, boosting all colors equally, while vibrance acts like a smart equalizer, selectively enhancing less saturated areas first. Understanding when each approach serves your creative vision makes the...

How to Check Your Generative Fill Credit Balance in Photoshop

Keeping track of your AI credit usage becomes essential when working with premium generative features. Understanding your remaining balance helps you budget your edits and avoid unexpected interruptions during important projects. The credit system divides features into standard tools (like basic generative fill) that don't consume credits, and...

How to Create Realistic Depth Blur Effects in Photoshop

Creating professional depth of field effects can transform flat images into dynamic photographs with natural-looking focus transitions. Two powerful methods in Photoshop offer different advantages: Neural Filters provide automated depth detection with atmospheric effects like haze, while Camera Raw Filter delivers precise manual control with customizable bokeh shapes. Both techniques...

Three Professional Methods to Fix White Balance in Photoshop

Color casts can ruin even the best photographs, making whites appear yellow, blue, or green instead of neutral. Poor white balance destroys the natural look of your images and creates an unprofessional appearance that's immediately noticeable to viewers. These three techniques provide increasingly precise control over white balance...

Creating Dark Moody Wildlife Photo Edits in Photoshop

Dark, moody wildlife photography transforms ordinary animal portraits into dramatic, atmospheric pieces that capture the mystery and power of nature. This editing approach combines strategic lighting placement, careful color grading, and atmospheric effects to create compelling images that draw viewers into the scene. The workflow begins with essential noise reduction...

How to Create Professional Photo Composites in Photoshop

Creating compelling photo composites requires more than simply placing images together. This comprehensive tutorial demonstrates how to blend multiple elements seamlessly, from matching lighting and color to painting realistic shadows and highlights. The project showcases a dramatic scene inspired by Stranger Things, combining buildings, characters, and atmospheric effects with precise...

You’ve successfully subscribed to Photoshop Roadmap
Welcome back! You’ve successfully signed in.
Great! You’ve successfully signed up.
Success! Your email is updated.
Your link has expired
Success! Check your email for magic link to sign-in.