Horror and special effects imagery capture attention through realistic, unsettling details that make viewers look twice. This tutorial demonstrates how to transform an ordinary arm photograph into a convincing severed limb effect using strategic cutting, cloning, and texture work.
The technique combines precise selection tools with realistic flesh textures and shadow work to create a disturbing yet impressive visual effect.
Watch the Video
Practical Tips for Creating Realistic Severed Effects
These techniques help achieve convincing horror effects through careful attention to shadows, textures, and color adjustments:
- Use the pen tool for precise arm selection rather than quick selection tools to maintain smooth, professional edges
- Clone sheet textures over the original arm area before revealing the severed effect to create realistic background continuity
- Apply cloud brush textures with color burn blending mode to create authentic torn flesh appearances
- Add shadow layers beneath stringy flesh elements and blur them slightly for realistic depth
- Use the burn tool on midtones and shadows to darken exposed meat areas without over-processing the skin
Related Articles and Tutorials about Special Effects
Explore more advanced Photoshop techniques for creating dramatic visual effects and transformations.
Skin tearing effect in Photoshop
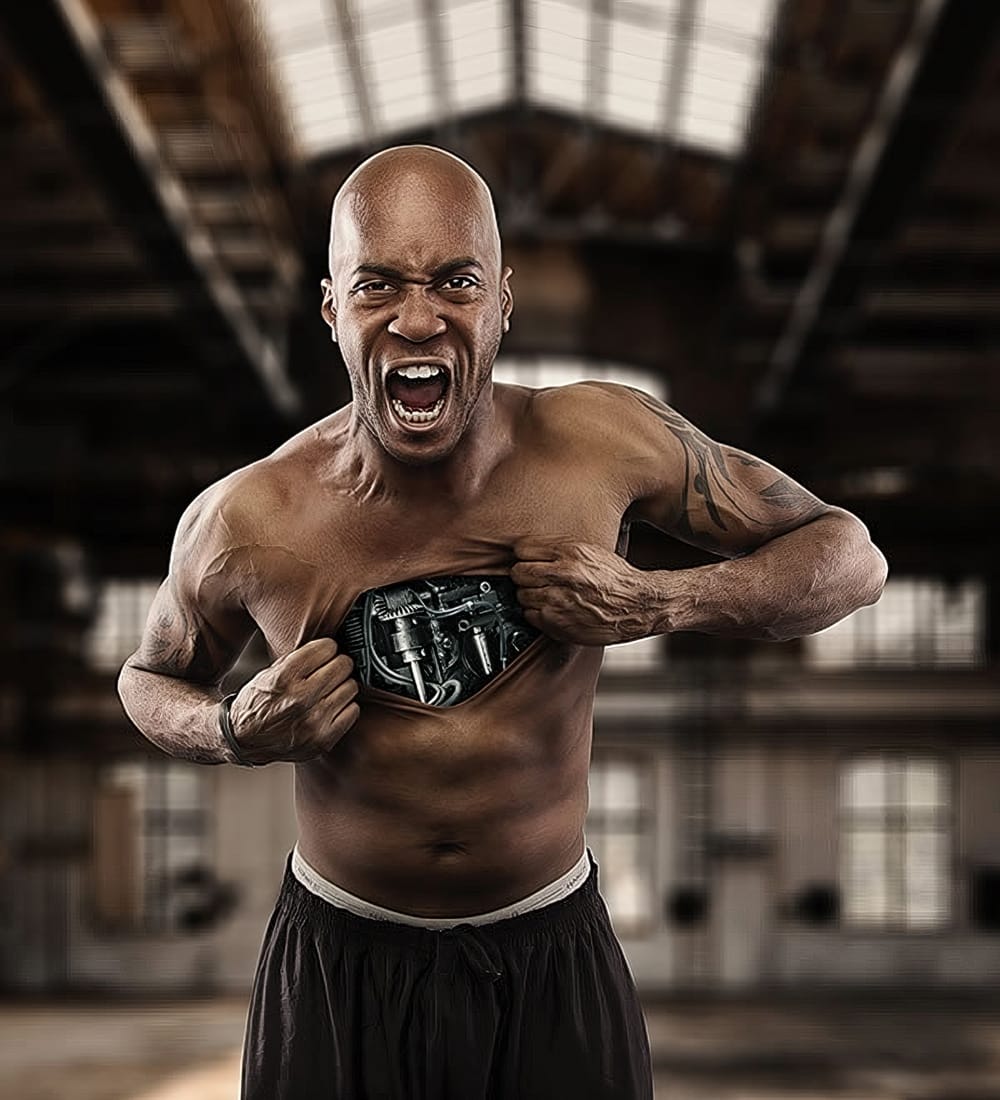
In this tutorial, you will learn how to create a captivating skin tearing effect in Photoshop. The tutorial will guide you through the process of transforming a subject into a robot, where the person rips open their chest with their hands to reveal the mechanical body within.
Not only will you master the Photoshop techniques, but you will also discover the secrets behind the lighting and photography setup. By the end of this review, you will have the skills to produce a visually striking and be
How to Cut Out Hair in Photoshop
This Photoshop tutorial by Phlearn will teach you some interesting techniques for cutting out hair from a background.
The process involves using the color channel with the highest contrast to create a selection, then applying a layer mask to isolate the hair. The tutorial also covers how to handle fringing around the hair using clipping masks and tools like the brush and clone stamp to ensure a natural look. This method is particularly effective with dark hair against a light background or vice

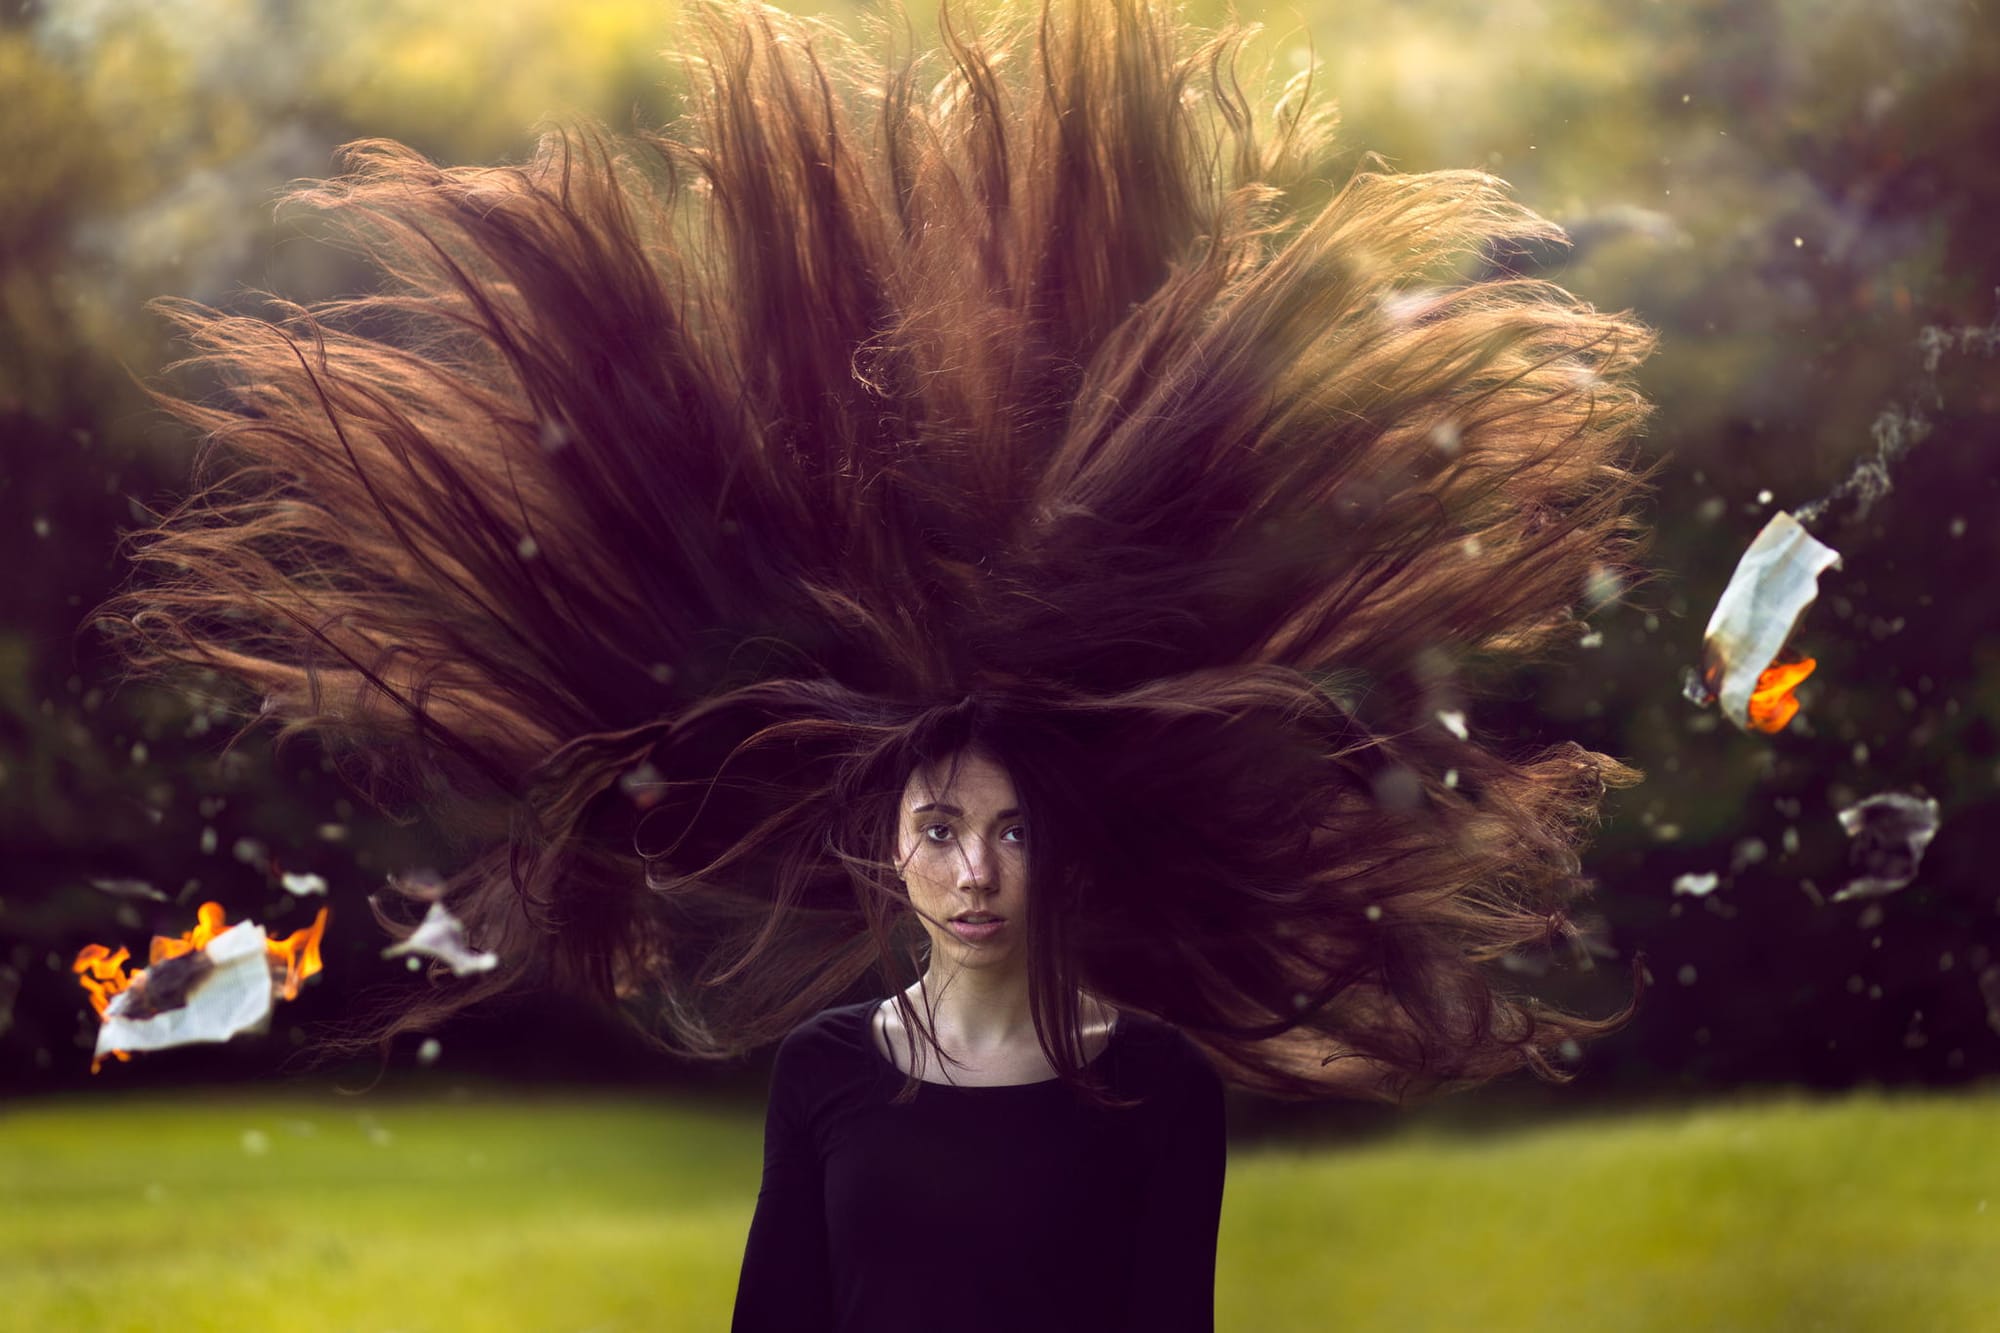
How to create a dramatic hair composition in Photoshop
This tutorial by Adrian Chudek on 500px ISO details how to create dramatic, long-haired portraits using Photoshop.
Start by choosing a suitable location and setting up your camera on a tripod. Direct the model to toss her hair while shooting multiple frames to capture hair from all angles. Photograph the model's face separately with controlled hair placement. Add an element like burning paper for dynamic effect, capturing various positions with consistent camera settings. In post-processing, me
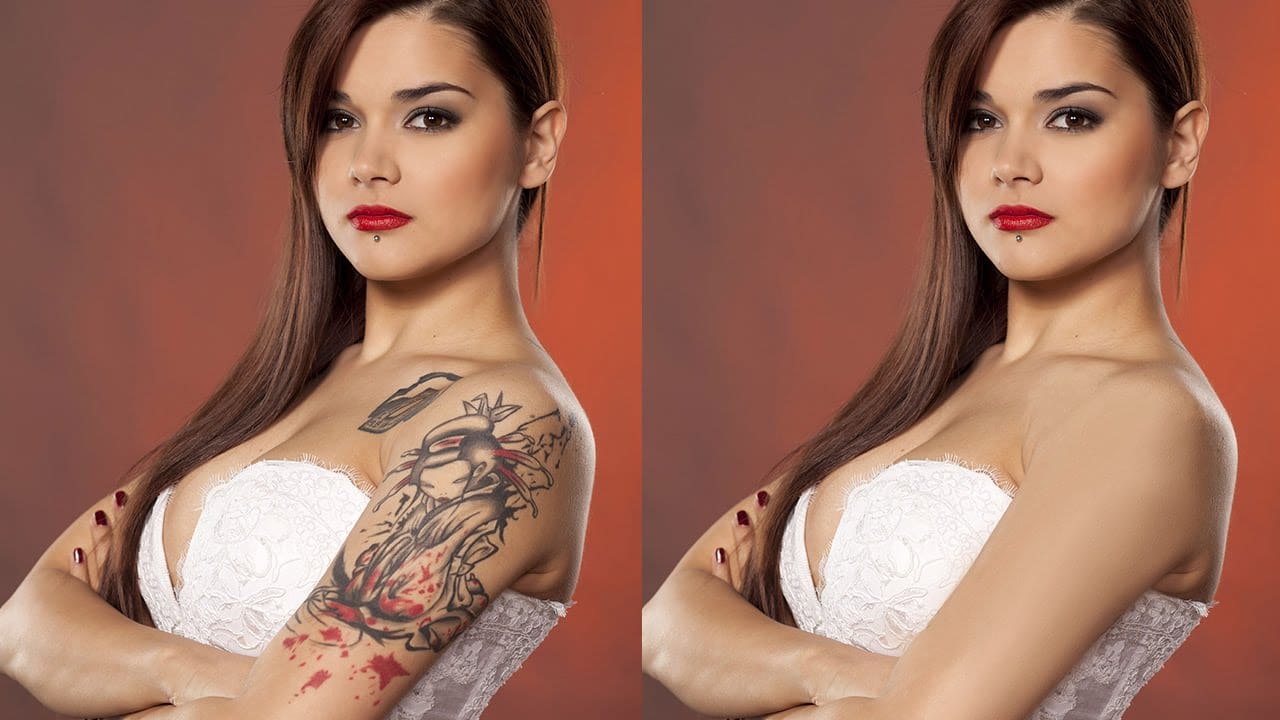
How to Remove a Tattoo in Photoshop
According to the author, Aaron Nace from Phlearn, removing a tattoo from an image using Photoshop is a more challenging task than simply retouching blemishes or other artifacts. While Photoshop offers excellent retouching tools, removing a tattoo can be more complex as it typically covers a larger area of the skin.
In this tutorial, Aaron demonstrates how to effectively remove a tattoo from a person's image in just a few straightforward steps using Adobe Photoshop. The author's approach aims to