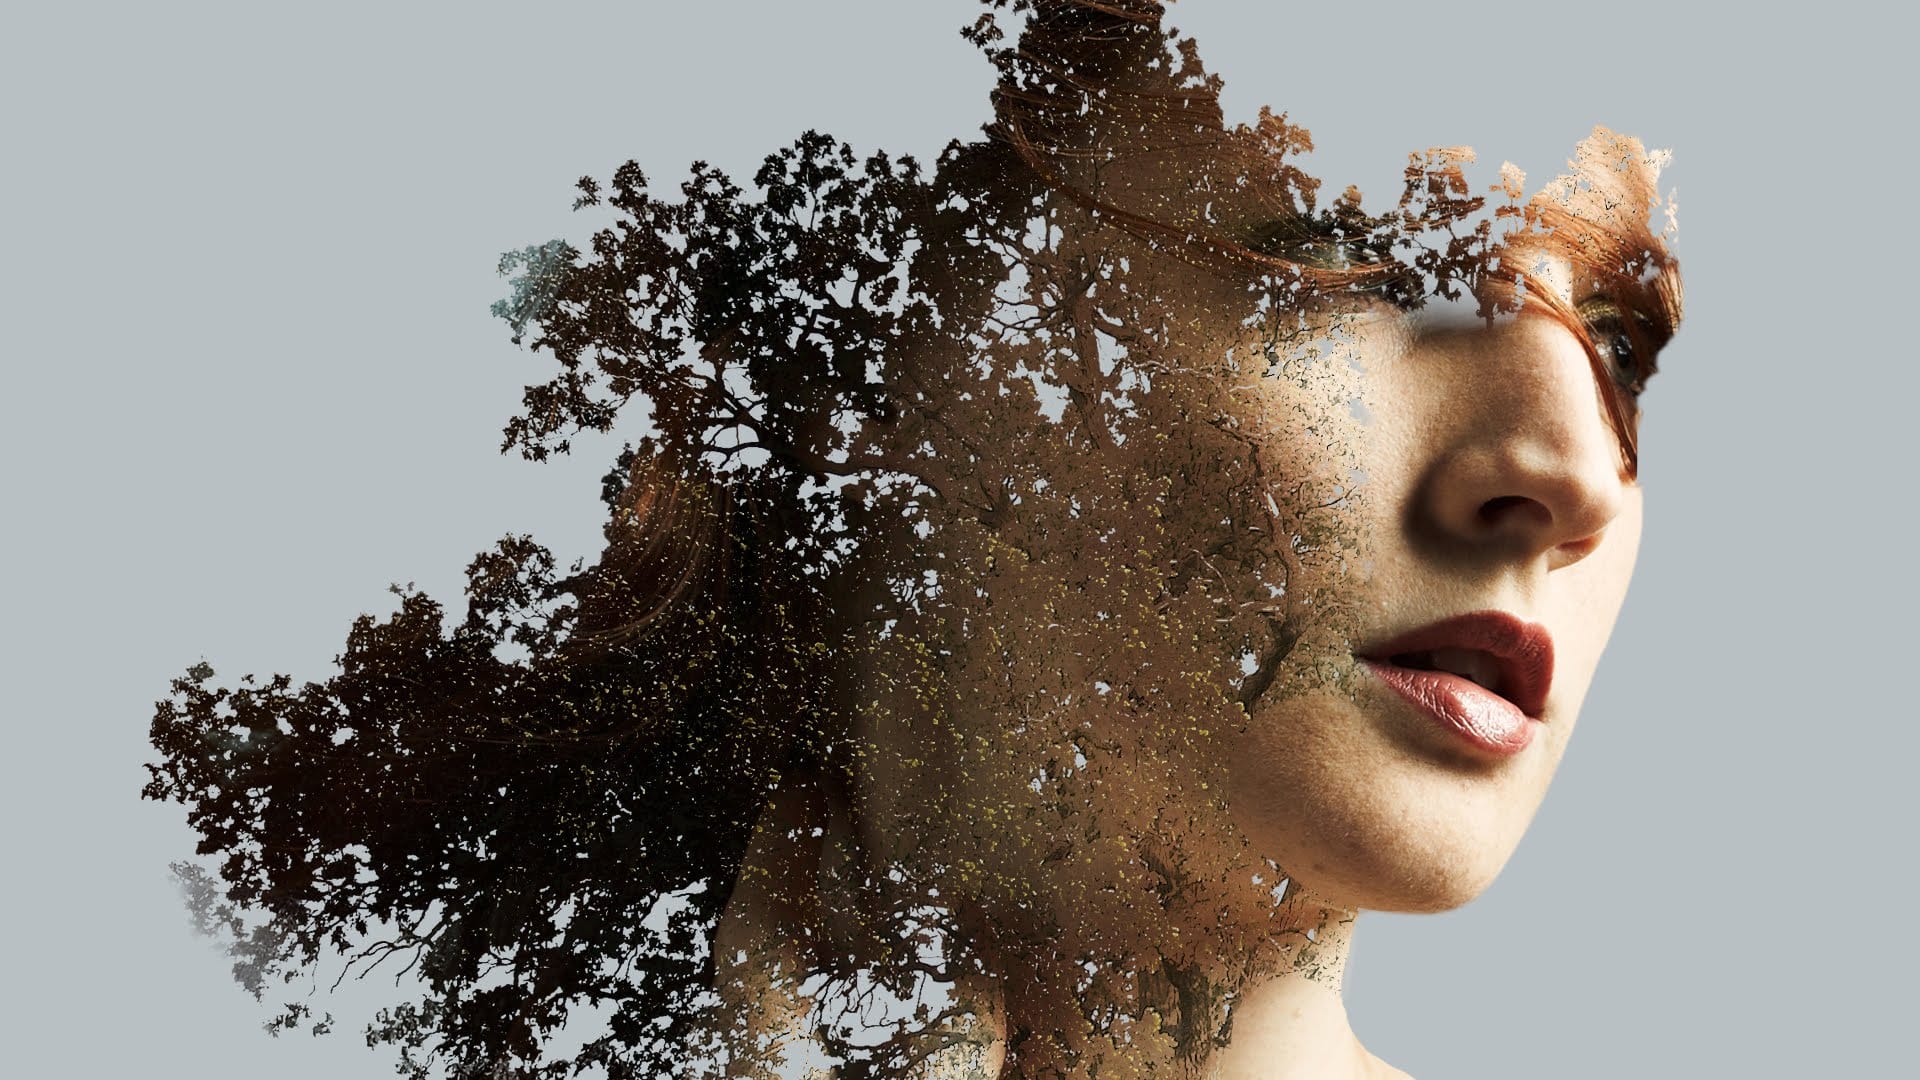
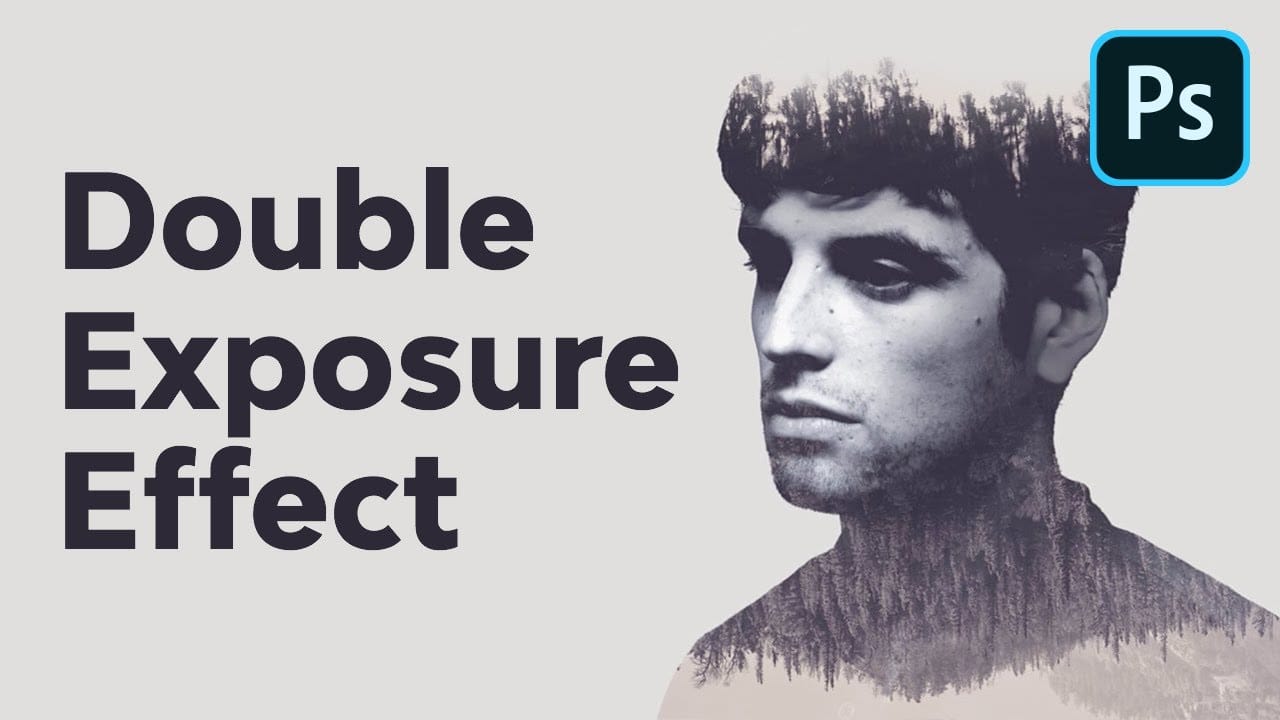
Creating custom brushes from photographs opens up new possibilities for double exposure effects. Instead of settling for basic silhouettes, you can craft organic edges with intricate details like tree branches that seamlessly blend into your subject.
This technique combines traditional double exposure methods with custom brush creation, giving you complete control over the final silhouette and texture integration.
Watch the Video
Practical Tips
These essential techniques will help you create professional-looking double exposure effects with custom brushes:
- Use levels adjustment to create strong black and white contrast before defining your brush - gray areas won't give you clean transparency
- Apply a white gradient to fade the edges of your brush source image to avoid harsh, blocky edges in your final brush
- Use bracket keys to quickly resize brushes and shift + bracket keys to rotate them for varied, non-repetitive results
- Create brushes at high resolution to maintain quality when scaling - the tutorial creates a 4800-pixel brush for maximum flexibility
- Convert your texture layers to smart objects before applying blend modes to maintain editability while preserving the screen effect
Related Articles and Tutorials
Explore more double exposure techniques and creative effects with these comprehensive tutorials.
Beautiful double exposure effect in Photoshop
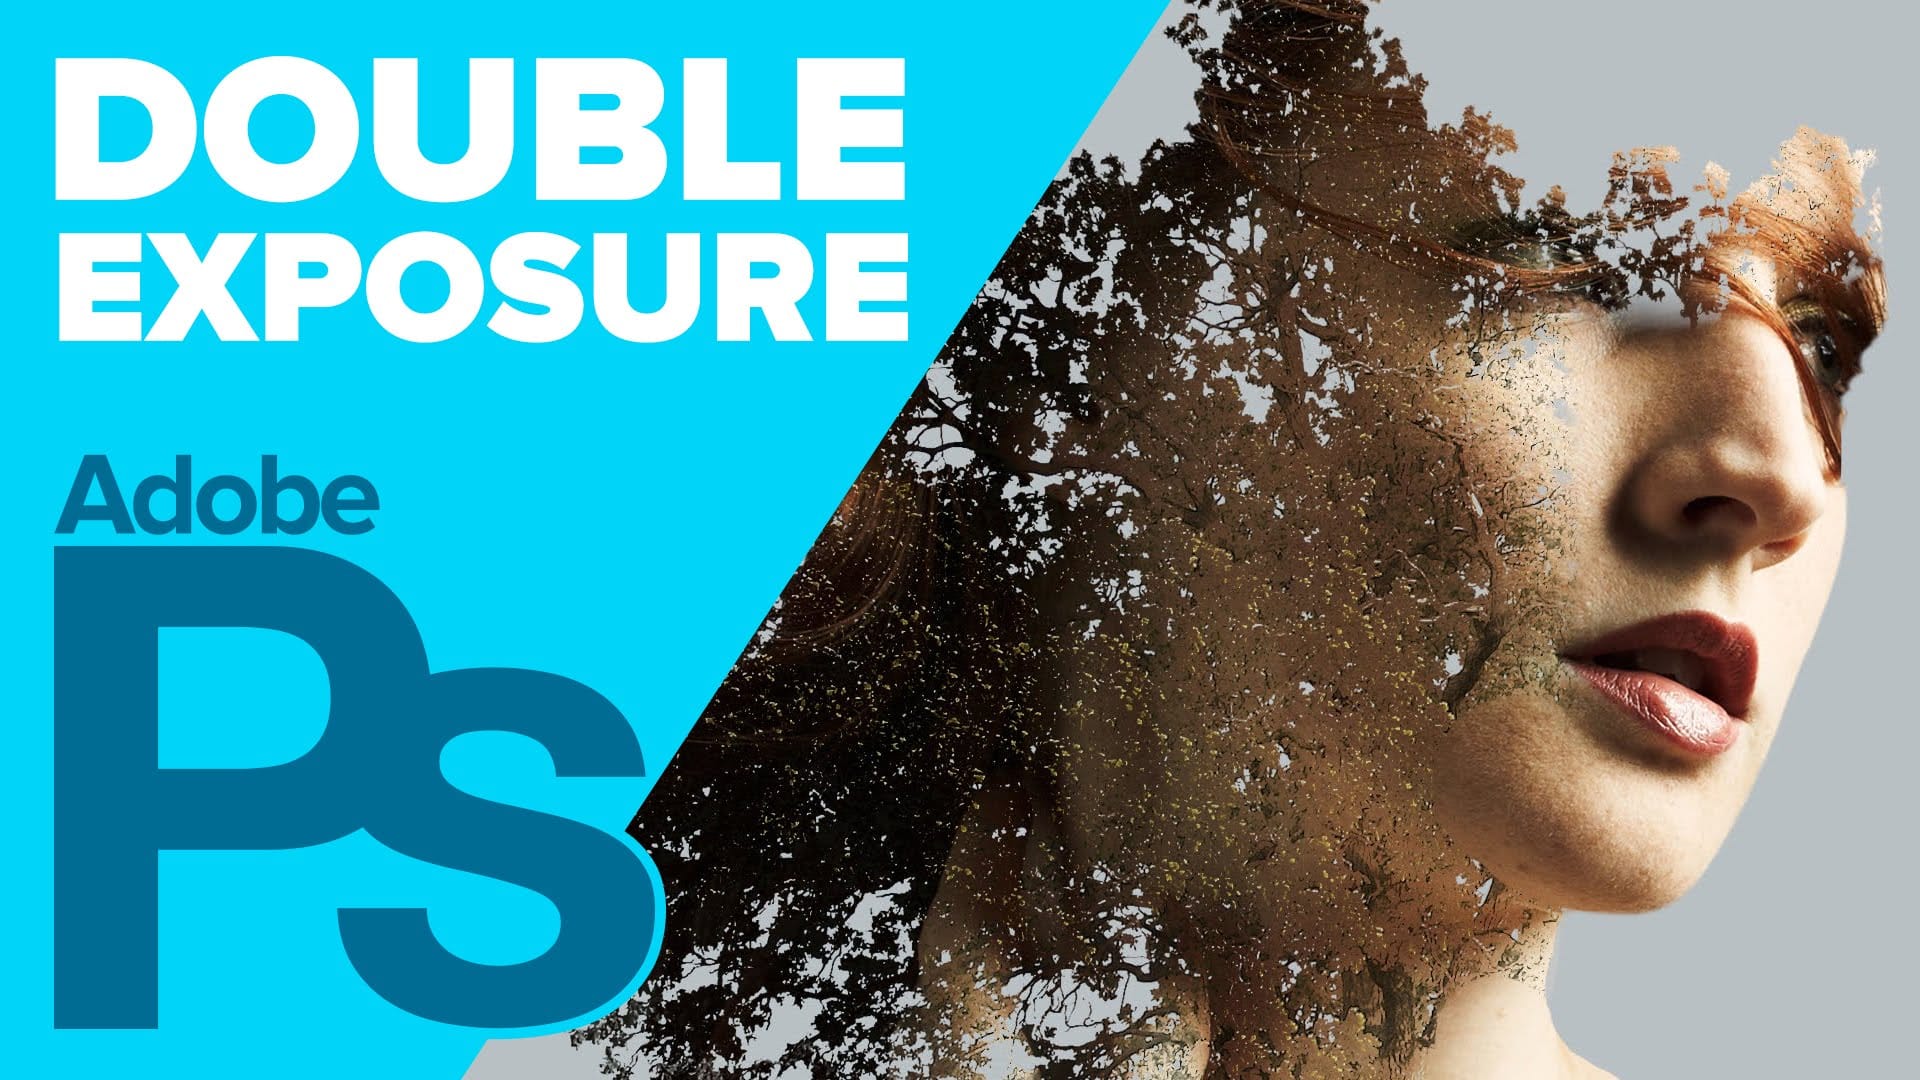
Double exposure creates striking artistic portraits by blending two photographs into one seamless image. This classic photography technique transforms ordinary portraits into surreal compositions where subjects merge with landscapes, textures, or abstract elements.
This tutorial demonstrates how to recreate the traditional film photography effect digitally using selection tools, layer masks, and blending modes in Photoshop.
Watch the Tutorial
Key Techniques for Double Exposure
Master these
Create a double exposure effect in Photoshop
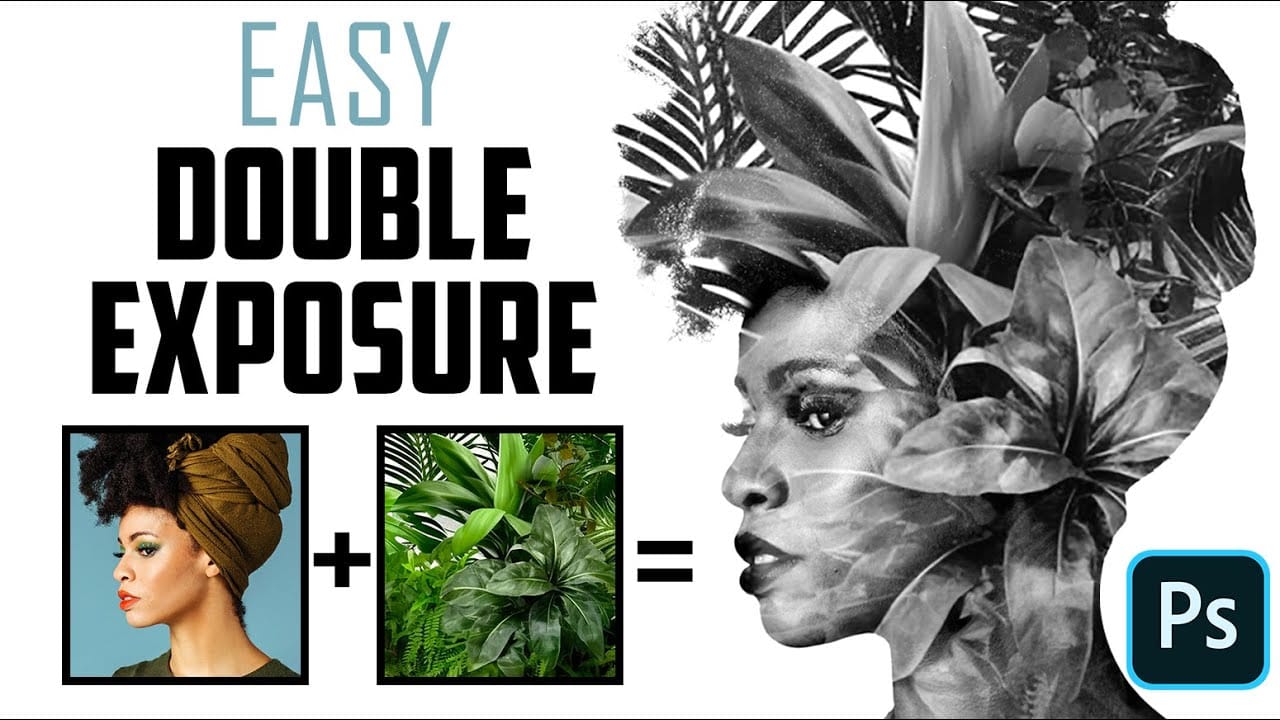
Double exposure effects blend two images to create striking artistic compositions where textures and subjects merge seamlessly. This technique transforms ordinary portraits by layering natural elements like leaves or cityscapes directly onto faces and silhouettes.
The process combines masking, blending modes, and layer adjustments to achieve professional-looking results that would traditionally require specialized camera techniques.
Watch the Tutorial
Practical Tips for Double Exposure Effe
Double Exposure Effect Photoshop Tutorial
Double exposure creates striking visual art by blending two images into one seamless composition. This surreal effect transforms ordinary portraits into captivating pieces worthy of album covers and movie posters.
The technique combines portrait silhouettes with landscape scenes, producing dreamlike results that tell stories through visual layers.
Watch the Tutorial
Essential Tips for Double Exposure Effects
These key techniques will help you create professional-looking double exposure eff
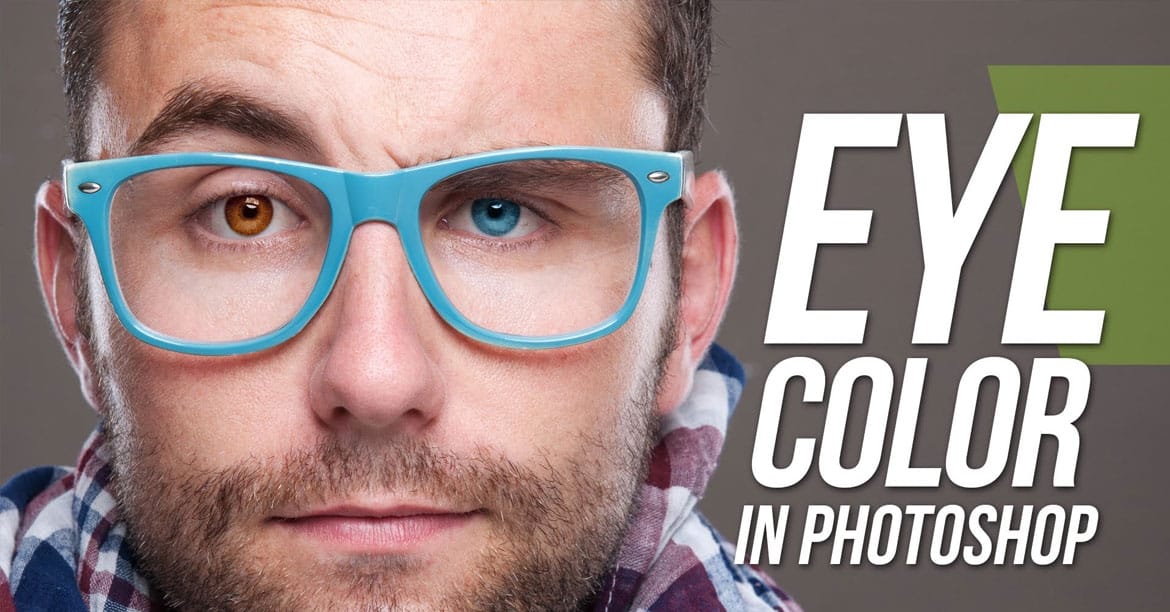
Learn how to easily change eye color in Photoshop
Double exposure effects blend two images into a single artistic composition, creating striking visuals where portraits merge seamlessly with textures like leaves, cityscapes, or abstract patterns. This technique transforms ordinary photos into compelling artwork by layering elements that tell a story or evoke emotion.
The process combines masking, blending modes, and color adjustments to achieve professional results that work well for creative portraits, album covers, or artistic photography pr
How to Create a Double Exposure in Adobe Photoshop
Howard Pinsky from IceFlowStudios shares a Photoshop tutorial on creating a double exposure effect. The author guides users through the process, which involves working with two images, using selection tools, layer masks, and Adjustment Layers.
The tutorial walks the reader step-by-step through the techniques needed to achieve this effect. By following the instructions, users can learn how to seamlessly blend two photographs to create a visually striking double exposure image. Pinsky's clear and
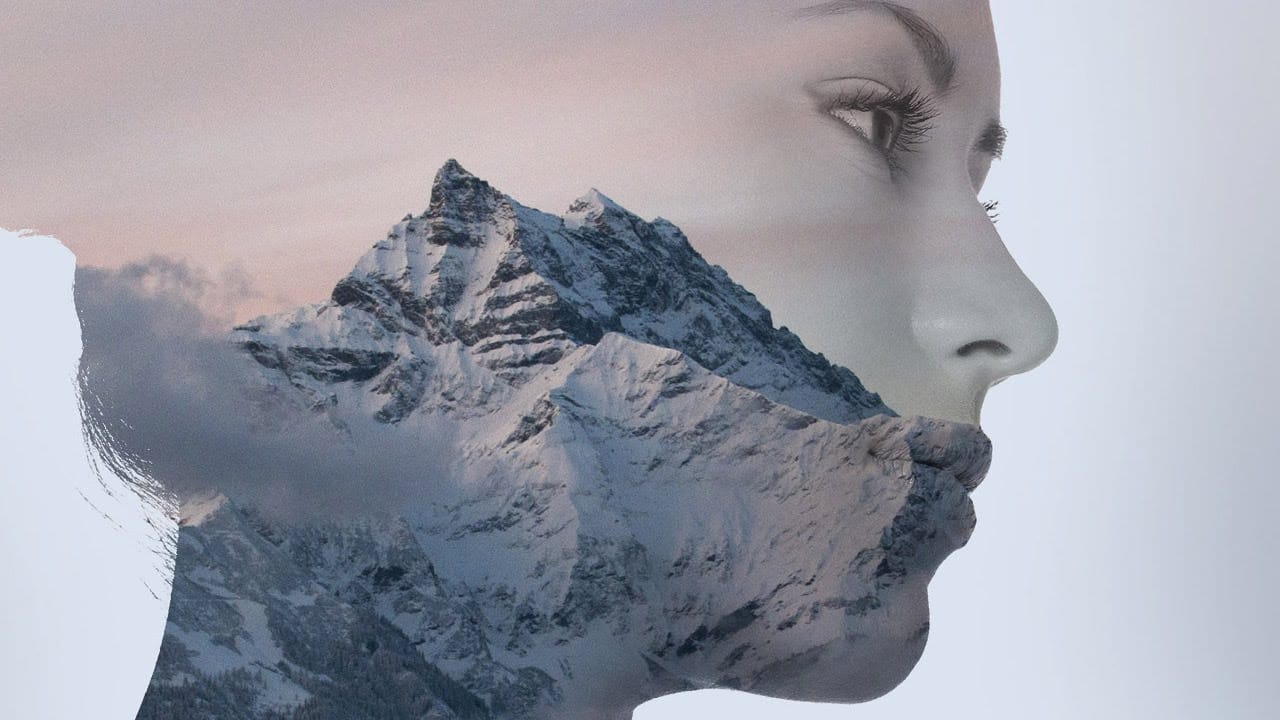
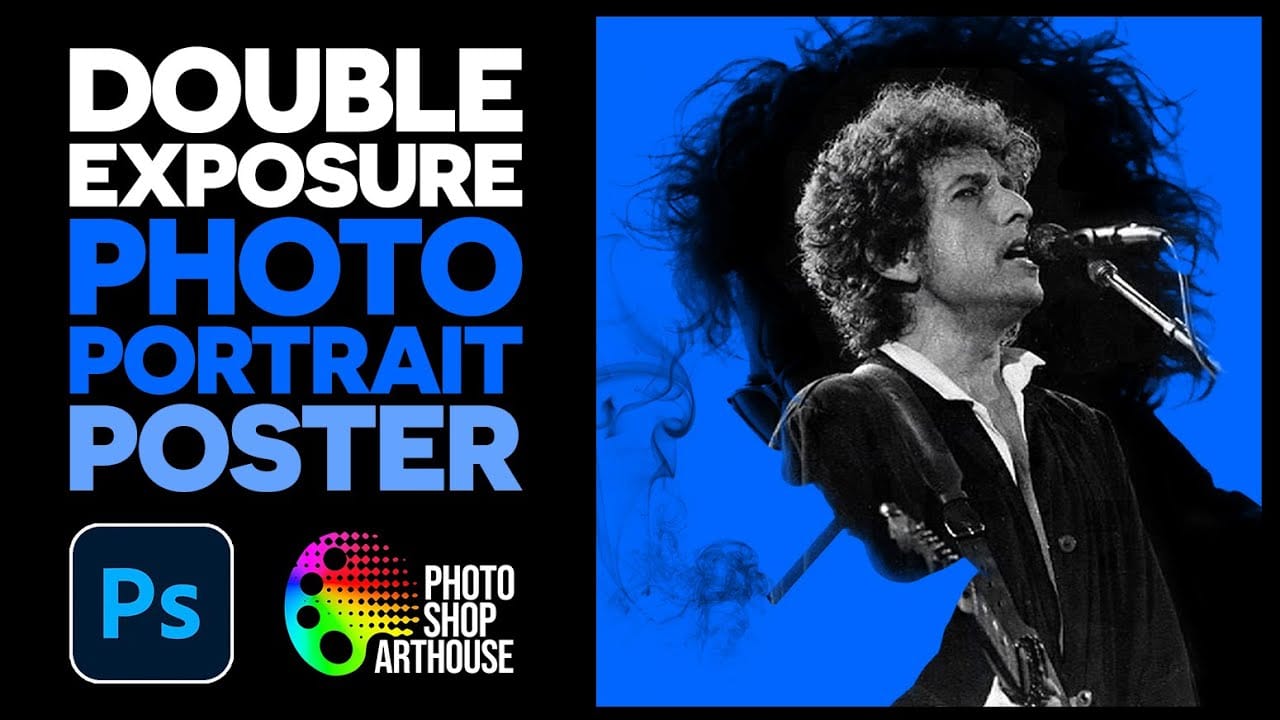
How to Create a Double Exposure Portrait Poster in Photoshop
Double exposure effects transform ordinary portraits into striking artistic compositions by blending a silhouette with another image. This technique creates dramatic posters where the subject's profile becomes a window into landscapes, textures, or abstract elements.
The process uses channel selections, layer masks, and clipping masks to seamlessly merge two images while maintaining clean edges and professional results.
Watch the Video
Practical Tips
These essential techniques will help yo
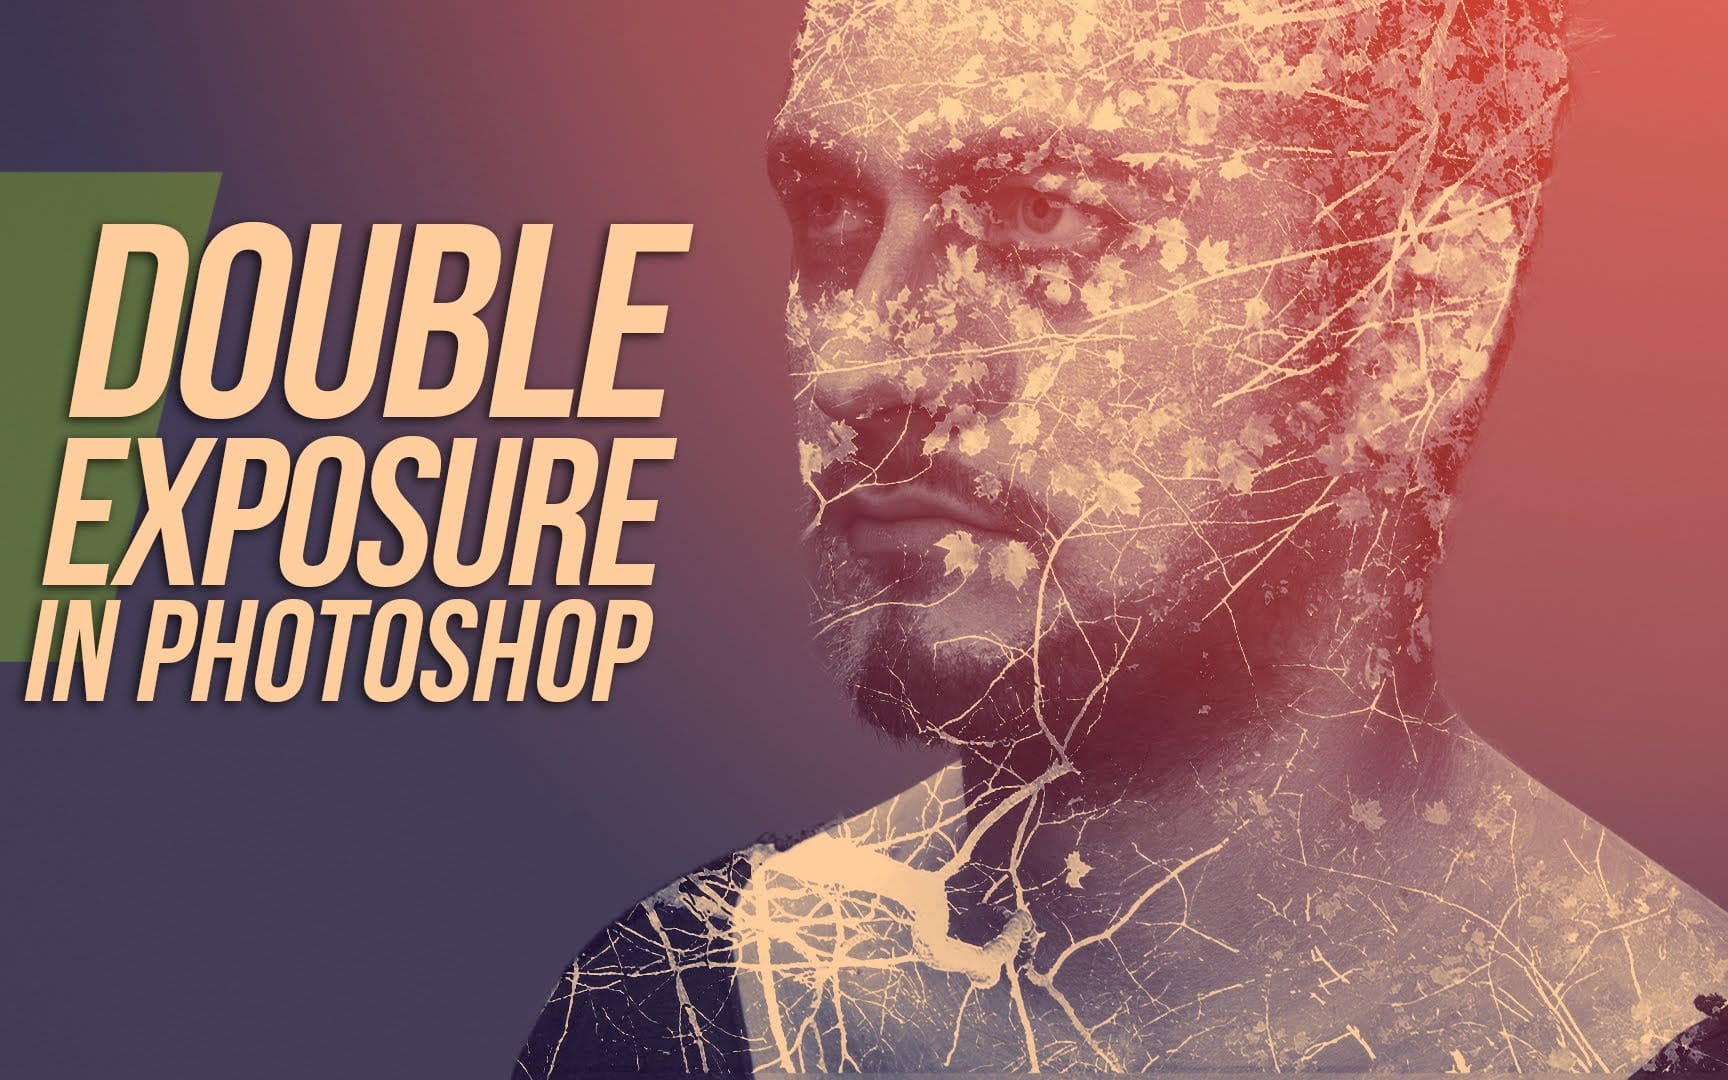
How to Quickly Create a Monochrome Double-Exposure Photo Portrait in Photoshop
The double exposure effect, a classic technique originating from film photography, allows for the striking fusion of two distinct images into a single, cohesive composition. This method is particularly effective for creating surreal and evocative portraits, blending a subject with landscapes, textures, or abstract elements to convey deeper meaning or artistic vision.
This video tutorial provides a practical guide to achieving a powerful monochrome double-exposure photo portrait using Adobe Phot
Make a trendy double exposure effect in Photoshop
You've probably seen this interesting effect of two or more overlapping photos on the covers of music albums, in modern magazines and in advertisements. In this video, we'll create a trendy double exposure effect in Adobe Photoshop with the help of Blending Modes and Clipping Masks in a few steps.
In photography and cinematography, a multiple exposure is a combination of two or more exposures to create a single image. Initially, this is a technique in which the camera shutter is opened more tha
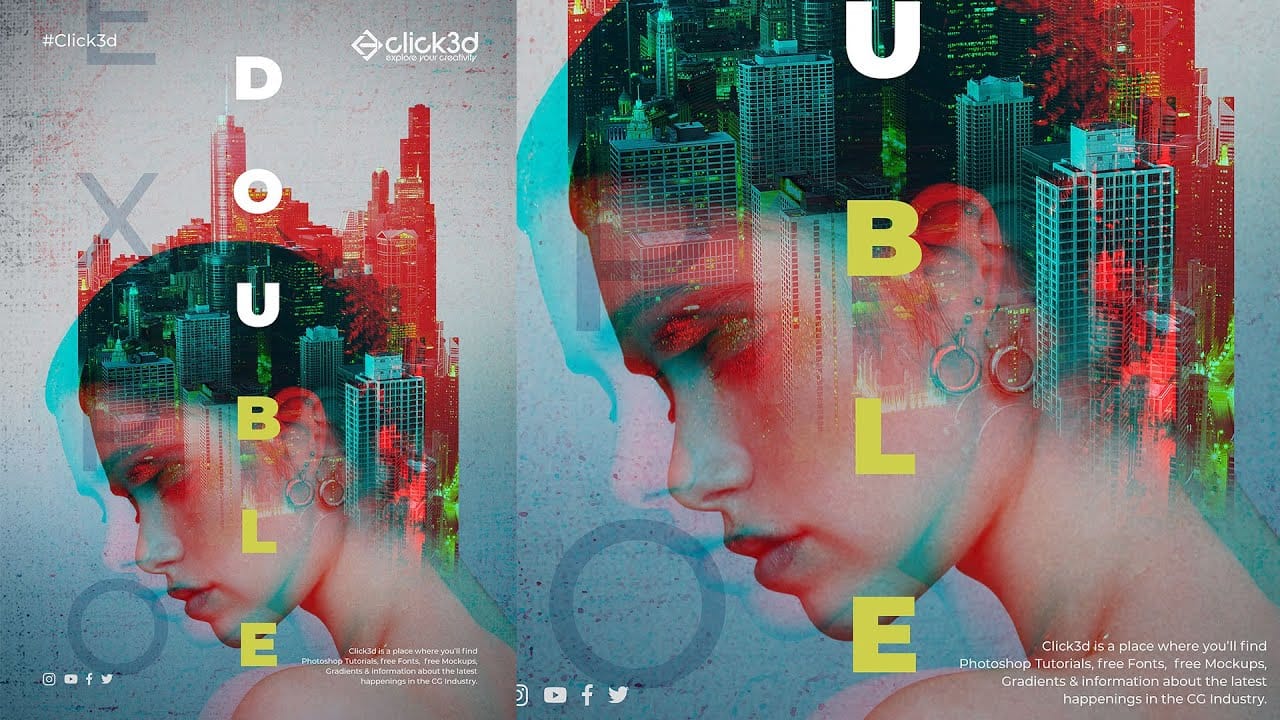
Double Exposure Glitch Poster Design in Photoshop
In this Photoshop tutorial by Click3D, you'll learn how to create a striking double exposure glitch poster design. The tutorial guides you through the process step by step, starting with the basics of setting up your project and selecting your images.
You'll discover how to combine double exposure techniques with glitch effects to achieve a unique and eye-catching design. The tutorial covers essential steps like blending layers, applying distortion effects, and refining your poster to enhance t