Create a Ripped and Worn Out Poster on a Wall in Photoshop

Create a Ripped and Worn Out Poster on a Wall in Photoshop

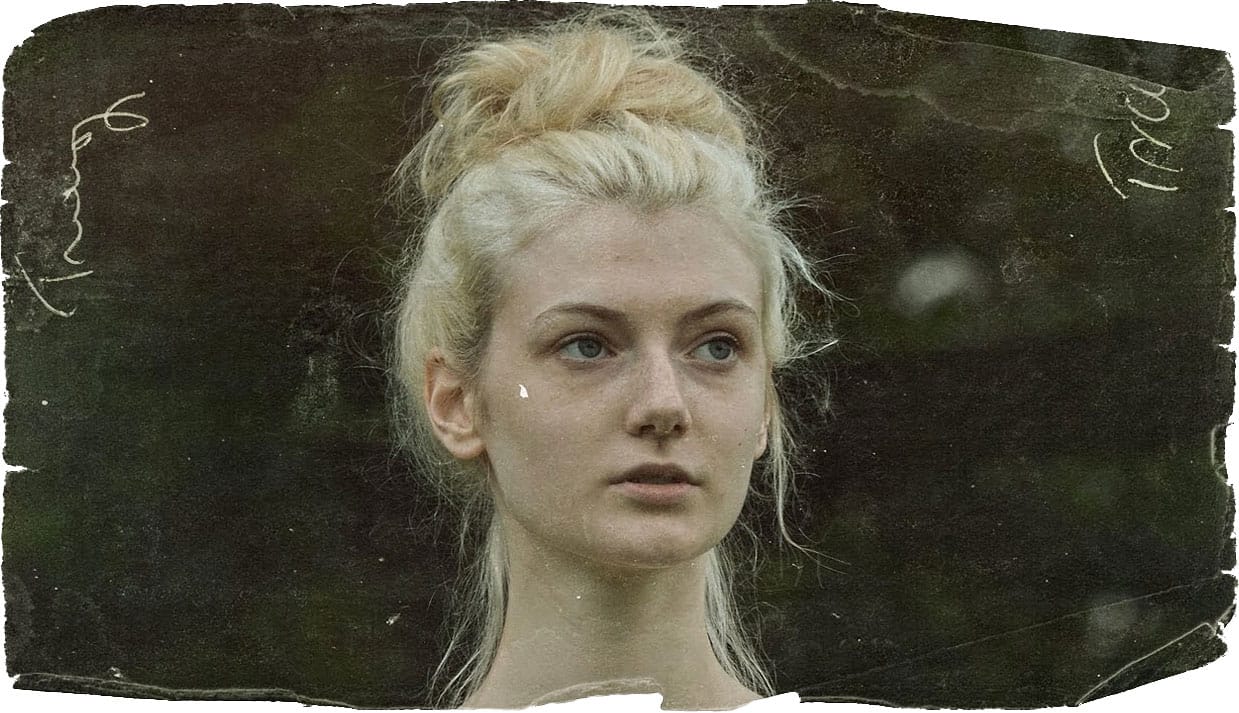
Vintage posters tell a story through their faded colors and torn edges. This weathered aesthetic adds a layer of history and authenticity to any design, transforming a clean graphic into something with tangible grit and character. Achieving this look digitally requires more than just adding a texture; it involves mimicking how paper and ink break down over time. This tutorial guides you through the essential Photoshop techniques, from creating realistic distortions to using grunge brushes, to craft a poster that looks like it has truly withstood the elements.

Watch the Tutorial

Video by Blue Lightning. Any links or downloads mentioned by the creator are available only on YouTube

Beyond Filters: Crafting Authentic Digital Grunge

Creating a convincing weathered effect in Photoshop is an exercise in controlled chaos. The goal is to replicate the natural decay of physical materials—paper puckering from moisture, ink fading under sunlight, and edges fraying from wear. While pre-made filters can offer a starting point, true authenticity comes from building these imperfections layer by layer. This approach allows for a level of detail and customization that makes the final image feel genuinely aged rather than simply processed.

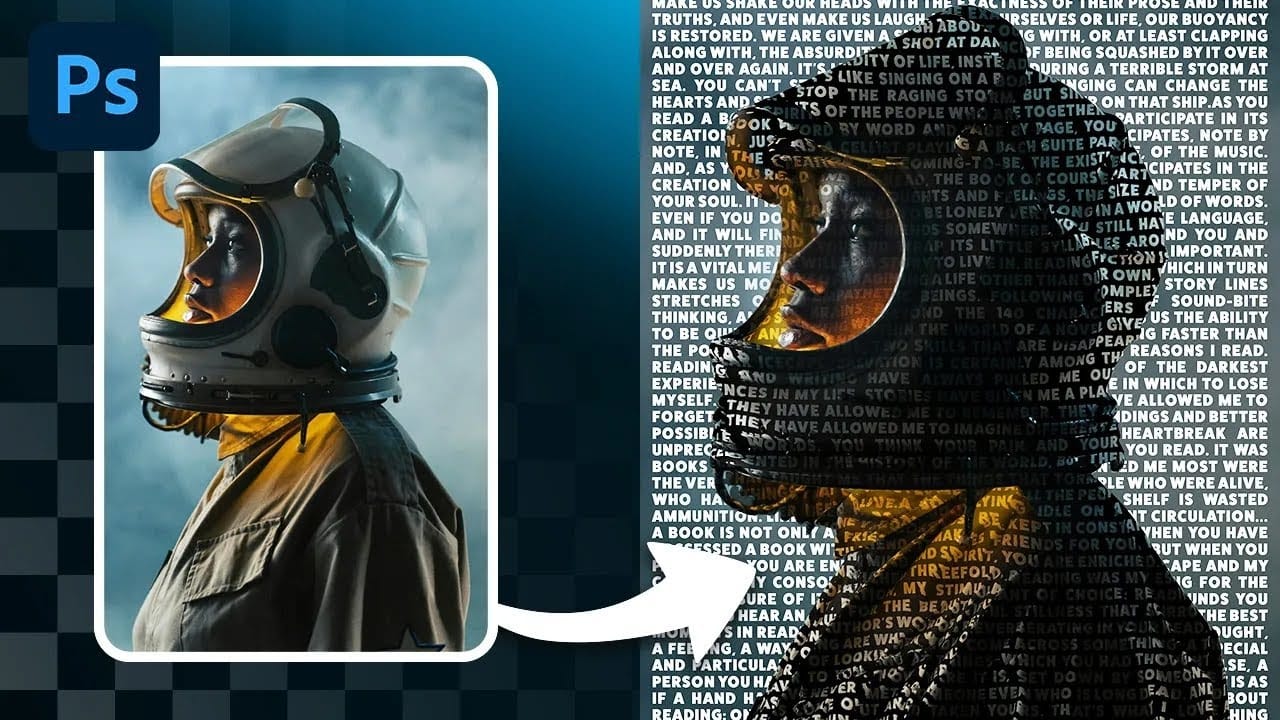
Two techniques are fundamental to this process: displacement maps and layer masks. A displacement map is a powerful tool that uses the texture of one layer to distort the pixels of another, making text and graphics appear to wrap around the uneven surface of aged paper. Layer masks, when paired with custom grunge brushes, provide a non-destructive way to create rips, tears, and worn spots. This combination allows you to control exactly how the poster "breaks down," revealing the underlying surface for a truly integrated effect.

Practical Tips for Creating a Weathered Poster

  • Prepare your displacement map. Before saving your texture as a PSD for the displacement map, apply a slight Gaussian Blur to smooth out the distortion for a more natural effect.
  • Group layers before distressing. Place your poster base and text layers into a single folder and apply a layer mask to the folder itself. This allows you to use grunge brushes to "rip" all elements at once.
  • Unlink masks for independent movement. Click the chain link icon between a layer and its mask to move the layer content, like text, without shifting the mask's position.
  • Use Levels for final contrast. After applying effects, use a Levels adjustment (Ctrl/Cmd + L) on the poster base to brighten highlights and deepen midtones, making it stand out from the background.

Explore more ways to create compelling poster designs and vintage effects with these guides.

Crafting a Typographic Poster in Adobe Photoshop
Join Adobe’s UX Growth Designer, Curtis Ying, as he transforms a Swiss Typographic poster through an engaging design process. With the input from the Instagram community, this presentation showcases how he carefully selects a bold red background that sets the tone for the entire piece. Throughout the process, Curtis shares his techniques for integrating organic shapes and text that harmoniously flow within the design. Utilizing various Photoshop tools, he guides you step-by-step, making it easy
Create a Striking Text Portrait Poster in Photoshop
Transforming an ordinary portrait into a captivating text-based artwork presents a unique creative challenge in Photoshop. Often, the frustration lies in making text appear to organically wrap around a subject’s contours rather than just sitting flat over the image. Achieving this seamless integration, especially when dealing with complex shapes, can feel like navigating an intricate technical puzzle. This tutorial offers a clear pathway to mastering text portrait effects using advanced masking
Apply a vintage and gritty old paper effect to your photos in Photoshop
In this tutorial by Jobe from DR Design Resources, readers will learn a quick and easy technique to transform their photos into a vintage-inspired look with an old paper effect in Adobe Photoshop. The process involves using a texture of an old paper and applying it to the desired image. The author demonstrates how to apply this effect on two different images, one with a light background and one with a dark background. This straightforward method allows users to easily achieve a gritty, aged ae
How to make a text poster of a portrait in Photoshop
Discover the artistry of text-driven graphic posters with BlueLightningTV's latest Photoshop tutorial. This engaging guide teaches you how to craft a stunning visual tribute to your favorite celebrity, musician, poet, writer, or leader by seamlessly blending their iconic lyrics, prose, poetry, or speech with their portrait. The tutorial walks you through each step, from selecting and preparing the perfect image to intricately wrapping text around the contours of their face. Watch tutorial

Get tutorials & freebies delivered to you.

Subscribe to the Photoshop Roadmap newsletter, a weekly roundup of new tutorials, insights and quality downloads, trusted by 6500+ readers.

You might also like

Using Foliage Brushes for Photo Enhancement and Digital Art

Transforming ordinary photographs into whimsical, romantic scenes often requires replacing or enhancing natural environments. Foliage brushes offer photographers and digital artists a powerful way to overpaint backgrounds, create dimensional leaf structures, and build entirely new environmental elements that feel both surreal and believable. The key to realistic foliage work lies...

How to Add a Film Border to Any Image in Photoshop

Film borders add instant vintage character to digital photos, recreating the nostalgic feel of analog photography. This technique combines layer masking, texture overlays, and strategic positioning to seamlessly frame your images with realistic film edges that look naturally weathered and imperfect. Watch the Video Practical Tips These essential techniques will...

How to Create Double Exposure Portraits in Photoshop

Double exposure portraits blend two images into one artistic composition, creating striking visuals where a silhouette merges with landscapes, textures, or abstract elements. This technique transforms ordinary portraits into compelling artwork by layering the second image inside the dark areas of your subject. The process relies on high contrast between...

How to Remove Glasses Reflections with Firefly Image Model 5 in Photoshop

Glasses reflections can ruin otherwise perfect portraits, obscuring your subject's eyes and creating distracting bright spots. While traditional AI models can remove these reflections, they often alter facial features and frame details in the process. Photoshop's new Firefly Image Model 5 changes this by preserving facial...

How to Create Realistic Specular Highlights Using Basic Brush Techniques

Specular highlights bring objects to life by simulating how light reflects off surfaces. These bright spots of reflected light add dimension and realism to your digital artwork, making flat surfaces appear three-dimensional and convincing. This technique uses simple brush strokes combined with strategic blending modes to create professional-looking highlights that...

How to Create a Wood Engraving Effect from Photos in Photoshop

Wood engravings capture the timeless aesthetic of traditional printmaking, transforming ordinary photographs into artwork that resembles hand-carved illustrations. This technique combines the rustic charm of wood textures with the precise detail of engraved lines, creating images that feel both historical and artistic. The process uses non-destructive editing methods and smart...

You’ve successfully subscribed to Photoshop Roadmap
Welcome back! You’ve successfully signed in.
Great! You’ve successfully signed up.
Success! Your email is updated.
Your link has expired
Success! Check your email for magic link to sign-in.