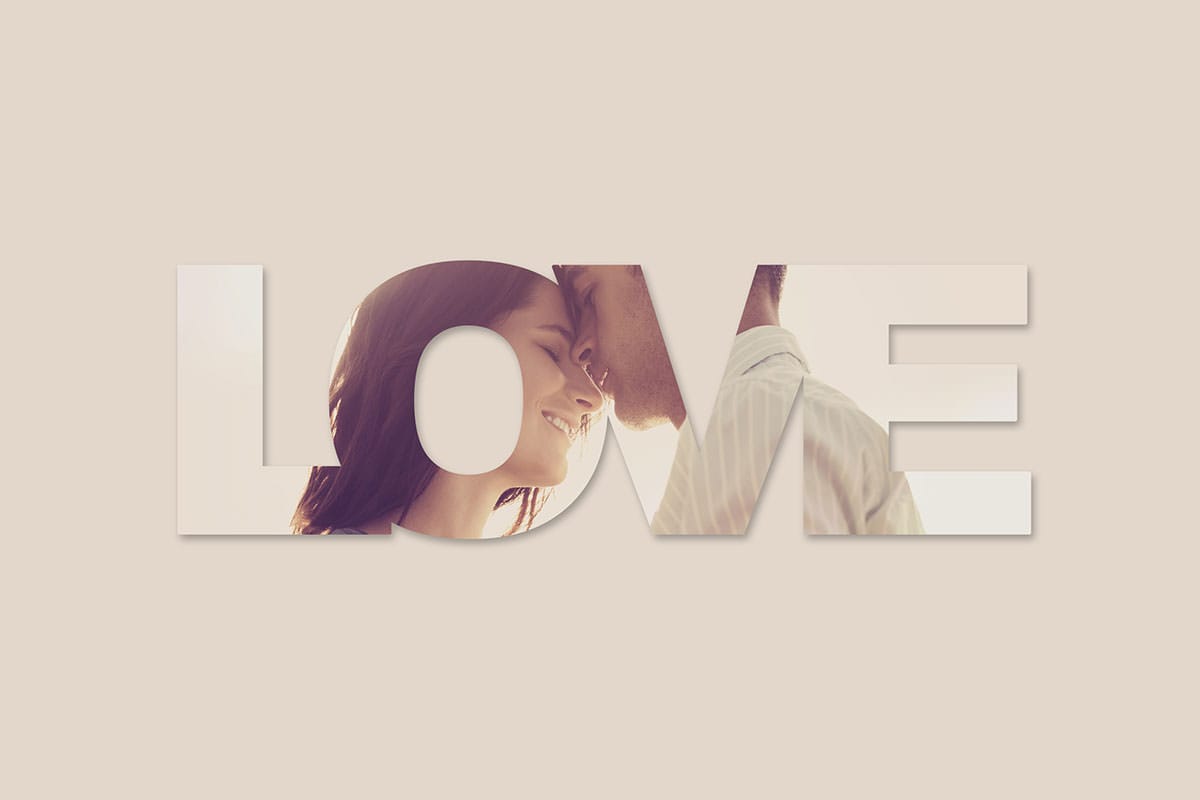
Text filled with vibrant images creates striking visual impact that transforms ordinary typography into compelling design elements. This technique uses Photoshop's clipping mask feature to seamlessly insert any photograph into letter shapes.
The method works for posters, social media graphics, and branding projects where bold visual statements matter most.
Watch the Tutorial
Video by PHLEARN. Any links or downloads mentioned by the creator are available only on YouTube
Essential Tips for Image-Filled Text
Master this popular design technique with these key strategies from the tutorial.
- Choose thick, bold fonts to ensure your images remain clearly visible within the letter shapes
- Hold Alt (or Option on Mac) and click between layers to create clipping masks quickly
- Stack multiple images as clipping masks on the same text layer for varied visual effects
- Adjust levels and saturation on clipped images to match your overall design aesthetic
- Use the Move tool to reposition images independently while keeping text in place
More Tutorials About Placing Images in Text
Explore additional techniques for combining typography with photographic elements.
How to Place an Image in Text in Photoshop
Turn ordinary text into a striking visual by filling it with an image. This popular design technique is perfect for posters and graphics. This tutorial shows you how to use clipping masks in Photoshop to easily place any photo inside your words.
Watch the Tutorial
Practical Tips for Creating Image-Filled Text
Follow these key steps from the video to master this simple yet powerful technique.
* Choose a bold font. Use a thick, bold typeface so that more of your image is visible inside th
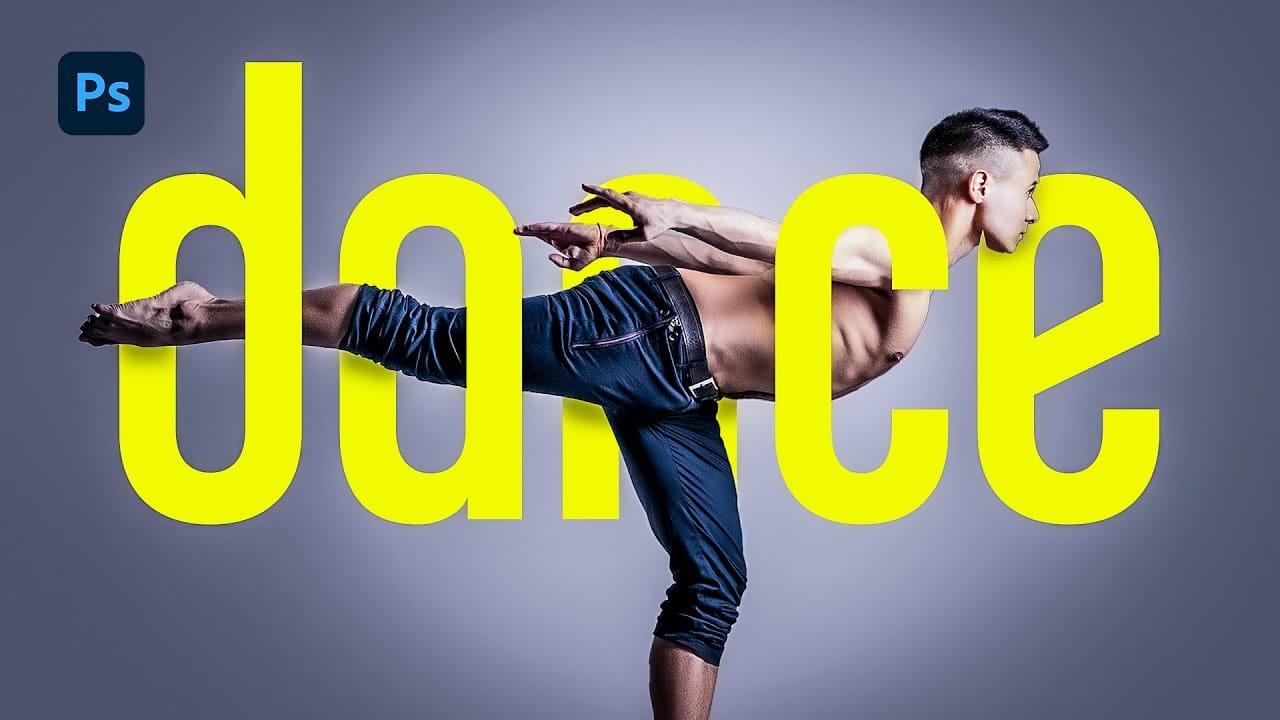
Inserting Multiple Images Inside Text In Photoshop
Placing multiple images inside text in Adobe Photoshop is a popular design technique that can add visual interest and depth to your designs. This technique involves inserting images into letters or words to create an eye-catching and unique design.
The Clipping Mask feature in Photoshop is used to achieve this effect. Clipping masks allow you to use one layer to define the shape of another layer, making it ideal for inserting images into text. With this technique, the possibilities are endless

How to Merge Text with Images in Photoshop Using Layer Masks
When text weaves seamlessly through images, it creates a polished, dimensional look that conveys depth and craftsmanship. This technique uses precise layer masks and strategic brushwork to integrate text realistically with photographic elements, making the typography feel embedded in the scene rather than simply overlaid.
Watch the Tutorial
Practical Tips for Text-Image Merging
* Use Select > Subject for quick initial selections, then refine edges manually for better accuracy
* Set brush
100+ Brilliant Photoshop Text Effects: The Ultimate 2025 Roundup
You won’t admit this: You spend hours making text look like liquid gold. Not for clients. Not for your portfolio. Just because. Here’s the thing: Text effects are your guilty pleasure. You tell yourself you’re “practicing.” You say you’re “building skills.” But really? You just love watching letters transform into