Professional sign mockups require more than just placing text on a surface. This technique combines content-aware fill, perspective correction, and smart object linking to create reusable templates that automatically update both signs and their reflections whenever you modify the source design.
The process creates a complete workflow where changes to a single PSD file instantly propagate through the entire mockup, including realistic perspective distortion, reflections, and environmental lighting effects.
Watch the Video
Practical Tips
Master sign replacement mockups with these essential techniques:
- Use content-aware fill to remove original signage cleanly, then follow up with clone stamp tool for precise touchups
- Create a white shape layer matching the sign's perspective, then flatten it with transform tools to determine the actual 2D dimensions
- Save your sign design as a separate PSD file and use Place Linked to create automatically updating smart objects
- Apply tilt shift blur to reflections with reduced opacity and blue color adjustments to match environmental lighting
- Use blend mode underlying layer controls to make reflections interact realistically with surface textures
Related Articles and Tutorials
Explore these additional mockup and design placement techniques for professional results.
Easily create realistic mockups and templates in Photoshop
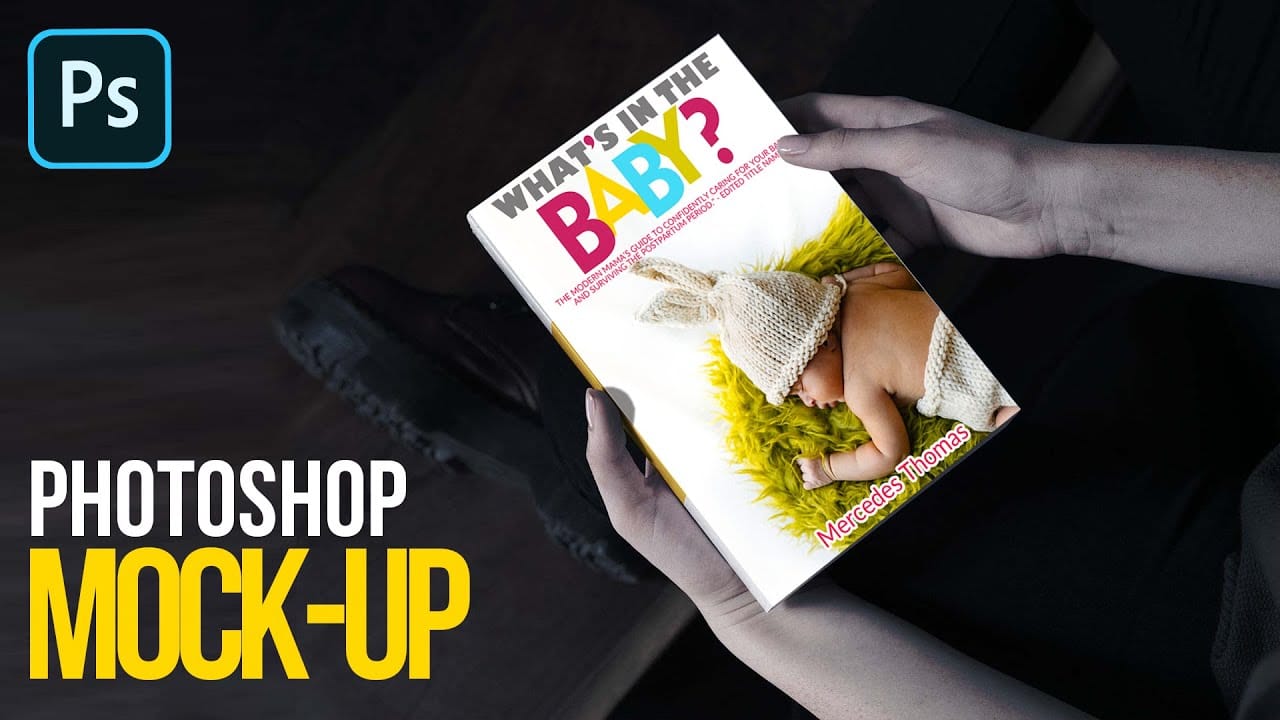
In this tutorial by Quistt, you'll discover how to craft realistic mockups and templates in Photoshop with ease. This comprehensive guide will walk you through the process of creating high-quality product showcases, whether you're designing for books, signs, t-shirts, or various other merchandise.
You'll learn to utilize Photoshop's powerful tools and features to produce mockups that look both professional and authentic. The tutorial covers techniques for adding realistic details and ensuring y
How to Create Reusable Drag & Drop Mockup Templates in Photoshop
Manually warping and blending logos onto product photos takes 15-30 minutes each time. Smart objects in Photoshop transform this repetitive process into a one-time setup that creates reusable templates.
This technique lets you drag and drop any design into a pre-configured mockup that automatically applies warping, blending, and lighting effects.
Watch the Tutorial
Essential Tips for Drag & Drop Mockups
* Create a rectangular shape layer as your container, then convert it to a smart objec

How to Create Realistic Design Mockups in Photoshop
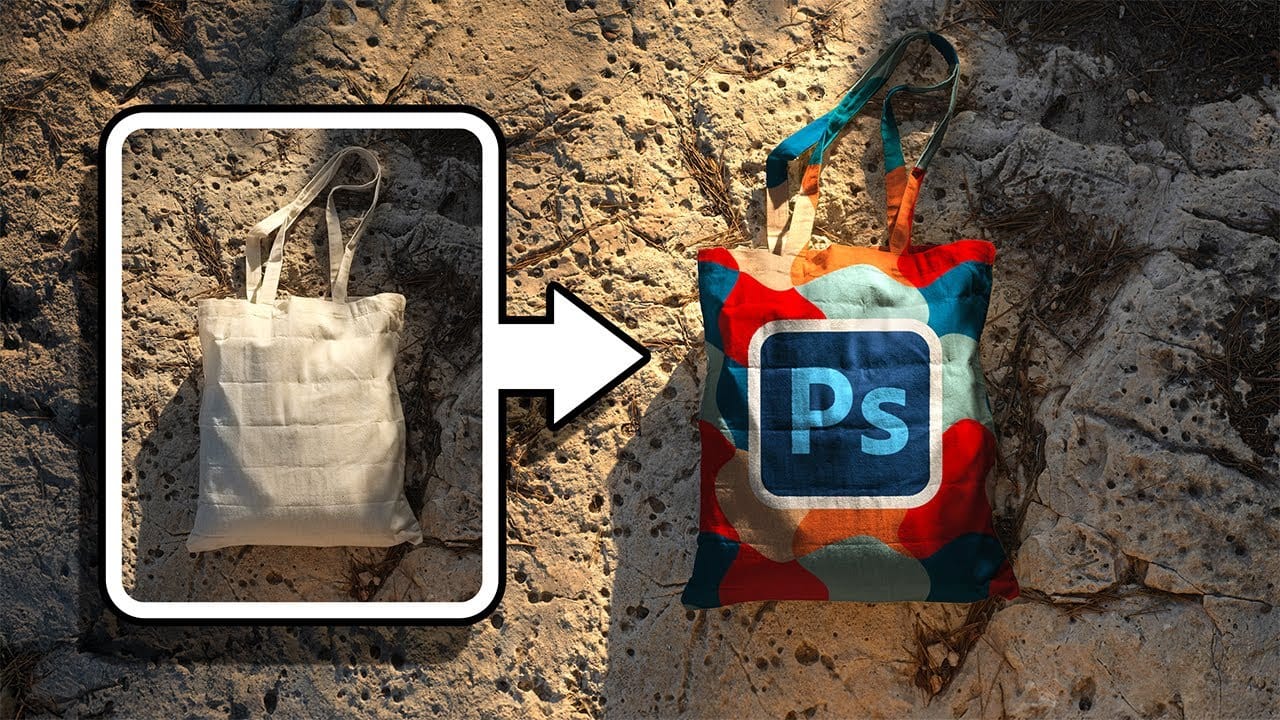
Creating convincing product mockups requires more than simply placing a design onto a template. Real fabric surfaces have subtle color variations, texture bumps, and complex lighting that affect how printed designs actually appear.
This comprehensive tutorial demonstrates professional techniques for building realistic mockups from scratch. You'll learn to control surface preparation, blend modes, displacement mapping, and lighting effects to achieve results that match real-world printing condit
Create a colorful vintage marquee bulb sign in Photoshop
Add a touch of vintage Broadway style to your designs by creating a stunning marquee bulb sign effect in Adobe Photoshop. This tutorial guides you through using Photoshop's 3D features, real textures, and bulb photographs to achieve realistic depth and illumination.
Watch the Full Tutorial
Practical Tips for Creating Your Marquee Sign
Achieve a professional-looking vintage marquee sign by following these key steps:
* Process each letter individually in 3D to simplify bulb placement, avoid

How to Create a Rusty, Vintage Tin Sign in Photoshop
This video will teach you how to create a rusty, vintage tin sign in Photoshop where you can swap out the artwork at any time without destroying any of the effects.

10 Stationery, Signs and Logos Mockup PSD Files
Explore a collection of 10 professionally designed mockup templates specifically for Photoshop. These templates include a variety of stationery items, signs, and logos, making them perfect for your design needs.
You can easily access each template by clicking on the corresponding image, which will direct you to its download page. This streamlined process ensures you find exactly what you need without any hassle.
Before incorporating these designs into your commercial projects, be sure to revie
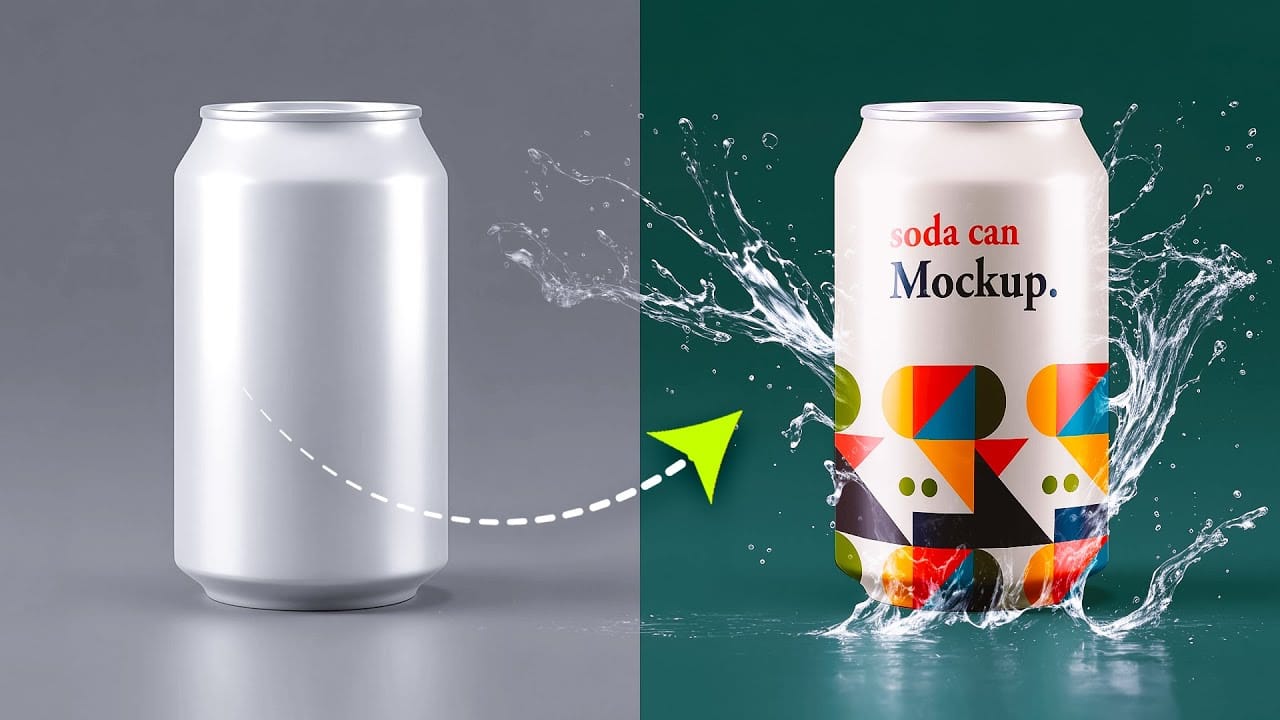
How to Create a Can Mockup in Photoshop Using Smart Objects and Masks
Professional can mockups transform flat designs into realistic product presentations that clients can instantly visualize. This technique combines precise measurement, smart object workflow, and blending modes to wrap your graphics seamlessly around curved surfaces.
The process creates reusable templates that automatically apply proper perspective and lighting effects to any design you place inside.
Watch the Tutorial
Essential Tips for Can Mockup Creation
* Measure your can dimensions fi
How to Replace Any Sky in Photoshop Using Selection Tools and Color Adjustments
A dull, overexposed sky can drain the life from an otherwise compelling photograph. Sky replacement transforms flat images into dramatic scenes that capture attention and convey mood.
This tutorial demonstrates the complete process of replacing skies in Photoshop using built-in selection tools, smart objects, and color matching techniques for natural-looking results.
Watch the Video
Essential Tips for Sky Replacement
* Match the sun position between your original photo and replacement sky

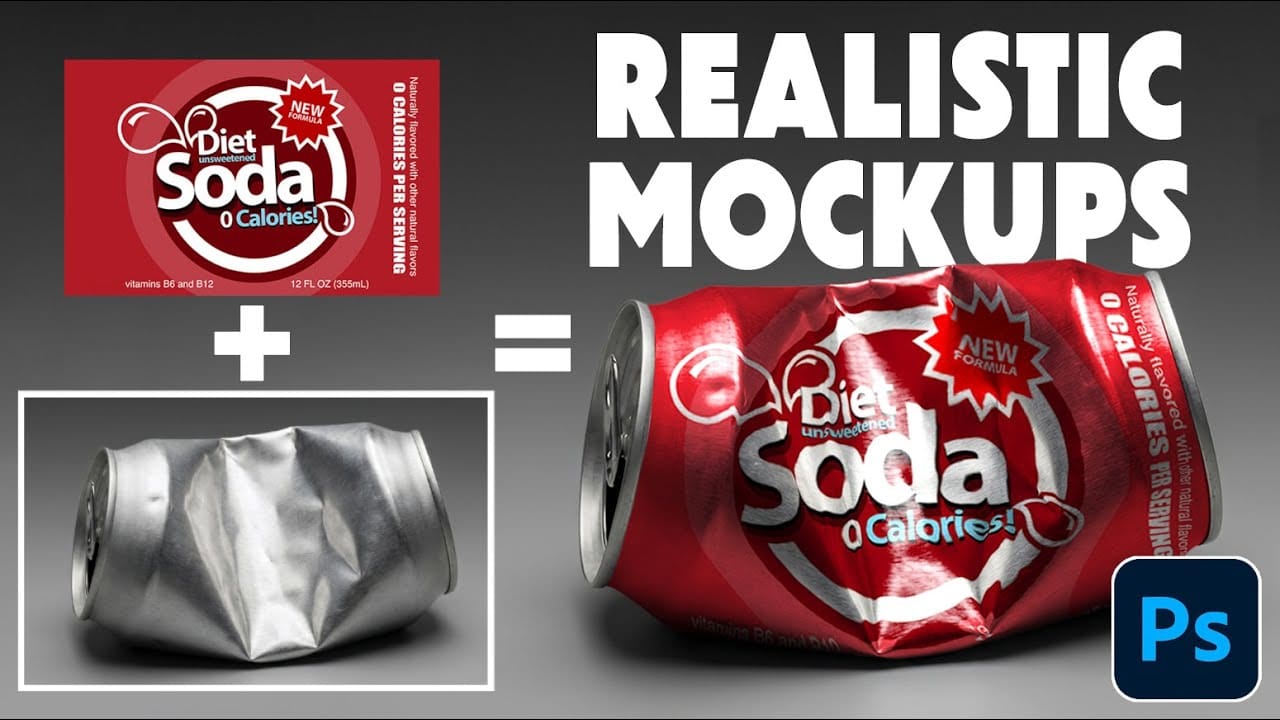
How to Wrap Designs Around Complex Objects Using Displacement Maps in Photoshop
Professional mockups require more than simply placing a design onto an object. Complex surfaces like crushed aluminum cans demand advanced techniques to achieve realistic wrapping that follows every contour and deformation.
This process combines displacement mapping, smart objects, and blending modes to create reusable templates that automatically conform any design to irregular surfaces while preserving authentic lighting and reflective highlights.
Watch the Video
Practical Tips
Master th