

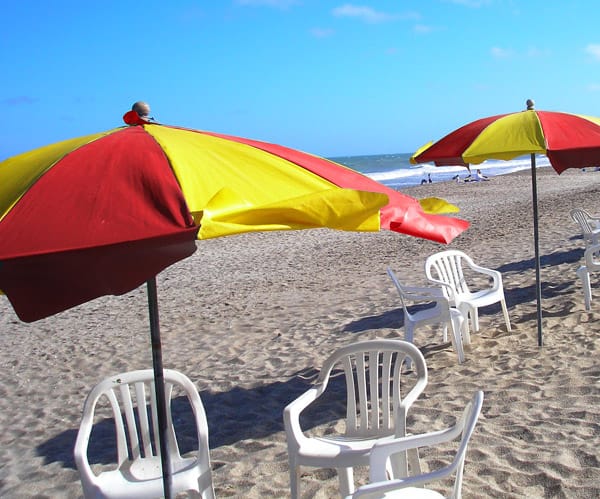
The Color Replacement brush is a tool that lets you paint with one color over another color, keeping the brightness and contrast of the image. This way you can easily change the color of an object without using complex masking and color correction tools. In this tutorial we are going to learn how to replace the color of these beach parasols from blue to red and leave the yellow part untouched.
Select the Color Replacement brush from the tools palette.
Now let’s take a look at the preferences bar.
There are many settings you can change. In this case we will use the following: Brush Size: 50 px (Set the size of the brush according to the resolution of the image. You will need a medium to large brush for large areas, and a small one to paint the details). Mode: Hue. Sampling: Continuous (the first Eydropper icon). Limits: Discontiguous. Tolerance: 40%. Antialias: Unchecked. I will explain the meaning of these setting at the end of this tutorial.
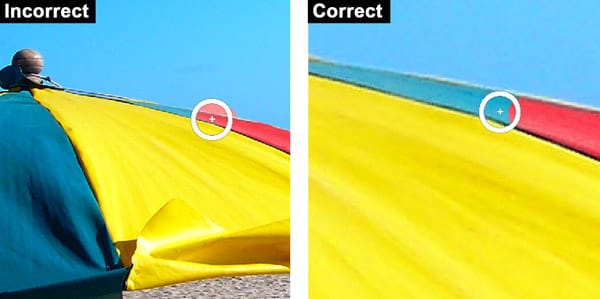
Using a vivid red color as the foreground, start painting over of the beach parasol taking care that the center crosshair doesn’t leave the blue area that you are painting on. You don’t have to be very precise when using this tool. As you paint, it will only replace the colors that are stepped over by the crosshair, leaving the other colors untouched. In this case when the crosshair is over the blue color, the yellow colors will be left untouched.

There are some situations where the color to be replaced is similar to an adjacent color resulting in unwanted areas being painted. The solution to this problem is to decrease the brush size and paint with a little more care.
You may need to repeat the process until you acquire some practice, mostly with the difficult spots where two similar colors are very close. But it shouldn’t take long until you manage to replace the blue color from the beach parasols.
There is no need to go in depth with the Color Replacement tool settings. The settings we used in this tutorial are ok with most cases. Anyway, there are two settings that are worthy to be explored when you are using this tool for the first time.
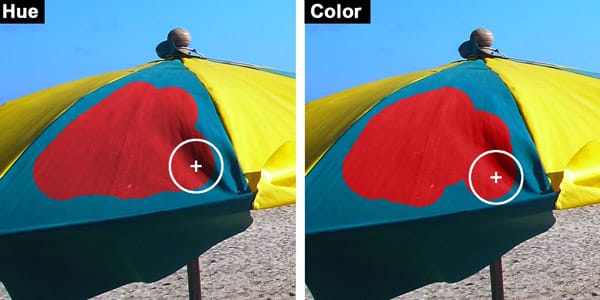
The Mode setting has four options. The most useful are Hue and Color. If you choose Hue, you will replace only the tint (hue) of the underlying color and the saturation and luminosity will remain untouched. But if you choose Color as the painting mode, you will replace both the hue and saturation of the underlying color leaving the luminosity without any changes.
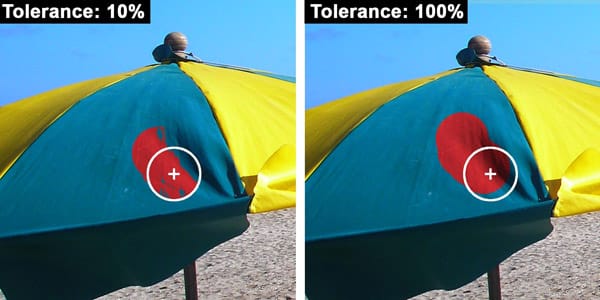
The other setting is the Tolerance. It works much like the paint bucket and wand tools tolerance setting. With a large tolerance the Color Replacement tool will paint over colors that are distant to the one being sampled by the brush tip crosshair. On the contrary, if you choose a small tolerance, only the colors that are close to the sampled color will be replaced.
That’s all you need to know to start using this wonderful and fun tool. When you become more familiar with it, you will be able to explore other settings and you will find that it is perhaps the easiest way of changing colors in a photograph.
Thanks for Reading — Want More Like This?
Subscribe to the Photoshop Roadmap newsletter for more expert tutorials and insights delivered directly to your inbox.


